Spark new hairstyle ideas with this free crochet mesh headband pattern and enjoy a lightweight accessory perfect for many occasions.
Think about creating something so simple yet so pretty that it makes you smile every time you wear it. That’s exactly what this project is all about. Making your own headband isn’t just a fun activity—it’s also a way to show off your style. This crochet headband comes with a gorgeous mesh design that’s lightweight, stretchy, and perfect for everyone. It’s the type of accessory that works for any occasion, whether you’re hanging out with friends, running errands, or just looking for something cute to wear. The design is unique and eye catching, with its open, airy pattern that adds a modern touch. It’s super comfy and keeps your hair in place while making you look fashionable.
Crochet Mesh Headband Pattern Free For School Trips And Fun Days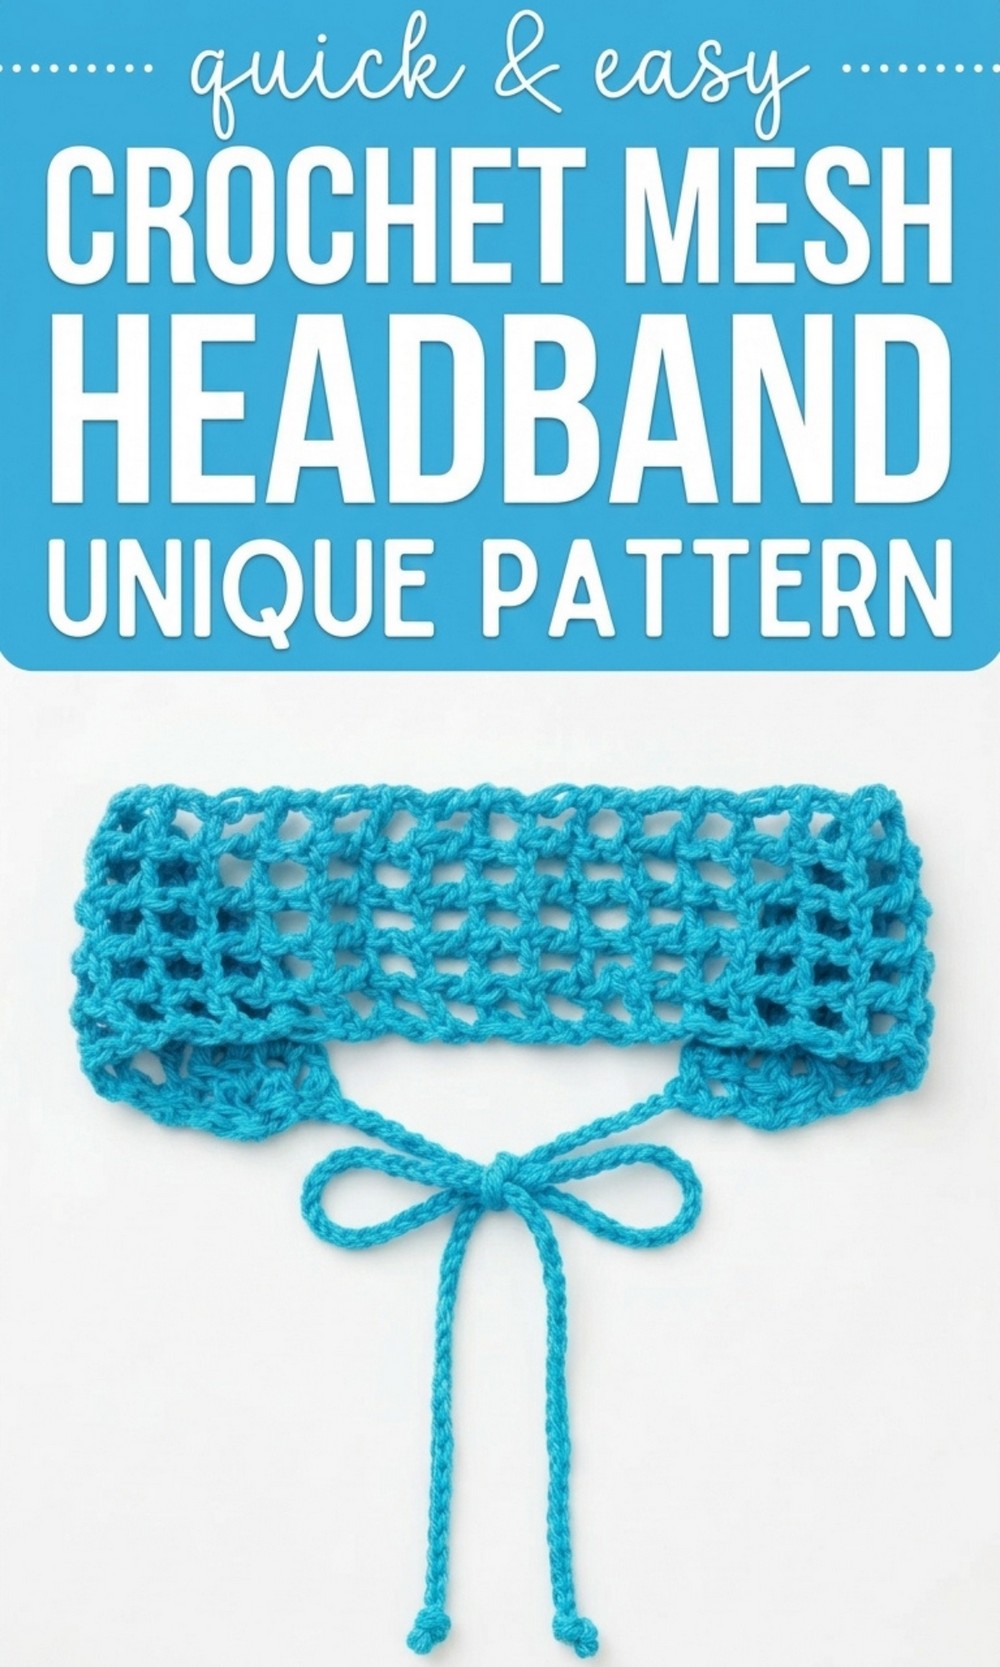

If you know basic stitches like double crochet and chains, you’re ready to get started. You can finish this headband quickly, making it the perfect project for a cozy afternoon. This headband is totally customizable. Pick your favorite colors, add decorative elements like buttons or small flowers, and make it truly one of a kind. It’s a handmade piece you’ll love wearing or gifting to someone special.
With this free crochet pattern, you can create a headband that’s not only practical but also stylish and trendy. Start now and turn a simple idea into something beautiful and personal. You’ll feel proud every time someone asks, “Where did you get that amazing headband?”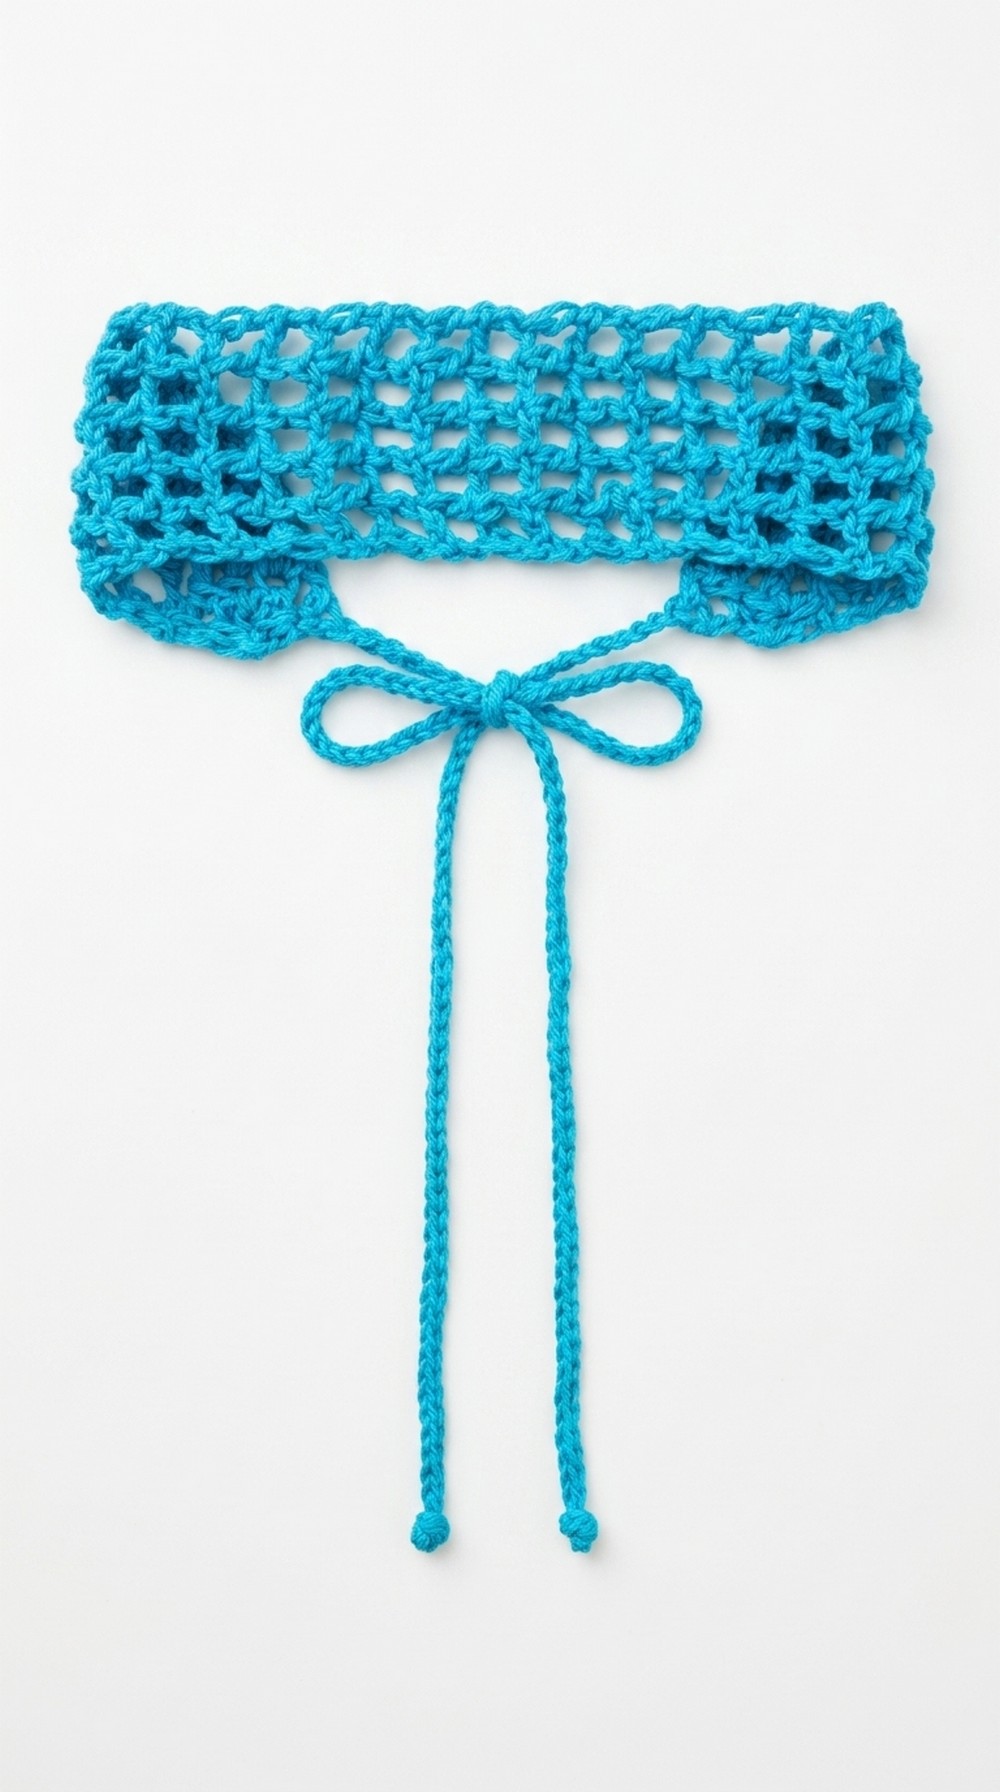
Crochet Mesh Headband Pattern
Materials Needed
To create this headband design, assemble the following materials:
- Yarn: Light or medium weight yarn works best for this pattern. Choose #3 (light) or #4 (medium/worsted) yarn. For summer wear, opt for cotton yarn, and for colder weather, use an acrylic/wool blend.
- Crochet Hook: Match your hook size to your chosen yarn:
- Use 4mm (US size G 6) hook for light yarn.
- Use 5mm (US size H 8) hook for medium yarn.
- Scissors: For cutting the yarn.
- Tapestry Needle: For weaving in ends and joining the headband.
- Measuring Tape: To ensure your headband is the correct size.
Gauge
Accuracy is not critical for this pattern because the mesh design is forgiving and stretchy. However, if you want to ensure a precise fit, check the gauge. A general guide is:
- For medium yarn and a 5mm hook: 4 double crochet (dc) stitches x 4 rows = 2″ x 2″ (5cm x 5cm).
- Adjust your hook size for a looser or tighter stitch.
Finished Size
The headband’s size can be customized to fit most head circumferences. As a general rule:
- Adult headbands typically measure 20–22 inches in circumference and 2–3 inches in width.
- The pattern includes flexibility for resizing, so you can adjust both the width and length to fit children, teens, or adults.
- The mesh stretch makes it easy to create a snug yet comfortable fit.
Stitches and Abbreviations
The pattern is written in US terms, and the stitches used are:
- ch: Chain
- dc: Double Crochet
- hdc: Half Double Crochet
- st(s): Stitch(es)
Pattern Notes
- The headband is worked flat in rows and later joined to form a circle.
- Chains at the beginning of the row count as a stitch unless explicitly stated otherwise.
- The mesh pattern is achieved using alternating double crochets and chains.
- The pattern can be customized for width by increasing or decreasing the total number of rows.
Step by Step Crochet Pattern
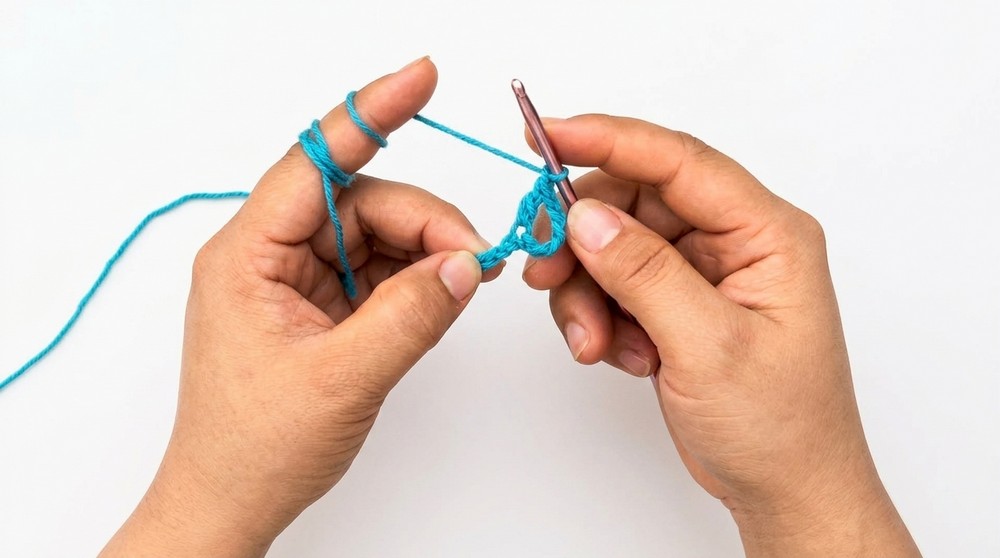
1. Step 1: Foundation Chain
- Begin with a slip knot on your hook.
- Chain a multiple of 6 + 2. This count ensures the mesh structure aligns properly.
- For an adult sized headband, chain 32 (30 for the repeat + 2 for the foundation).
- Test the length of the chain around your head to ensure the headband fits comfortably. Add or adjust chains if needed (just make sure it remains a multiple of 6 + 2).
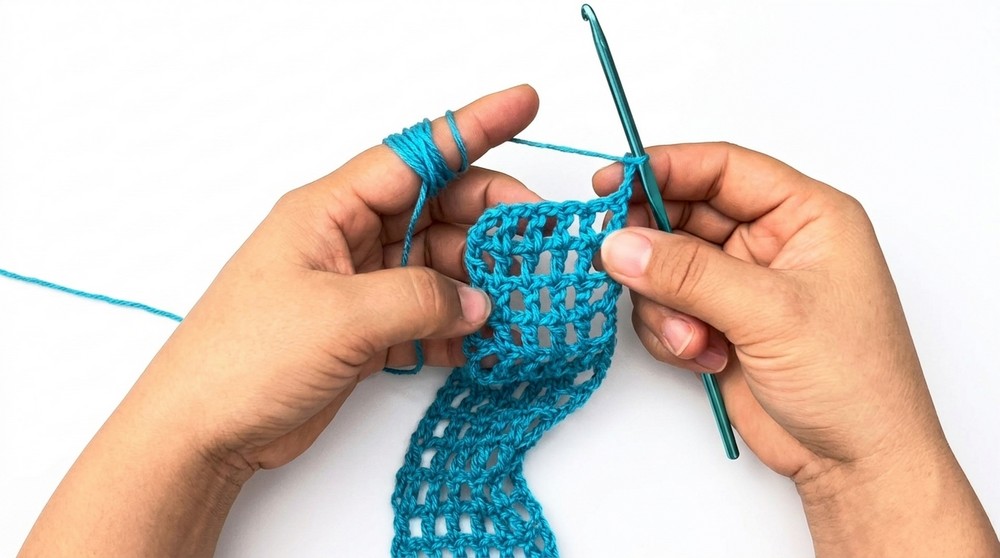
2. Step 2: Row 1 – Create the first mesh row.
- Work 1 double crochet (dc) into the 4th chain from your hook (note that the skipped chains count as the first dc).
- Chain 1 (ch 1), skip 1 chain, and work 1 dc into the next chain.
- Repeat the instruction between the asterisks (ch 1, skip 1 chain, dc) across the foundation chain.
- Once you reach the last chain, work 1 double crochet in it.
- Turn your work, and chain 3 (this serves as the first dc for the next row).
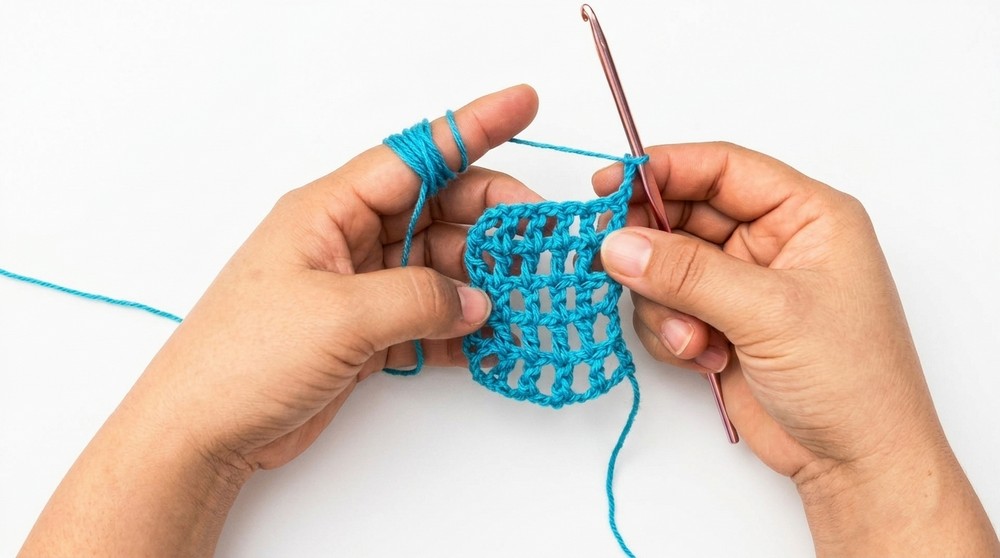
The mesh pattern will now be established, with double crochet stitches separated by chain spaces.
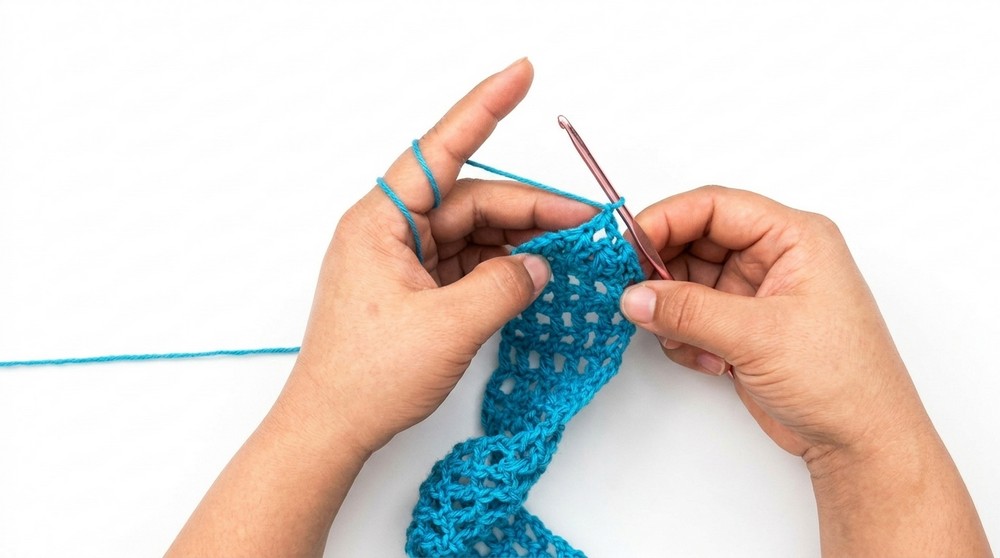
3. Step 3: Row 2 – Work Mesh Rows
- Skip the very first stitch since the turning chain (ch 3) counts as the first dc.
- Work 1 dc into the next dc stitch from the previous row.
- Chain 1 (ch 1), skip the chain space from the previous row, and work 1 dc into the next dc.
- Continue repeating the pattern: dc, ch 1, skip 1, dc until you reach the end of the row.
- Finish the row by working 1 dc into the top of the turning chain from the previous row.
- Turn, and chain 3 to begin the next row.
4. Step 4: Repeat Rows
- Repeat Row 2 to build the headband height.
- The standard width for a mesh headband is typically 5 to 6 rows, but you can add more rows if you prefer a wider headband (for a hair wrap or ear warmer).
- Continue until the headband reaches the desired width.
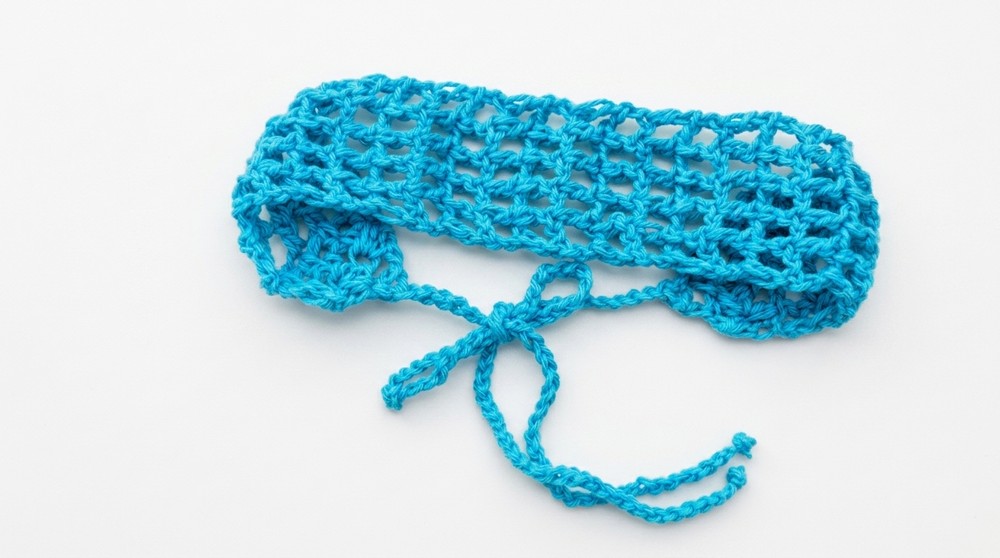
5. Step 5: Joining the Headband
- With the correct width completed, fasten off and leave a 10–12 inch tail of yarn for sewing.
- Fold the headband so that the shorter sides align. Use your tapestry needle to join the two ends using a whip stitch for a neat seam. Alternatively, you can use slip stitches with your hook.
- Once joined, fasten off securely and weave in all loose ends with the tapestry needle.
Customization Ideas
This pattern allows for plenty of customization to suit your style and needs:
- Color Play
- Use multiple colors for a striped or gradient headband.
- Try self striping or variegated yarn to add an effortless pop of color.
- Add a Border
- For a polished finish, add a single crochet border around the edges or work a slip stitch along the top and bottom rows of the headband.
- Wider or Narrower Design
- To create a wider headband, simply continue adding rows of the mesh pattern until your preferred width is achieved. For a narrower headband, stop after 3 or 4 rows.
- Embellishments
- Add crochet flowers, beads, buttons, or bows to the headband for a playful or elegant look. Attach these embellishments with a tapestry needle or glue.
- Alternate Stitches
- If you’d like more structure, replace double crochets (dc) with half double crochets (hdc) or single crochets (sc).
- If you’d like more structure, replace double crochets (dc) with half double crochets (hdc) or single crochets (sc).
Tips for Crochet Success
- Even Edge: Be sure to crochet into the top of the beginning turning chains at the end of each row for a straight edge.
- Stretch Factor: Because the mesh design stretches, make the headband slightly smaller than your head circumference to ensure a snug but comfortable fit.
- Block Your Project: If your stitches appear uneven or curled, lightly block the headband. Wet the fabric, gently shape it, and let it dry flat. Cotton or wool yarn benefits most from blocking.
- Test Fit: Before joining the ends, wrap the headband around your head to confirm the fit. Add or remove rows or chains from the foundation as needed.
Conclusion & Remarks
You’ve successfully completed your Crochet Mesh Headband—congratulations. This lightweight and stretchy headband is a versatile accessory that works beautifully with casual or formal outfits. Use the basic mesh pattern described here as a foundation to experiment with different colors, textures, and embellishments.
Whether you’re making this for yourself, gifting it to a loved one, or selling it at markets, this timeless design is sure to impress. Share your finished designs on social media and encourage others to join the world of crochet.