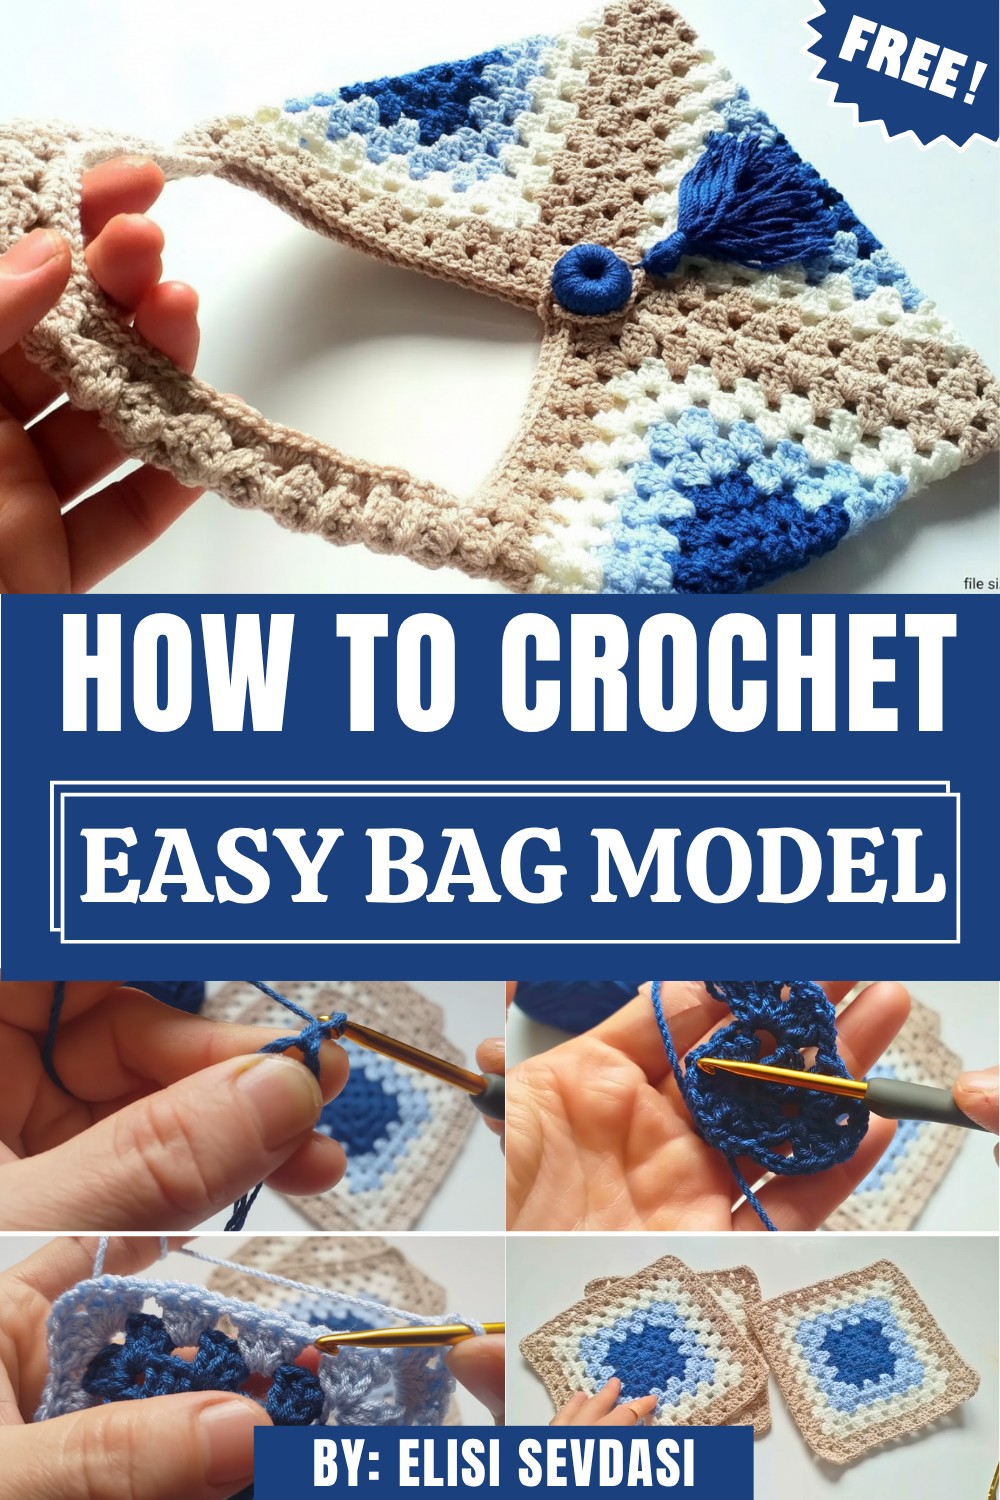
Carry your essentials in style with this Free Crochet Bag Model Pattern that’s durable, practical, and perfect for adding a chic handmade touch.
A well‑designed handmade bag brings practicality and style together — ideal for daily outings, shopping trips, or casual days out. The Free Crochet BAG MODEL Pattern gives you the freedom to create a beautiful bag that balances utility with a refined look, offering storage space, durability, and a handmade aesthetic that complements many outfits.
Adorable Handmade Crochet Bag Model Pattern for Gifts

This bag is perfect for everyday use — from errands and shopping to casual outings — thanks to its blend of sturdiness and understated elegance. Its clean silhouette and customizable size make it easy to match with a variety of outfits. Depending on your choice of yarn, color, and finishing details, the final piece can be as simple and functional or as stylish and expressive as you like. With this pattern, you gain a practical accessory that combines usefulness with timeless charm.
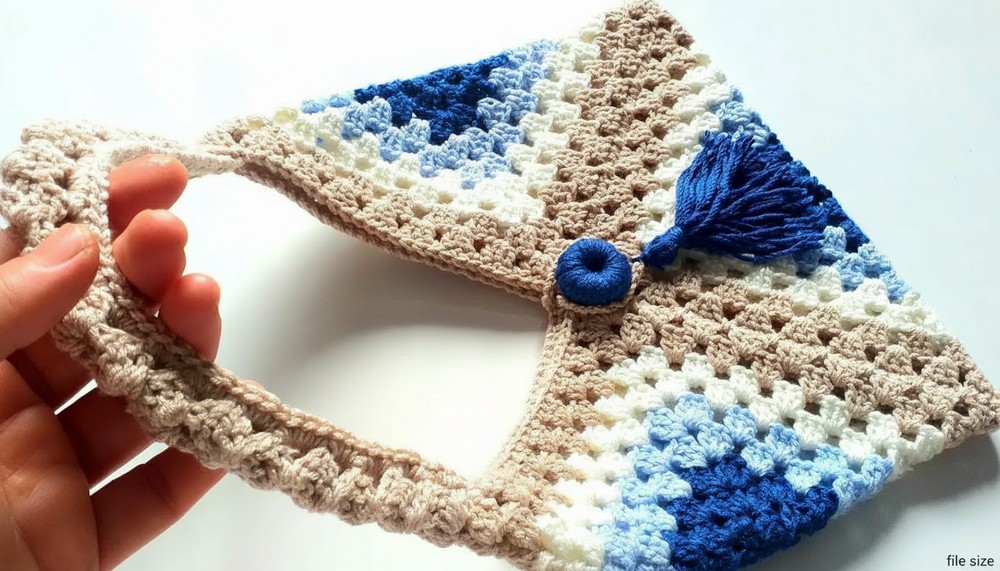
Crochet Bag Model Pattern with Motifs
Materials
- Yarn
- Brand/Type: [Use your preferred yarn, or reference the yarn mentioned in the video description]
- Weight: Medium-weight yarn (4)
- Colors: Use a combination of at least 3 shades for motifs, edges, and handle (e.g., dark blue, light blue, cream, and coffee tones).
- Crochet Hook
- Size: 4 mm (or size stated as per your gauge).
- Additional Tools
- Scissors
- Tapestry Needle
- Stitch Markers (optional)
- Gauge
- Although gauge is not crucial for this project, checking your gauge ensures proper finished size. Gauge is approximately 4 double crochets per inch.
Finished Size
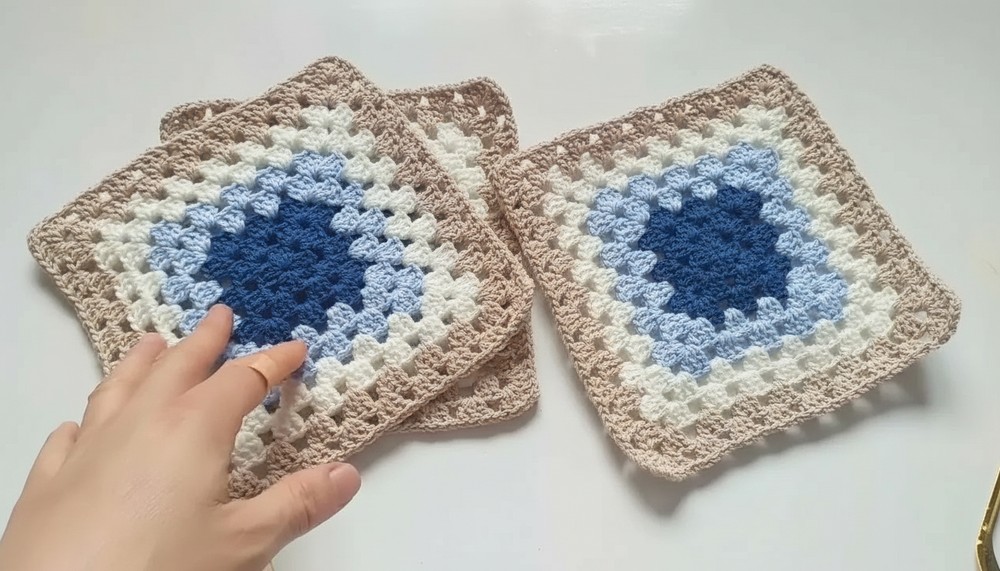
The size of the bag depends on the number of motifs and the size of each motif. With 3 motifs as described:
- Approximate Dimensions:
- Width: 12 inches
- Height: 10 inches
- Handle Length: Customizable up to 25 inches.
Pattern Instructions
Step 1: Creating the Motif
Foundation Ring:
- Wrap the yarn twice around your finger to create a magic ring.
- Secure the loop with a single crochet stitch.
Round 1:
- Chain 4 (counts as the first double crochet plus chain 1).
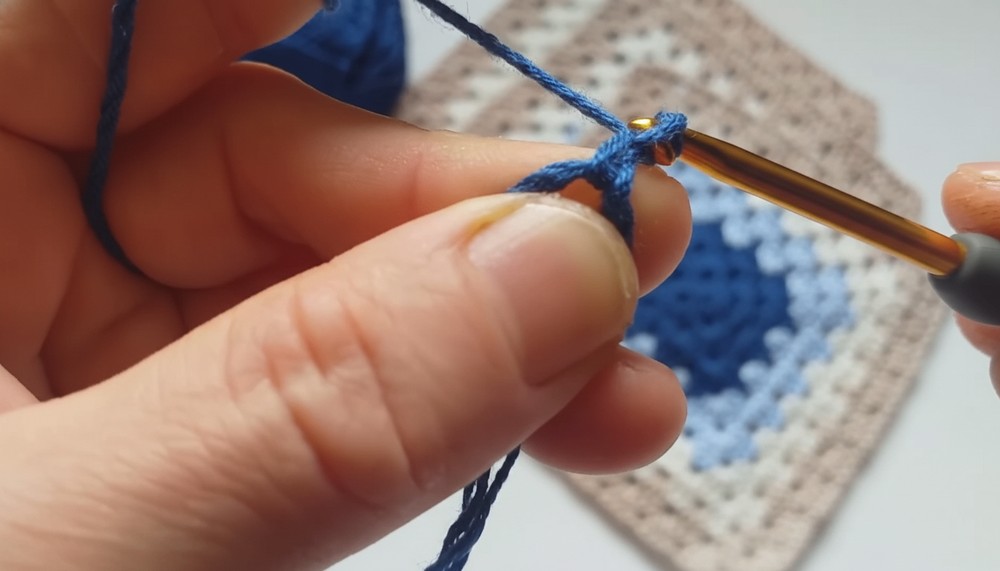
- In the magic ring, make 3 double crochets, chain 2. Repeat this step until you have 4 groups of 3 double crochets.
- Chain 1 and slip stitch into the third chain of the starting chain to close the round.
Round 2:
- Slip stitch into the nearest corner space.
- Chain 3 (counts as the first double crochet). Work 2 double crochets into the same corner, chain 3, and make 3 more double crochets in the same space.
- Chain 1 and move to the next corner space. Repeat 3 double crochets, chain 3, 3 double crochets.
- Continue until all corners are filled. Join with a slip stitch.
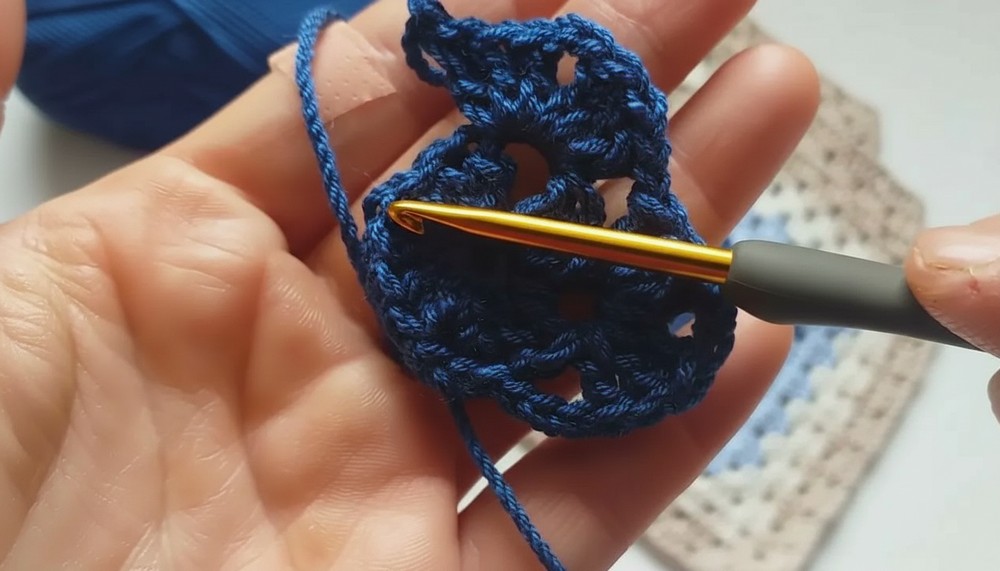
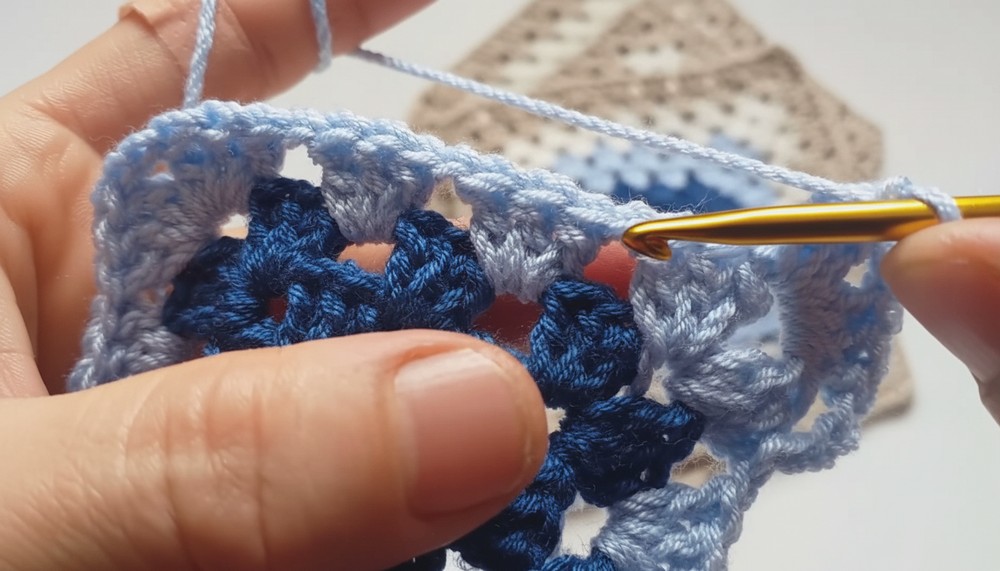
Repeat Round 2 to start growing the motif, adding more spaces between corner groups of double crochets. Change yarn colors after every other row to achieve a striped motif effect. Stop when your motif reaches the desired size for your bag.
Step 2: Joining the Motifs
Once you have completed 3 motifs:
- Place two motifs side by side with their wrong sides facing each other.
- Begin joining them with single crochet stitches along the edges, aligning the stitches carefully to ensure even seams.
Repeat this process for adding the third motif to complete the body of the bag. Make sure to leave the top section open for handles.
Step 3: Adding Edging
- Starting at one corner, work single crochet stitches evenly around the edges of the entire bag.
- On each corner, make 2 single crochets, chain 1, and 2 single crochets to maintain the shape.
- Finalize by joining your last single crochet stitch with a slip stitch.
Step 4: Creating and Attaching Handles
Handle Foundation:
- Chain 26 (or desired length for the handle).
- Work single crochet stitches in each chain across to create a sturdy strap.
Attaching Handles:
- Align the strap ends to the top edges of the bag, ensuring even placement.
- Sew or crochet the strap securely in place using single crochet stitches.
Step 5: Adding Decorative Buttons or Tassels (Optional)
- Button:
- Chain 8 and join into a ring with a slip stitch.
- Crochet single stitches around the ring until your button reaches the desired thickness/density.
- Attach the button to the bag using a tapestry needle and thread.
- Tassels:
- Cut several strands of yarn (approx. 6 inches).
- Fold them in half and attach them to a corner using a loop knot method.
- Trim tassels evenly for a polished look.
Special Techniques
- Magic Ring: Create a tightly closed ring by pulling the tail of yarn after your first round of stitching.
- Even Stitch Spacing: Place stitch markers to maintain uniformity along edges during motif joining.
- Color Changes: Use slip stitches to seamlessly transition between different yarn colors at the end of each round.
Customization Ideas
- Use a chunkier yarn and larger hook for a bigger bag.
- Add lining for durability and aesthetics.
- Make shorter handles for a hand-held tote design.
- Use colorful beads or charms on tassels for extra flair.
Conclusion and Important Remarks
Congratulations on completing your bag! This unique summer project not only enhances your crocheting skills but results in a stylish, handmade accessory perfect for outings. The motifs offer flexibility in size and customization, ensuring a one-of-a-kind bag tailored to your preferences.
Final Look:
The finished bag features three large motifs joined to create a colorful tote with a sturdy strap and optional tassel/button embellishment. The combination of colors and structural crochet work makes it a standout piece.