Rock a chic style with Crochet Off-The-Shoulder Top Pattern to enjoy a comfortable fashionable outfit that adds fun charm and flair to your summer.
This stylish and elegant top stands out with its stunning off-the-shoulder design, perfect for adding a touch of grace to your wardrobe. The soft, flowy texture gives it a light and comfortable feel, making it ideal for summer days, evenings out, or casual gatherings.

Playful Crochet Off-The-Shoulder Top Pattern for Summer Fun
Its flattering neckline highlights your shoulders beautifully, creating a feminine and relaxed look. Pair it with skirts, jeans, or shorts for a versatile outfit that suits a variety of occasions. With its unique style and charming appearance, this top offers both comfort and beauty, making it a must-have piece for any season.

This step-by-step crochet pattern creates a stunning off-the-shoulder summer top with beautiful detailing in the center and side panels.
The tutorial is written in US crochet terminology and is suitable for intermediate to advanced crocheters.
Materials List
- Yarn: Any lightweight cotton or DK-weight yarn for comfort and breathability. (Recommended: Summer-friendly yarns such as cotton blends)
- Crochet Hook: 4.0 mm (US G/6).
- Additional Tools:
- Stitch markers to track rows or sections
- Scissors
- Tapestry needle for weaving in ends
- Measuring tape for sizing adjustments
Skill Level
Intermediate to Advanced
Familiarity with double crochet (DC), single crochet (SC), slip stitch (SL ST), chain (CH), and intermediate techniques like connecting pieces and creating decorative loops is required.
Key Abbreviations
- CH: Chain
- SC: Single Crochet
- DC: Double Crochet
- SL ST: Slip Stitch
- ST: Stitch
Special Notes
- This top consists of three main pieces: two side cups and one back panel, joined together with slip stitches.
- Straps are added at the end with customizable chain lengths.
Pattern Instructions
Step 1: Side Cups
Part 1: Create a Square Base
- Chain Foundation: Start by creating a chain long enough to fit across your bust area. Ensure the chain count is even. For this tutorial, the count is 22 CH.
- Row 1: CH 2 (counts as first SC). Work 1 SC in each chain across. Turn.

- Total stitches: 22 SC.
- Row 2–22: Repeat Row 1 until the square base is large enough to cover your bust.
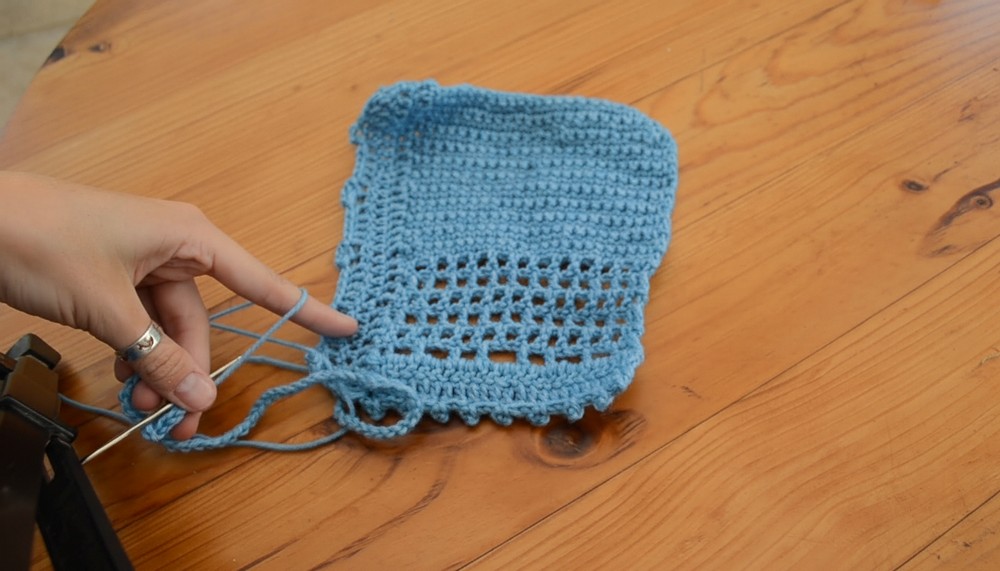
Part 2: Mesh Pattern Detailing
- Row 1: CH 2 (counts as first DC).
- Work 1 DC in next ST, CH 1, SK 1 ST, and repeat DC, CH 1, SK 1 to the end of the row.
- End with 2 DC in the last 2 stitches. Turn.
- Rows 2–5:
- CH 2 and repeat the same DC, CH 1, SK 1 pattern.
- Make sure to stack the DC stitches directly on top of the previous row’s DCs.
- Row 6: CH 2 (counts as first DC).
- DC in the next ST, CH 2, SK 2 STS, repeat this DC, CH 2, SK 2 to complete the row.
- Rows 7–8: Work DC stitches only to create a solid base. The total number of DCs should match the count of the square’s width (e.g., 22 DC).

Part 3: Decorative Edge
- Final Row:
- SL ST, CH 3, SL ST back into the same ST to create a small loop.
- Repeat across by skipping 1 ST, SL ST, CH 3, SL ST into the next ST.
Step 2: Side Panel Edges
- Work Along the Side:
- Attach yarn to the side edge of the square.
- CH 2 and DC evenly along the side of the cup to ensure a clean, even edge.
- Count the stitches carefully to replicate this on the other side. In this tutorial, 33 DCs were worked.
- Return Row: Turn and repeat DC across (33 DC).
- Create Rope Holes for lacing:
- CH 5, SL ST into the next ST to form a loop.
- Skip 1 ST, CH 5, SL ST into the next ST. Repeat this pattern across the edge.
- The loops will serve as holes for threading a rope or decorative lace.
Step 3: Back Panel
- Chain Foundation: CH to the length necessary to fit the back width of your bust. For example purposes, 55 CH were used.
- Repeat the Same Pattern:
- Follow the Side Cup Square Base Pattern (Rows 1–22) using SC rows.
- Add the mesh pattern (DC and CH rows) from the Side Cups.
- Add the decorative edge as in the Side Cups.
Step 4: Join Side Cups and Back Panel
- Align one side of the back panel with one side of a cup. Use SL ST to join them together by working along the edges.
- Align and join the other cup to the back panel in the same way.
- Make sure to keep the joins consistent and seams aligned for a clean look.
Step 5: Straps
- Arm Straps:
- CH a length that fits around your arm comfortably. Example: CH 38.
- SL ST to join the ends of the chain to the opposite side of the same panel, forming a loop.
- Row 1: CH 2, DC in each chain around. Join with a SL ST at the beginning.
- Row 2: Repeat Row 1.
- Row 3: Create spacing by CH 2, SK 2, DC to the end of the round.
- Repeat for the Other Arm: Create the strap on the other side following the same steps.

Step 6: Center Bow Rope
- Create Lace Rope: CH a long rope that can be threaded through the loops along the side panel holes. Add a bow in the center for decoration.
Conclusion
You have now completed the beautiful off-the-shoulder summer top! The detailing, including the side laces and decorative edges, makes it the perfect summer accessory. Try different yarn colors to customize the look further.
Pattern Corrections
- Ensure row counts are even and aligned when joining the panels.
- If the arm straps feel too loose, reduce the chain count, or adjust with fewer DC rows in the straps.
Tips
- Use blocking to shape your top and ensure smooth, even edges, particularly for the ribbing and decorative edges.
- Make sure to align and measure side panels, back panels, and straps against your body for a customized fit.
- Add beads or decorative tassels to the center rope for extra flair!