Feel warm and stylish with a Free Crochet Wrap Sweater Pattern and make a cozy sweater that is perfect for layering and casual daily looks.
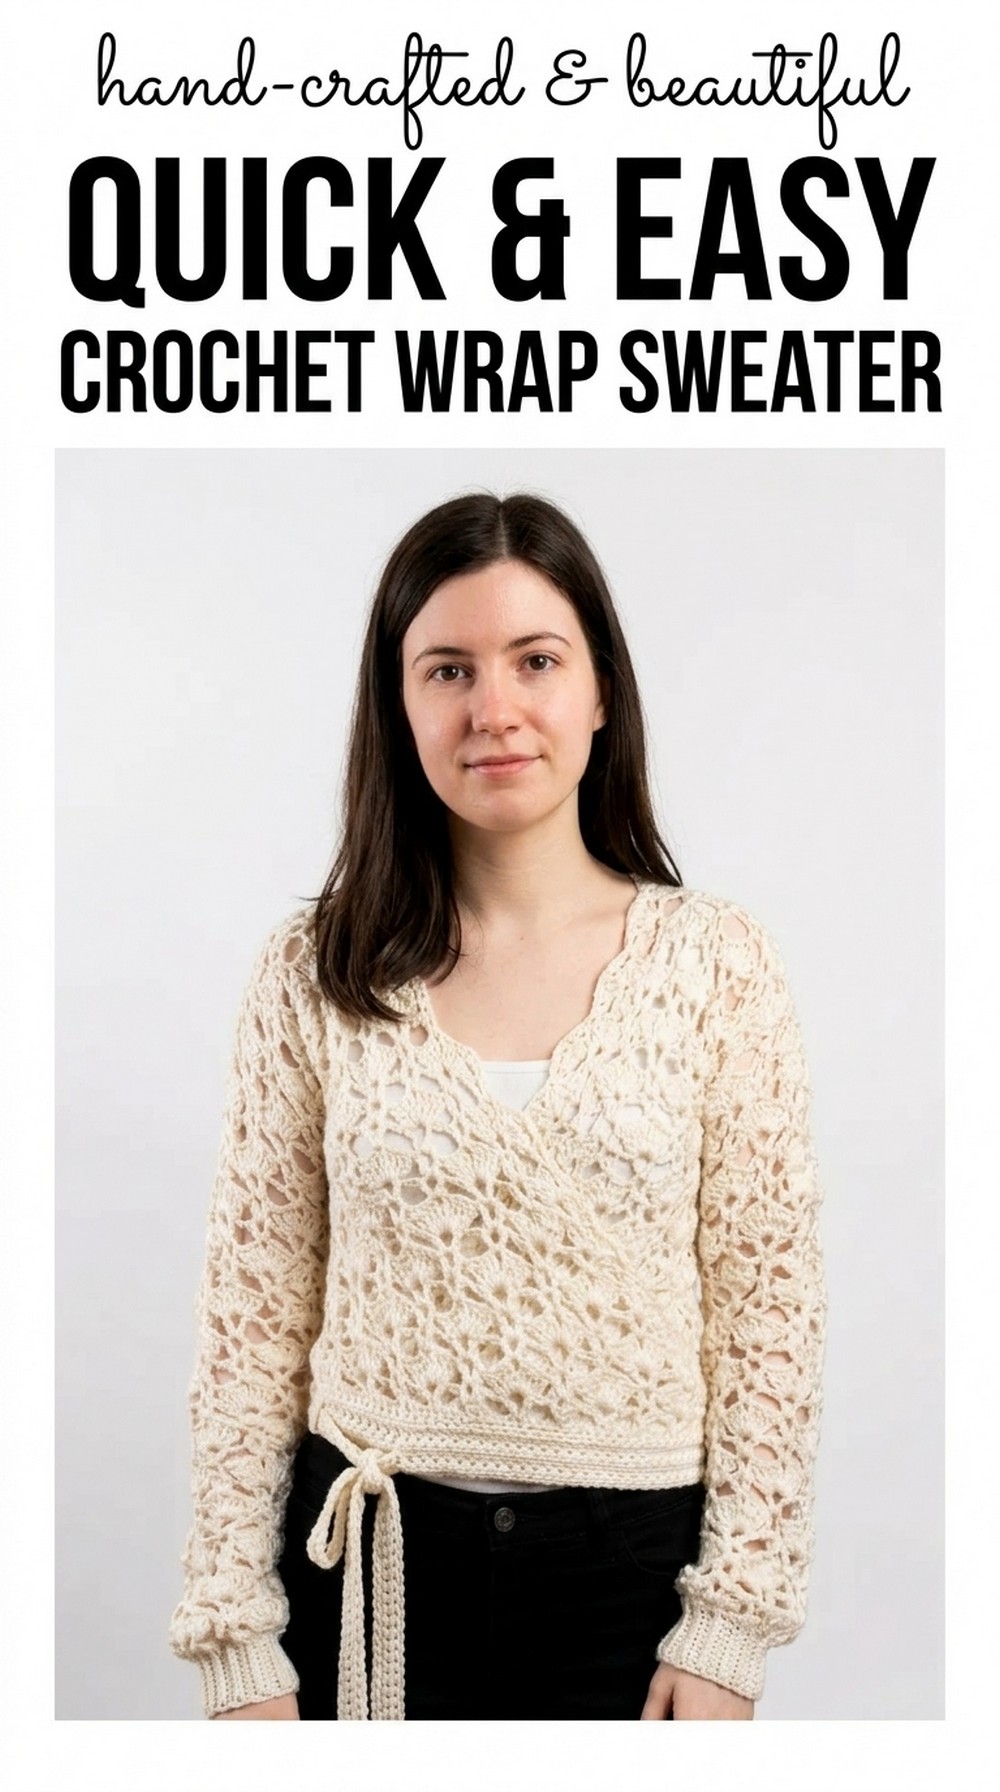
Stunning Free Crochet Wrap Sweater Pattern for Work or Relaxing at Home
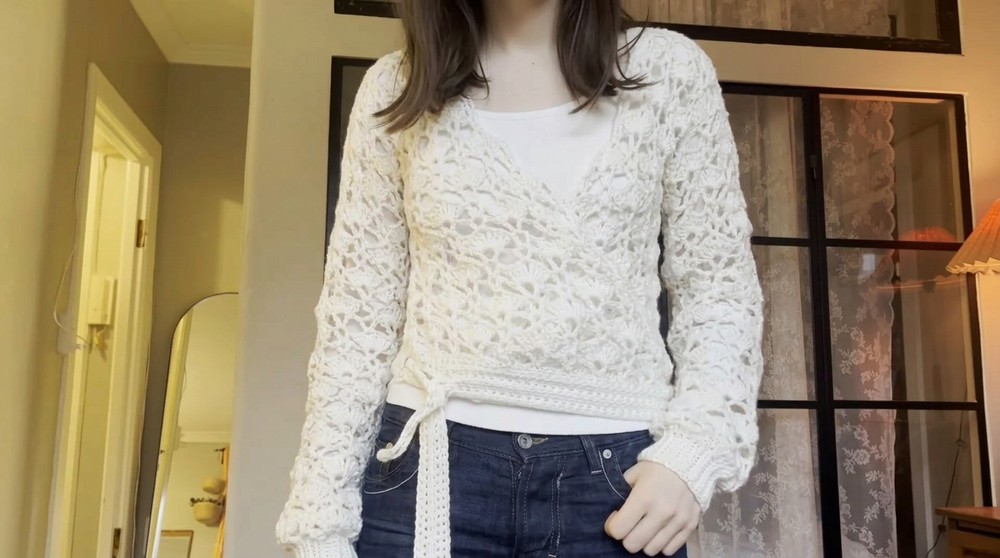
This guide has everything you need to create a cozy and stylish crochet wrap sweater that you’ll absolutely love. The Free Crochet Wrap Sweater Pattern is perfect for any season, keeping you warm while making you look beautiful. Its wrap around design is not just comfortable but also adjustable, so it fits everyone perfectly. 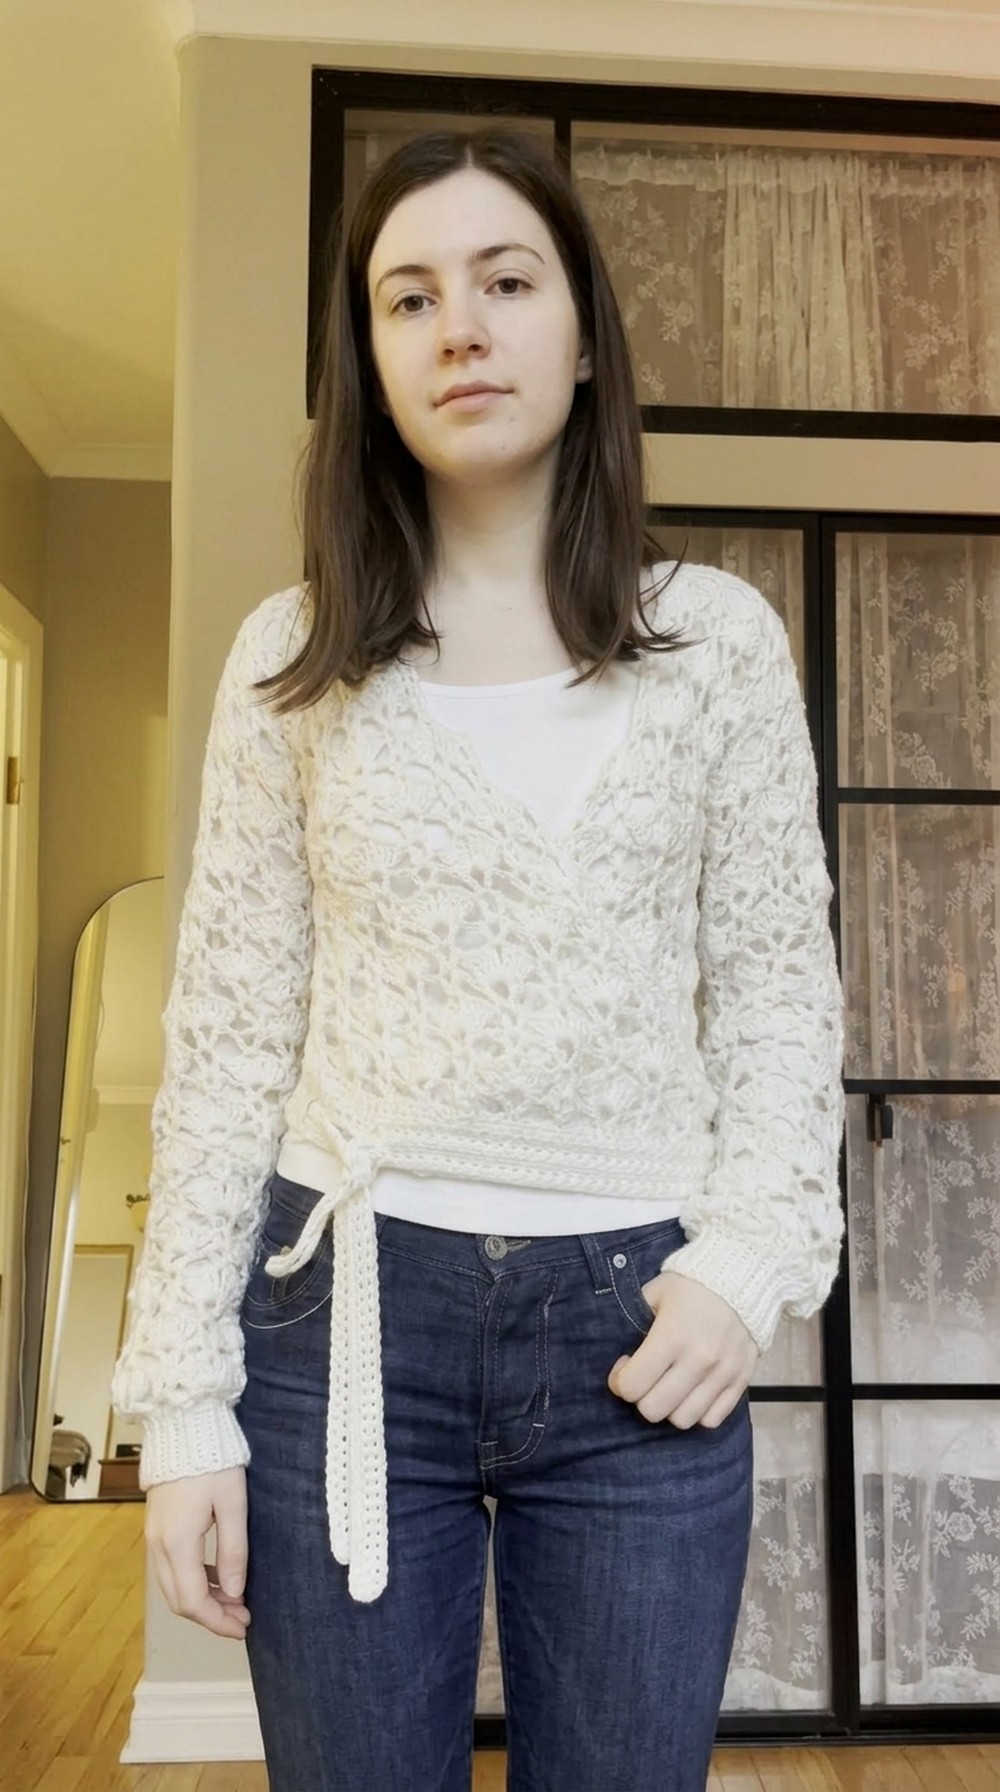
The soft yarn and unique stitch pattern make it stand out, giving it an elegant and handmade charm. Whether you want to wear it at home, go out looking stylish, or gift something special, this sweater is the perfect pick.
Breezy Crochet Wrap Sweater Pattern
Materials Needed
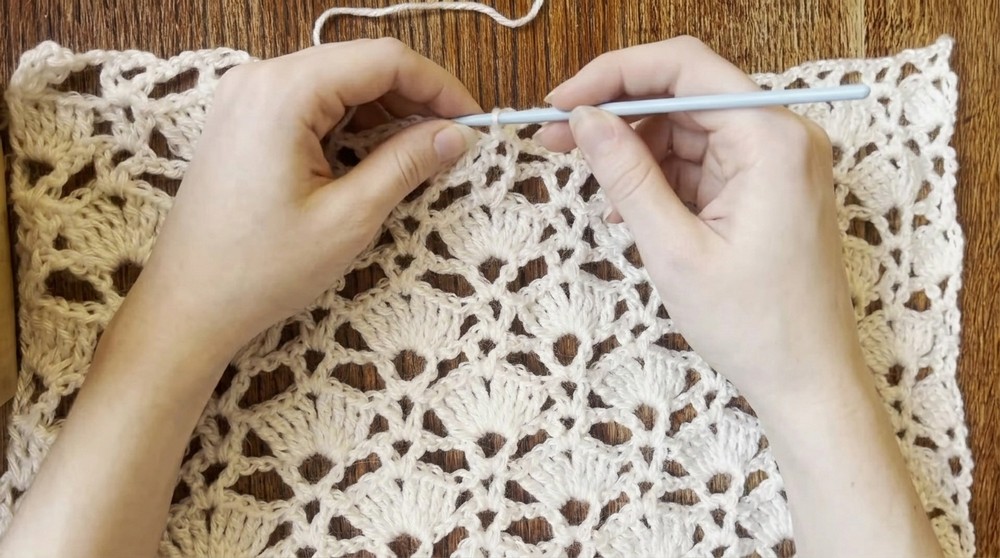
- Yarn: Wool blend (30% wool, 70% acrylic), about 300 grams (approximately six skeins, depending on size). Choose a yarn weight suitable for a 4 mm hook.
- Crochet hook: 4 mm hook (or size recommended by yarn manufacturer).
- Other tools:
- Stitch markers
- Scissors
- Tapestry needle
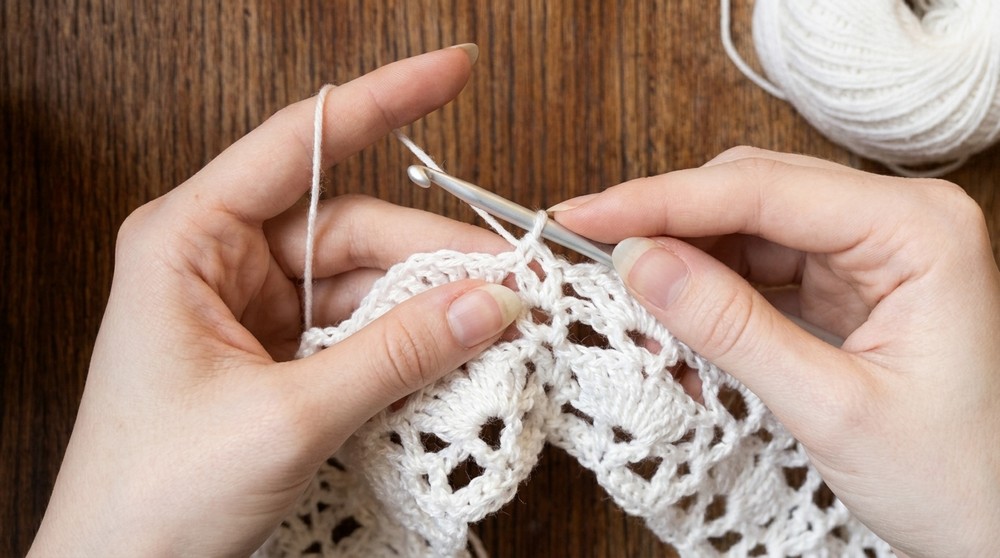
Techniques Used
- Foundation Single Crochet (Optional): This technique is used to create a stretchy foundation chain by crocheting the base chain and the first row simultaneously.
- Linked Double Crochet: A method to link double crochets together for tighter, compact stitches.
- Slip Stitch Joining: Used to join panels and seams.
- Triple Crochet (Treble Crochet): Used for decorative and lacy sections.
- Half Double Crochet: Utilized for creating the neck section of the back panel.
Pattern Instructions
Front Panels
- Create Panel Base:
- Start with a slip knot using the wool blend yarn.
- For the first row of the front panel, choose a foundation method: either make a chain and then single crochet into each chain, or create a foundation single crochet chain. Note: If you are a beginner, chains with single crochets are simpler.
- The base chain length must be slightly longer than the distance from one side of your waist to the other. Make sure the chain is divisible by 10 plus 1.
- Example: For the given reference, 61 stitches were used.
- Row 1:
- Chain 4 (counts as the first double crochet and one chain).
- Make a double crochet in the same stitch.
- Repeat: Chain 2, skip 4 stitches, double crochet into the fifth stitch, chain 2, double crochet into the same stitch. Continue repeating this pattern until the end of the row.
- At the end of the row: Chain 2, skip 4 stitches, double crochet into the last stitch, chain 1, and finish with a double crochet.
- Row 2 (Start Decreases):
- Chain 4, this counts as the first double crochet plus one chain.
- Skip the first stitch immediately below the chain.
- In the next stitch, make 4 triple crochets, chain 1, and another 4 triple crochets in the same space.
- Move to the next panel’s gap, and repeat: Double crochet into the next space, chain 2, double crochet into the same space.
- Continue the pattern of alternating 4 sets of triple crochets (with 1 chain in between) and a double crochet pair (with chains) for the entire row.
- Subsequent Rows:
- Repeat the patterns of Row 1 and Row 2 alternately, ensuring to reduce the panel width by skipping stitches for decreases on one side only. (This is to shape the top of the panel.)
- Continue following this process of decreases until the widest part of the panel reduces to fewer flowers at the top.
- Stop decreasing when the desired width is less than half the original width.
- Example: The sample started with 6 flowers wide and ended at 2.5 flowers.
- Finish the Front Panel:
- Stop decreases and continue straight without shaping, following the same pattern for the height needed.
- Example: The panel reached a height of 11 flowers tall.
- Make a second identical front panel.
Back Panel
- Create Back Panel Base:
- Begin with the same foundation chain as the front panel.
- Example: 61 stitches were used.
- Row Repeats:
- Follow the same overall pattern as the front panels but without any decreases. This makes the back simpler to crochet.
- Reaching the Neck Area:
- The back panel joins the front panels in a way that leaves an opening for the neck.
- When you have the desired height, reduce stitches for the final 2 rows to create space for the neckline.
- For the neck area: Use half double crochets and chain spaces for the smaller gap areas. Use standard stitches to finish the flower motifs on either side of the neck.
Attach the Panels
- Lay the front panels on top of the back panel.
- Use slip stitches to join the seams cleanly:
- Join the shoulders of the front and back panels together.
- Leave space open for the neckline.
- Repeat the same process for the side seams, leaving armhole spaces as required for attaching sleeves later.
Sleeves
- Create Sleeves:
- Use the same pattern as the back panel, but make the base chain shorter (depending on the size and fit desired).
- Example: For smaller sleeves, the base chain was 50 stitches.
- Follow the same row repeats as the back panel, with no neck shaping.
- Example: The sample sleeves reached a height of 14 flowers.
- Join Sleeves:
- Fold each sleeve lengthwise and slip stitch to close up the side.
- Attach the sleeves to the body panels by slip stitching into their respective seams.
Cuffs
- Create Cuffs:
- Start with a 10 chain base (adjust for desired cuff width).
- Work slip stitches into the back loops only to create a stretchy ribbing texture.
- Continue until the cuff circles the sleeve completely.
- Attach Cuff:
- Fold the cuff in half and slip stitch the edges together.
- Join the cuff to the base of the sleeve using slip stitches.
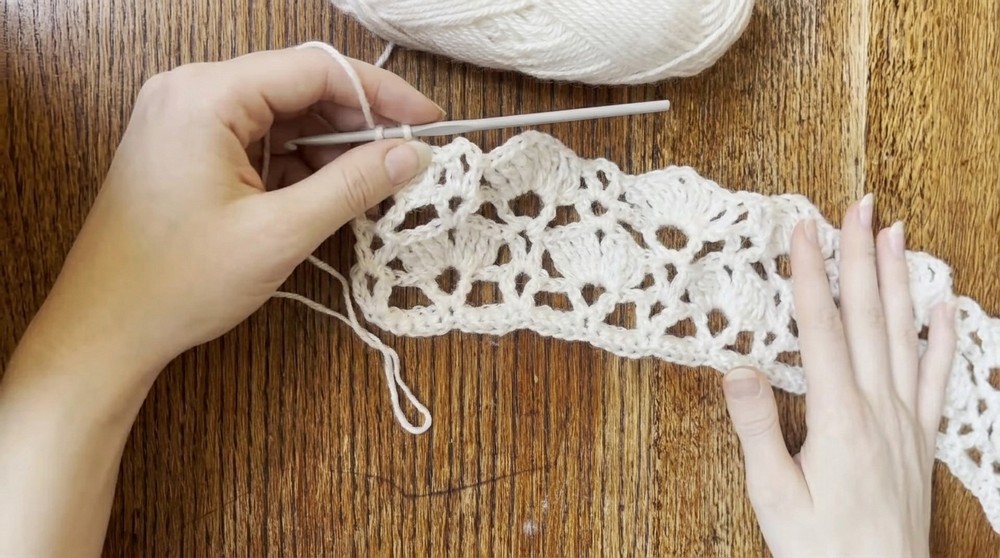
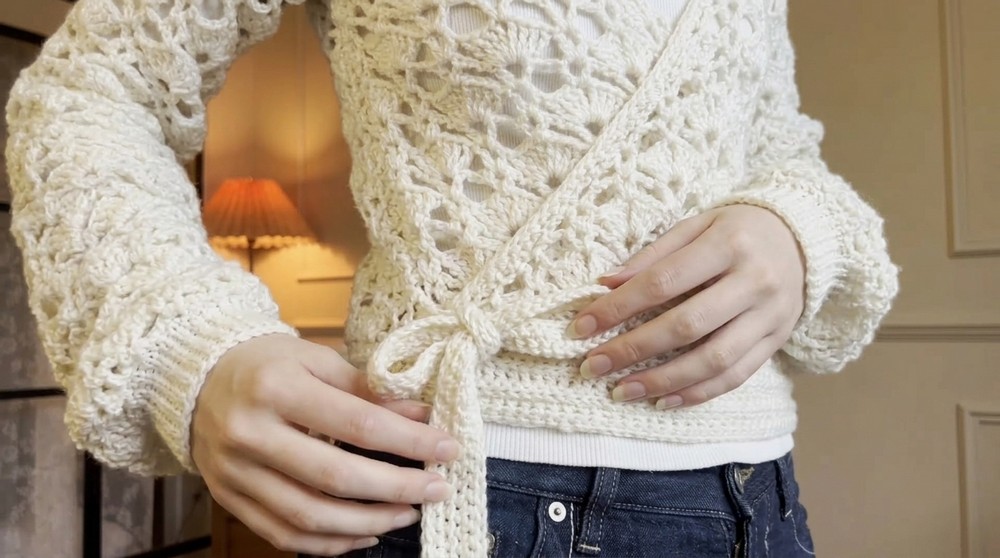
Waist Border with Bow Tie
- Create Border:
- Attach yarn to the bottom edge of one front panel.
- Work a linked double crochet foundation chain around the bottom edge, including decreases in every second stitch.
- Extended Foundation Chain:
- After working the border pattern across the back and the second front panel, extend the chain for a tie (approximately 97 stitches on each side makes for a balanced bow).
- Repeat & Finish Border:
- Return along the foundation chain using rows of linked double crochets.
- Create a total of five rows, ensuring symmetry for the border and ties.
- Connect the borders together, leaving an opening for threading one of the ties through.
Finishing the Pattern
- Tie off all loose ends and weave them neatly with a tapestry needle.
- Block the sweater gently to shape it perfectly. Wet blocking or steam blocking is recommended for a polished look.
- Thread the shorter bow through the opening in the border and tie it with the longer bow behind the back.
Final Words
This crochet wrap sweater is an elegant yet functional creation, perfect for various occasions. Its lacy texture, adjustable fit, and bow detail make it both stylish and customizable.
Tips for Maintaining Your Sweater
- Washing: Hand wash in cold water with mild detergent; lay flat to dry to prevent stretching.
- Storage: Fold and store in a dry, cool place to maintain its shape and prevent mildew.
- Repairs: Keep a small amount of your yarn for future repairs, such as fixing snags or tears.