Elegant Crochet Twisted Top combining style and comfort, designed for modern fashion lovers looking to elevate their wardrobe with a unique touch.
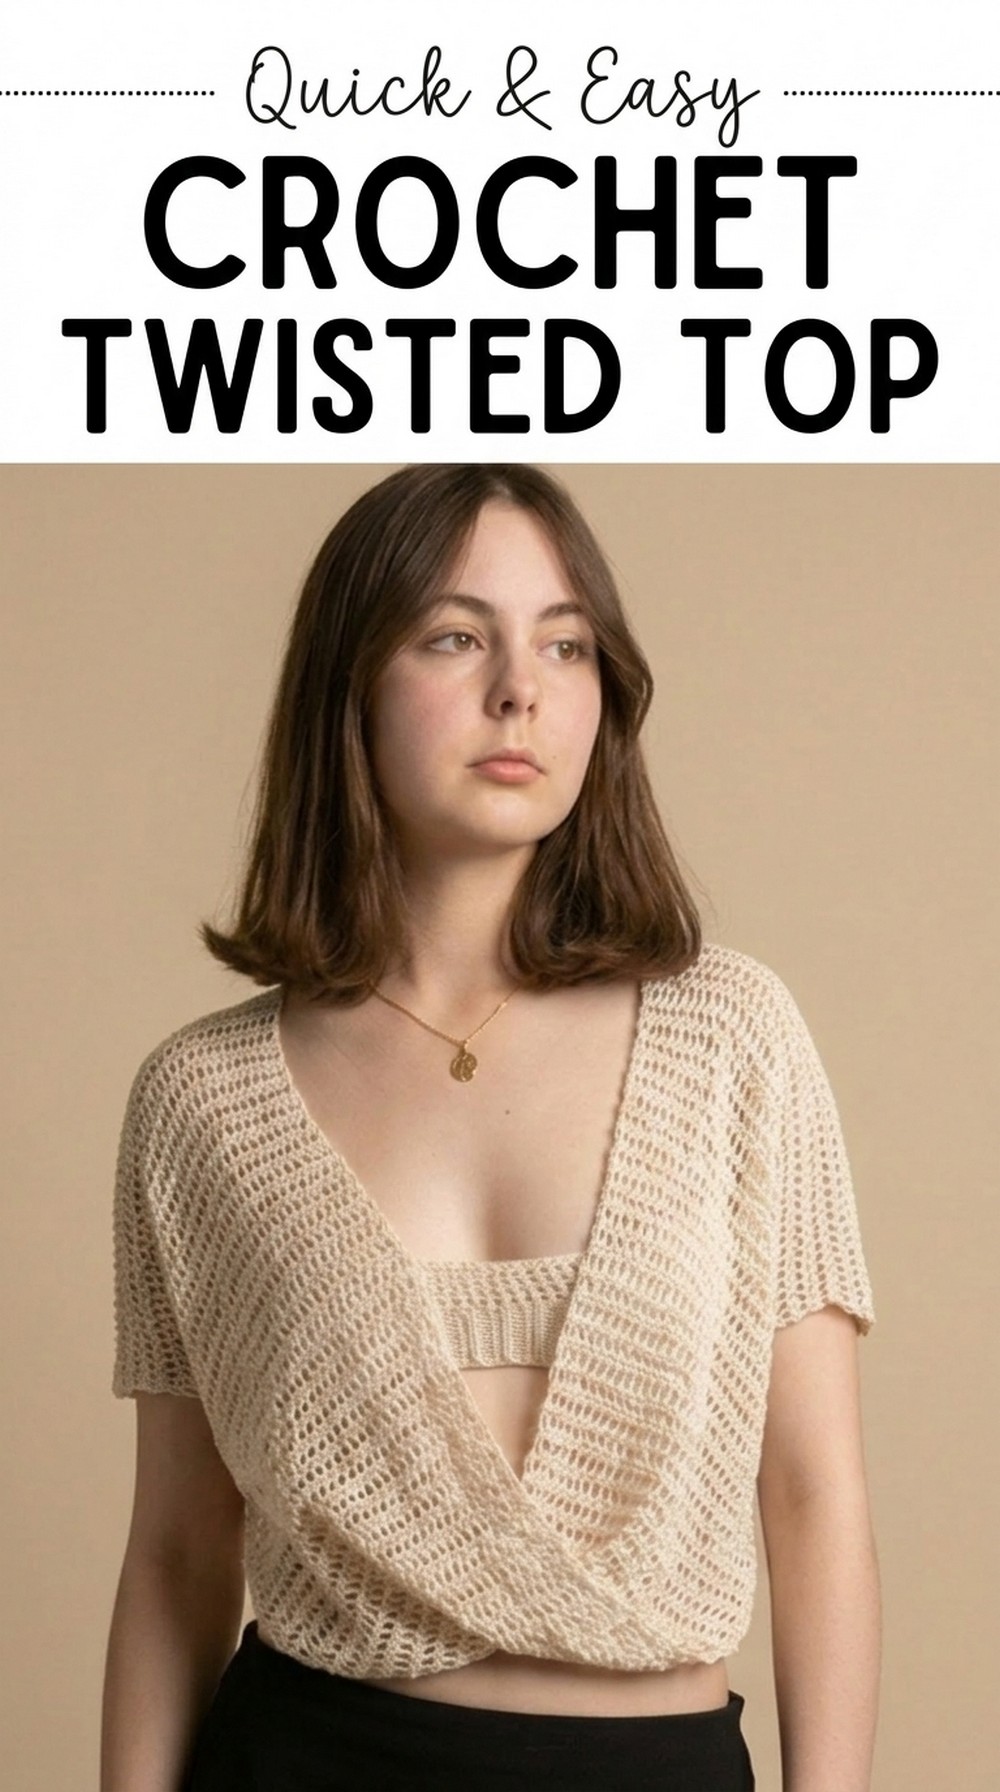
Make This Free Crochet Twisted Top Pattern for a Casual Chic Look
Whether for casual outings, summer days, or a chic evening look, the twisted top is versatile and fun to wear. Its unique twisted front design adds a modern and trendy touch to any outfit, making it a must have for every wardrobe.
The Crochet twisted top is lightweight, soft, and breathable, which makes it perfect for warm weather while still being great for layering in cooler months. Made using simple crochet stitches like the half double crochet, even beginners can create this stylish piece with ease.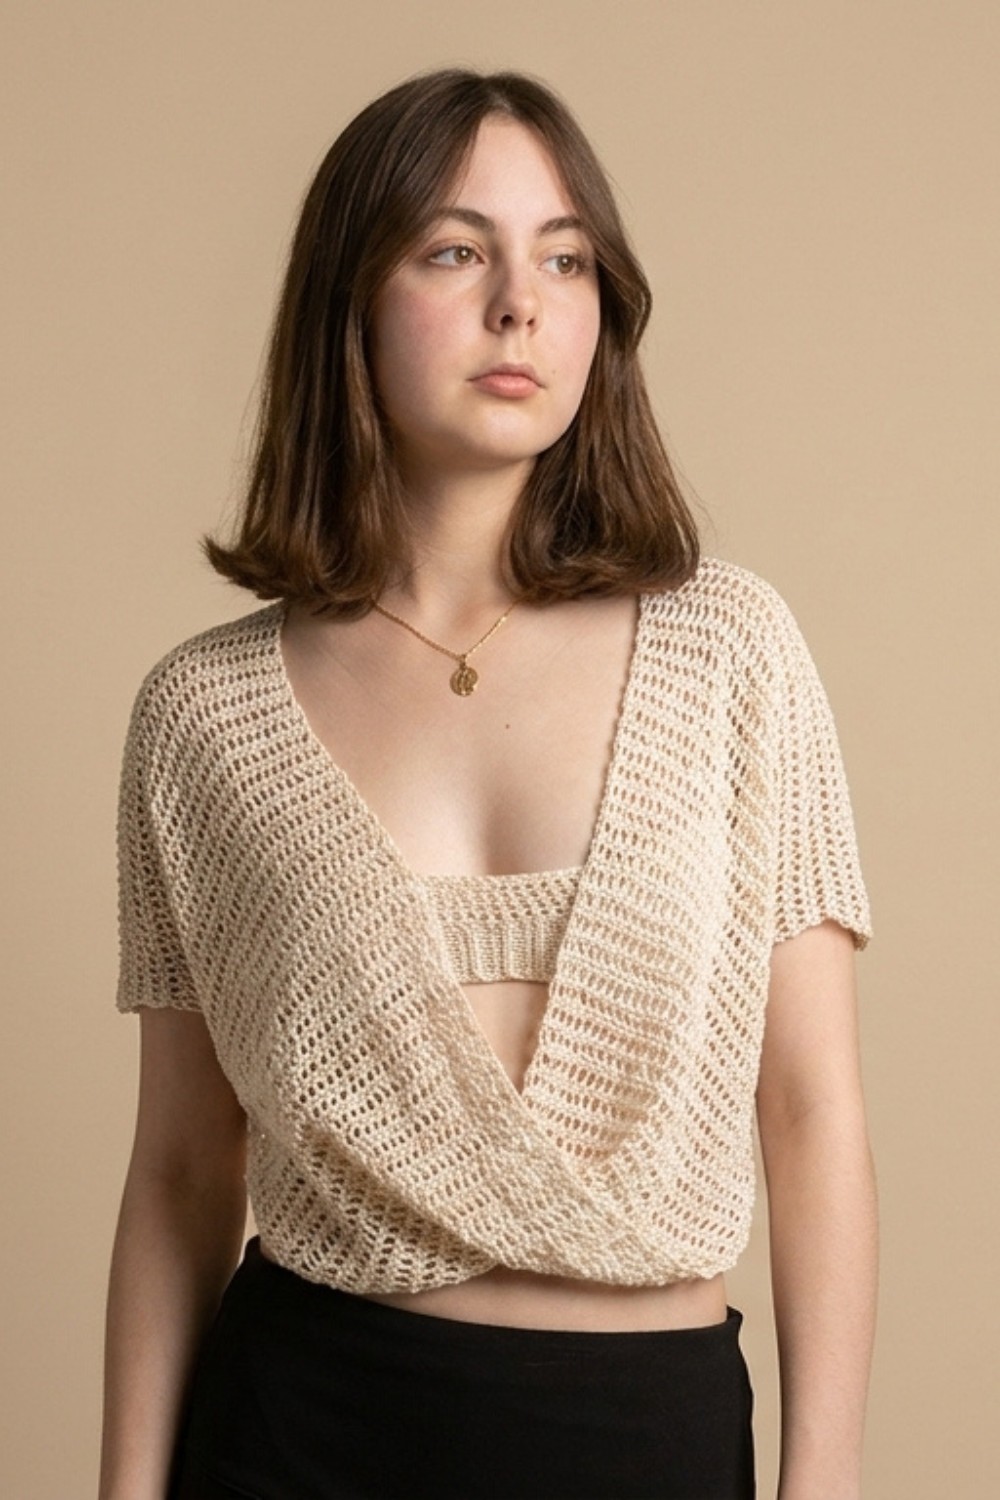
You can customize the size and color to match your personal style, making it truly one of a kind. Pair it with jeans, skirts, or shorts for endless outfit options. This crochet top is not just practical but also a joy to crochet. Create your very own twisted top today and add a fresh, handmade flair to your look.
Crochet Twisted Top Pattern
Skill Level
Easy
Construction Overview
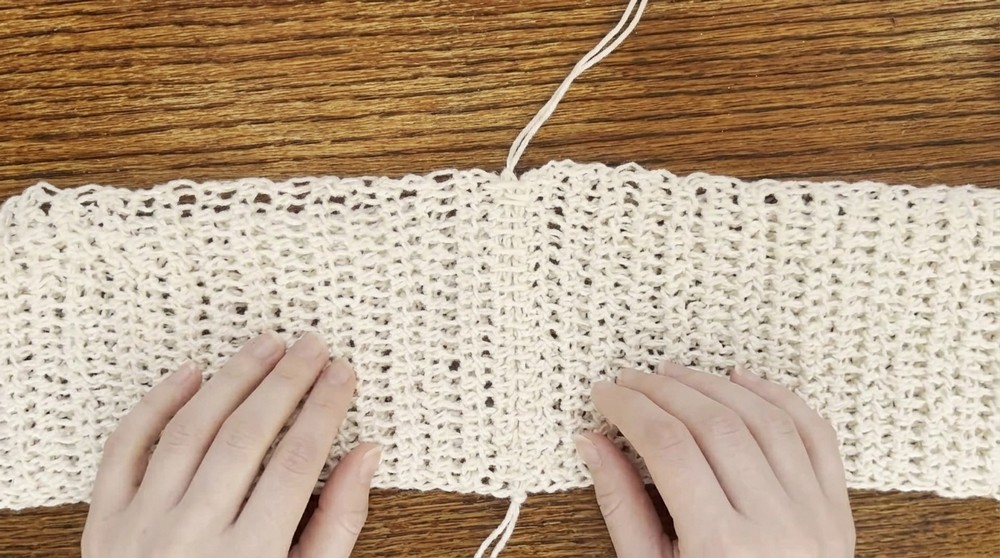
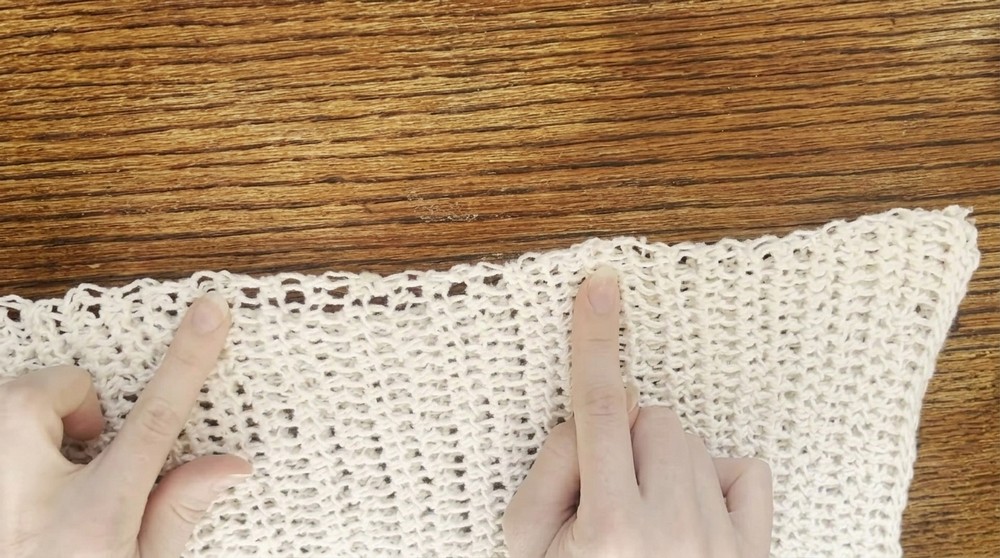
The top is made from two identical rectangular panels worked in rows of half double crochet (hdc).
Each panel is:
- As wide as half your waist plus sleeve length, and
- As long as double the desired length from shoulder to hem.
The panels are then:
- Seamed together at the shoulders.
- One front panel is twisted once.
- The sides are partially seamed, leaving openings for sleeves and the bottom.
- Ties are added at the shoulders to close the back.
Materials
- Yarn:
- Any medium weight yarn (Category 4) or similar yarn that gives a soft drape. Cotton or a cotton blend is recommended for garments.
- Quantity will depend on your size, but as a guideline, expect approximately:
- S–M: 400–600 g
- L–XL: 600–800 g
- Hook:
- One hook one size larger than the yarn label recommends, to achieve a looser drape.
- For example, if the yarn suggests 4.0 mm, use a 4.5–5.0 mm hook.
- Notions:
- Scissors
- Yarn needle (for weaving in ends)
- Stitch markers or safety pins (at least 4, more if desired)
- Measuring tape
Abbreviations (US Terminology)
- ch = chain
- st(s) = stitch(es)
- sl st = slip stitch
- hdc = half double crochet
- RS = right side
- WS = wrong side
Gauge
Since this pattern is fitted on the body during construction, gauge is flexible, but to avoid surprises it is recommended to check:
- Work a small swatch in hdc, e.g. 15 sts × 10 rows.
- Measure how many sts and rows = 10 cm (4″).
- Use this information to adjust stitch count for your own measurements, if needed.
Special Notes and Techniques
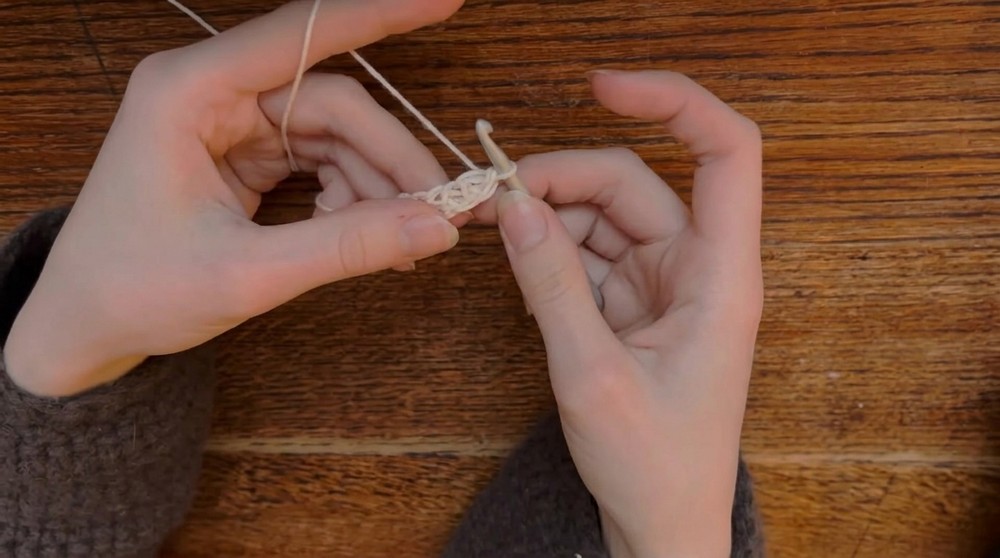
1. Foundation Chain Options
You may begin your panel in one of two ways:
- Standard Chain + First Row of HDC:
- Chain the required number of stitches.
- Work one hdc in each chain across.
- Foundation HDC Chain (as in video):
- This creates a stretchier and neater edge. Basic description:
- Ch 1.
- Yarn over, insert hook into chain, pull up a loop (3 loops on hook).
- Yarn over, pull through 1 loop (this creates the “chain” part).
- Yarn over, pull through all 3 loops (this creates the hdc).
- For the next foundation hdc, yarn over, insert hook into the “V”/base of the previous hdc, and repeat.
- This creates a stretchier and neater edge. Basic description:
Either method is acceptable; choose the one you prefer.
2. Loose Tension
A slightly loose tension is recommended. This makes the fabric more flowy and comfortable to wear, and is why a larger hook size and relaxed tension are used.
Sizing and Measurements
The top is made of two identical panels.
You will need these two key measurements:
- Panel Width (starting row):
- This row will determine:
- The length of your sleeve, and
- The width of the waist area when folded and twisted.
- It must:
- Stretch from one side of your body to the other side (across the front or back of your waist), and
- Also be the desired sleeve length from shoulder toward wrist or mid arm, depending on preference.
- This row will determine:
- Panel Length (number of rows):
- When folded in half, the panel should measure from:
- Top of shoulder down to where you want the top to end at your waist.
- So, the total length of the panel must be double your desired shoulder to hem length.
- When folded in half, the panel should measure from:
Example from the transcription:
- Panel width: 40 sts
- Panel length: 74 rows
- When folded in half: 37 rows from shoulder to hem.
Your numbers will vary depending on your size and yarn.
Pattern Instructions
1. First Panel
Step 1: Determine Starting Length (Width of Panel)
- Using your measuring tape, wrap it:
- From one side of your waist (side seam area),
- Across the front of your body,
- To the other side of your waist.
- Adjust for sleeve length:
- Add more length to reach the desired sleeve length from shoulder if necessary, since the starting row also becomes the sleeve length.
- Make a chain or foundation hdc that roughly matches this measurement while slightly stretched.
The example in the transcription used 40 stitches.
Step 2: Foundation Row
Option A: Regular chain start
- Ch your determined number of stitches (e.g., 40).
- Row 1 (Foundation row):
- Hdc in 2nd ch from hook and in each ch across.
- Turn.
- Stitch count: same as number of chains minus 1.
Option B: Foundation hdc (as demonstrated)
- Ch 1.
- Work foundation hdc stitches until your foundation strip equals the needed width (e.g., 40 foundation hdc).
- Turn.
Keep consistent stitch count across rows.
Step 3: Body of Panel
- Row 2:
- Ch 1, turn.
- Hdc in each st across.
- Rows 3 and onward:
- Repeat Row 2:
- Ch 1, turn, hdc in each stitch across.
- Repeat Row 2:
Continue until the folded panel length is correct:
- Periodically fold your panel in half (short ends together).
- Measure from the fold (which will be the shoulder) down to the edge.
- When this folded length matches your desired shoulder to waist length, note the number of rows you have.
- Double that number to get total rows.
Example from transcription:
- 37 rows when folded in half gave the desired length.
- Total rows needed: 37 × 2 = 74 rows.
Finish off and weave in the yarn tail at this point if desired, or leave a tail for seaming later (optional).
2. Second Panel
- Make a second panel identical to the first:
- Same width (same number of stitches in each row, e.g., 40).
- Same length (same number of rows, e.g., 74).
Assembly
3. Seaming the Shoulders
- Lay one panel flat; this will be your back panel.
- Place the second panel directly on top, aligning all edges; this will be your front panel.
- The short ends of both panels will form the shoulders.
Shoulder Seam 1
- At one end of the panels, align the stitches.
- Attach yarn at the corner (through both panels).
- Ch 1 (optional for security).
- Work sl st through both layers:
- Insert hook into first st of the back panel and first st of the front panel.
- Yarn over, pull through both layers and through the loop on hook.
- Repeat across the entire width:
- Total: same as panel width (e.g., 40 sl sts).
Fasten off.
Shoulder Seam 2 (With Twist)
Before seaming the other end:
- Take the front panel only (the one on top) and twist it once in the center.
- The back panel remains flat and straight.
- Align the remaining short edges of both panels again, now with the front twisted.
- Attach yarn as before.
- Sl st across the width (again, e.g., 40 sl sts) to create the second shoulder seam.
Now you have:
- A straight back panel.
- A twisted front panel.
- Both joined at the shoulders.
4. Closing the Sides
This step sets your sleeve opening and bottom opening.
Preparation
- Turn the top wrong side out (WS) so that:
- Shoulder seams (with slip stitches) are visible on the outside.
- Put the top on your body, slipping your arms through the sleeve openings, with the shoulder seams resting on your shoulders.
Marking Sleeve and Side Seam
Using stitch markers:
- On one side of the body, find the back and front panels at the side seam.
- Decide where you want the sleeve to end:
- Place a stitch marker there (this is the bottom of your armhole).
- Decide where you want the side seam to end at the bottom:
- Place another marker further down the side, leaving the bottom part open.
Note:
- The top must remain open enough at the bottom so you can comfortably pull it on and off.
- If you close too far down, it may be difficult to put the top on.
Counting Rows
- Take the top off.
- On the side with markers:
- Count how many rows from the shoulder seam down to the first marker. Example: 10 rows.
- Then count how many rows between marker 1 and marker 2. Example: 12 rows.
- These numbers determine:
- Where to start the side seam on the other side.
- How many rows to slip stitch together on both sides for symmetry.
Check the other side:
- Count from shoulder to intended armhole bottom and side seam bottom.
- Adjust markers so both sides have the same number of rows in each segment (shoulder to armhole, armhole to side seam end).
Side Seam (First Side)
- With the top still WS out, align the edges of front and back panels on the side you will seam first.
- Attach yarn at marker 1 (armhole bottom), going through both layers.
- Remove marker 1.
- Begin slip stitching downwards:
- You will alternate:
- One sl st into the gap between rows (the space), and
- One sl st into the side of the row itself.
- This gives you two sl sts per row, which matches the description in the transcription.
- You will alternate:
- Continue until you reach marker 2 (your desired end of side seam).
- You will typically end up with twice the number of rows in slip stitches (e.g., 12 rows × 2 = 24 slip stitches).
Fasten off and weave in the tail, or leave it to weave in later.
Side Seam (Second Side)
- Repeat the exact process on the opposite side:
- Count the same number of rows (e.g., 10 rows from shoulder to armhole, then 12 rows for side seam).
- Attach yarn at the corresponding row.
- Slip stitch down the same number of rows, alternating between gap and row edge.
- Ensure all slip stitched seams (shoulders and sides) are on the same side of the fabric (the WS).
5. Adding Shoulder Ties
Ties are added at the shoulders so the back can be tied and adjusted.
Important:
You will add the ties on the side of the shoulder opposite the shoulder seam, and on the side closest to the neck, not the sleeve.
For Each Shoulder
- Lay the top flat with WS out.
- Identify the shoulder:
- One side of the shoulder has the slip stitched seam.
- The other side is the neck side where ties will be attached.
- Attach yarn to the row of slip stitches at the shoulder seam, on the side closest to your neck.
Making the Chain for the Tie
- After attaching yarn, ch enough for a tie that:
- Starts at the shoulder,
- Reaches around your back,
- Can be tied comfortably into a bow.
- The example used 60 chains, but you can adjust:
- Longer chain for a larger bow.
- Shorter chain for a smaller bow.
Finishing the Tie
- After chaining (e.g., 60), ch 1 as a turning chain.
- Turn and sl st in each chain back toward the shoulder.
- When you reach the base of the chain (where you started), sl st into the same row of slip stitches again to secure the tie.
- Fasten off and weave in the end later.
Repeat for the Second Shoulder
- Attach yarn in the same way on the other shoulder, on the neck side.
- Make a tie of the same length (same number of chains).
- Work back with slip stitches and secure.
Finishing
6. Weaving in Ends
- Turn your top WS out (if not already).
- Use a yarn needle to weave in all yarn tails neatly along the seams and in the hdc stitches.
- Trim excess yarn.
7. Blocking (Recommended)
To improve drape and shape:
- Gently hand wash or steam block according to yarn label instructions.
- Lay flat to dry, shaping the panels and seams, especially around the twist and shoulders.
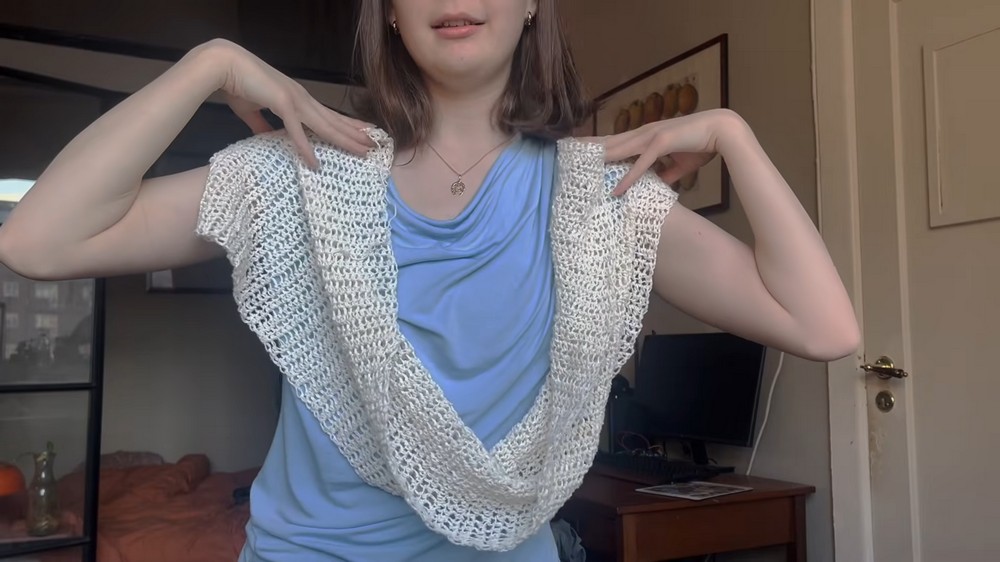
Wearing the Top
- Turn the top right side out, so seams are inside.
- Slip it over your head, aligning the twisted front panel in the center.
- Adjust shoulder seams so they rest correctly on your shoulders.
- Bring the ties to the back and tie them in a bow at a comfortable tightness.
You may wear:
- A matching crochet bralette or crop top underneath.
- Any camisole or bralette in a coordinating color.

Tips and Suggestions
- Adjusting for Size:
- Increase or decrease the number of starting stitches to change sleeve length and waist width.
- Work more or fewer rows to adjust body length.
- Checking Fit While Working:
- Frequently try the panel on (or measure against your body) as you add rows.
- Fold the panel in half to check the shoulder to waist length.
- Consistency:
- Ensure both panels have the same stitch count and row count, so the seams match up.
- Tension:
- If your fabric feels stiff or tight, go up a hook size or relax your tension.
- If it feels too loose or see through, go down a hook size.
- Side Seam Openings:
- Leave a larger bottom opening if you are unsure; you can always seam a bit more later.
- Ensure the armhole is comfortable and not tight.
- Custom Ties:
- You can replace the crocheted ties with ribbons or cords if preferred.
- You can add ties at both front and back shoulders for a different look.
Final Words
This crochet twisted top is a simple yet elegant project, relying almost entirely on basic half double crochet stitches and slip stitch seams. The twist in the front and the adjustable shoulder ties provide an interesting design while keeping the construction straightforward.
By adjusting the stitch count and row count and trying the panels on as you go, you can customize the fit for any body size. With proper finishing and care, this top can become a comfortable, stylish piece in your wardrobe.