Keep doors stylishly in place with this Free Crochet Door Stopper Pattern that adds charm, function, and a handmade touch to any room with ease.
A doorstop is a functional yet often overlooked item in a home, but it doesn’t have to remain ordinary. A crochet door stoper provides an opportunity to bring personality to this small but significant household accessory. It serves its purpose efficiently while adding a charming, handmade touch to any space. Whether it’s a decorative accent for a cozy cottage or a quaint gift for loved ones, it captures the essence of creativity and utility.
Cute Free Crochet Door Stopper Pattern That Holds Its Own

One of the most noteworthy qualities of a crocheted doorstop is its ability to adapt to various spaces. It can complement any interior design, whether rustic and traditional or modern and sleek. The seamless pairing of functionality with beauty makes it an ideal addition to entrances, kitchens, bedrooms, and more. Lightweight yet sturdy, this versatile home accessory is easy to move while maintaining its long-lasting appeal.
Far from being a mere practical item, a crocheted doorstop symbolizes care, attention, and a personal touch. It’s not only useful but also a unique enhancement to décor, proving that even the most utilitarian items can carry character and charm.
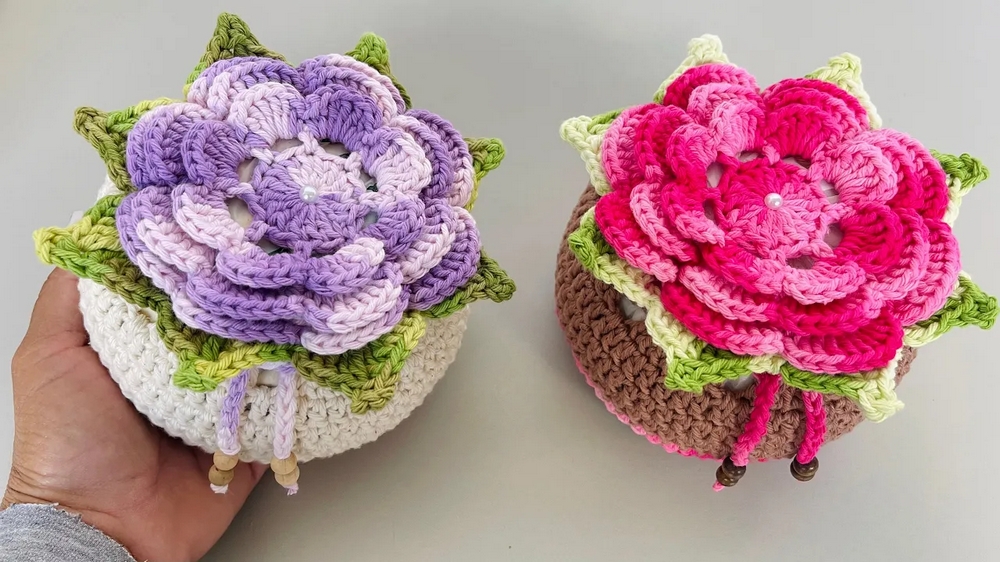
The process of making a crocheted doorstop often begins with the decorative piece that sits atop the doorstop. This can take many forms, such as a flower with delicately layered petals, soft leaves, or even geometric shapes that offer a minimalist look.
Step-by-Step Crochet Pattern for a Doorstop with Flower Design
Skill Level
- Beginner to Intermediate.
- A basic understanding of crochet stitches, including chains (ch), single crochet (sc), half double crochet (hdc), and double crochet (dc), is recommended.
Finished Size
- Final dimensions depend on the yarn and hook size but should be approximately 8–10 inches in diameter for the flower and base.
Materials
- Yarn:
- #6 (super bulky) yarn:
- Main base color (e.g., beige or white).
- Contrasting flower/petal colors (e.g., pink and mixed green for leaves).
- Use your preferred brand of yarn with vibrant, durable colors.
- #6 (super bulky) yarn:
- Crochet Hooks:
- 3.5 mm crochet hook as specified.
- Optional: Adjust to match your yarn thickness for uniform tension.
- Miscellaneous Supplies:
- Scissors for cutting the yarn.
- Darning needle for weaving in ends.
- Sand or other weight material (to fill the base).
- Small plastic or fabric bag to hold sand or weight.
- (Optional) Decorative ribbon or bead to enhance the finished product.
Gauge
- Gauge is not critical for this pattern. Ensure your stitches are even and can hold the filling securely.
Key Abbreviations (US Terminology)
- ch: Chain.
- sc: Single Crochet.
- sl st: Slip Stitch.
- hdc: Half Double Crochet.
- dc: Double Crochet.
- tr: Treble Crochet.
- rep: Repeat.
- yo: Yarn Over.
Special Techniques
- Magic Ring:
- Used to create a center circle for the flower.
- Alternative: Chain 6-7 and sl st into the first chain to form a ring.
- Working in Loops/Spaces Only:
- Some parts of the stitches are worked in back loops or chain spaces to create texture.
- Shaping the Base:
- Crochet high points in repetition to build a sturdy cylindrical shape for the doorstop.
Pattern Instructions
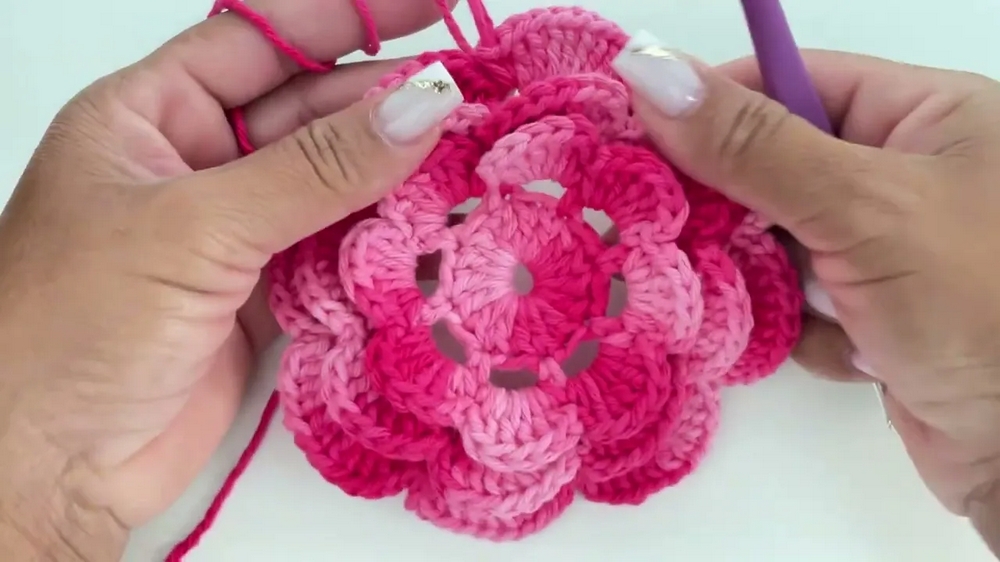
Part 1: Flower
- Magic Ring (Flower Center):
- Make a magic ring or chain 6, sl st into the first ch to form a loop.
- Ch 3 (counts as 1 dc), then work 16 dc into the ring.
- Pull the yarn tail to tighten the loop and close snugly.
- Sl st into the top of the 3rd chain (of the starting ch 3) to join. (16 dc in total)

- Petal Setup (Base for Petals):
- Ch 3, skip 1 dc, sc into the next dc.
- Repeat: Ch 3, skip 1 dc, sc into the next dc.
- Complete a total of 8 loops (petal bases).
- Sl st into the base of the first loop.
- First Row of Petals:
- In the first loop:
- Sc, ch 1, 5 dc, ch 1, sc into the same loop.
- Repeat for each of the remaining loops to create all 8 petals. Each petal: sc, ch 1, 5 dc, ch 1, sc.
- Fasten Off or continue with the next part as described.

- In the first loop:
- Second Row of Petals:
- Insert hook into the base of the first petal (between petals) and draw up the new color.
- Repeat petal creation while making larger petals:
- Sc, ch 1, 7 dc, ch 1, sc into the space between two petals.
- Work all the way around, ensuring the petals align neatly.
- Third Row of Petals:
- Repeat the same process, but now work 9 dc in each space between petals instead of 7.
- Repeat the same process, but now work 9 dc in each space between petals instead of 7.
Part 2: Leaves
- Begin Green Yarn (Leaf Base):
- Attach green yarn to the space between petals using a slip stitch.
- Ch 1, sc, then start the leaf creation.
- Leaf Formation:
- Ch 1, 3 dc into the same space, and 1 tr into the same space.
- Ch 3, sl st into the small loop at the top of the tr to form a picot.
- Repeat: 1 tr, 3 dc, and sc into the same space for the first leaf.
- Continue Around:
- Attach to the next space between petals with an sc and repeat the process to make a leaf.
- Work a total of 8 leaves.
- Fasten Off:
- Leave the green tail to weave in later.
Part 3: Base
- Begin Circular Base:
- Using the neutral yarn, make a magic ring.
- Work 6 sc into the ring. Pull the tail to tighten the ring.
- Rounds:
- R1: 2 sc in each st (12 sts).
- R2: (1 sc, 2 sc in next st) around—18 sts.
- R3: (1 sc each in the next 2 sts, 2 sc in the next st)—24 sts.
- Continue in this pattern, increasing by 6 sts each round, until the circle matches the flower’s outer edge.
- Build Cylinder:
- Once the base reaches the desired width, continue without increases:
- Work 1 sc into each st around for 8–10 rows to form the cylindrical body.

- Work 1 sc into each st around for 8–10 rows to form the cylindrical body.
- Once the base reaches the desired width, continue without increases:
- Insert Weight:
- Fill a plastic/fabric bag with sand (or another weight material) and insert it into the base.
- Close the Top:
- Continue working rounds, decreasing 6 sts each round until it closes completely.
- Use sl st to securely close the top.
Part 4: Attach Flower to Base
- Sew or crochet the back of the flower to the circular base. Ensure it is centered and securely attached.
Finishing
- Cord/Drawstring:
- Create a cord using 60 ch, or use decorative ribbon.
- Thread the cord through the top rounds for added decoration or secure tying.
- Optional Embellishment:
- Add a bead or pearl at the flower’s center or tie a ribbon around the base.
Final Tips
- Shaping: Adjust the petals while blocking to maintain even spacing and symmetry.
- Washing: Ensure the sandbag is removable for easy cleaning.
- Customization: Play with colors to match your decor or add more petals for a fuller bloom.
Conclusion
This charming crocheted doorstop combines functionality and beauty. The layered flower and surrounding leaves create a striking visual appeal, while the sturdy base ensures practical use. With its versatile design, this project makes a perfect addition to any room or a thoughtful handmade gift.