Bring festive charm to any space with the Free Crochet Large Christmas Tree Pattern, creating a stunning, easy, and customizable holiday centerpiece.
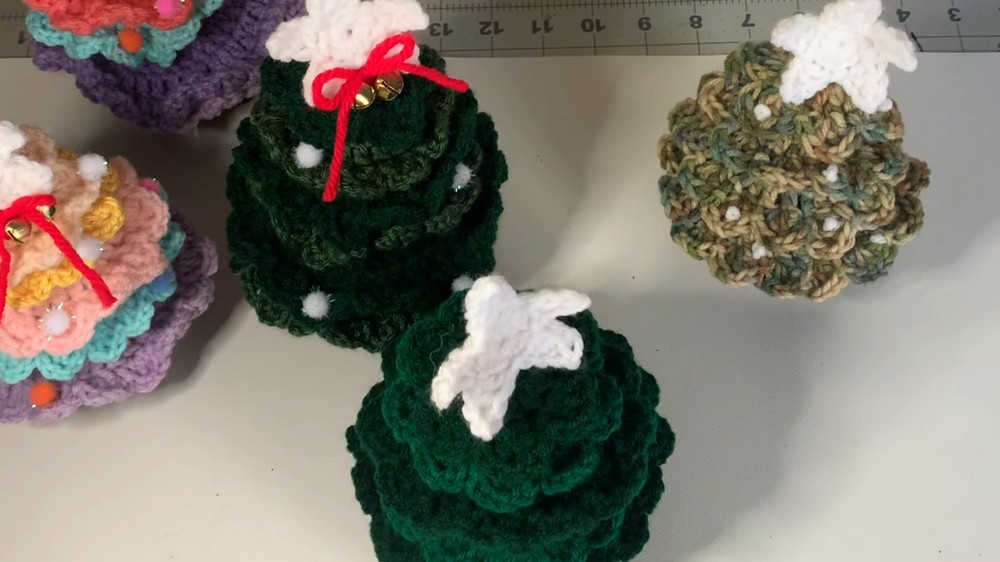
Glittering against a cozy backdrop, the handmade tree rises with layered scallops that mimic real branch tiers and a hint of sparkle that catches the eye. The Crochet Large Christmas Tree Pattern allows you to crochet a stunning, full-sized holiday centerpiece with ease. Soft yarn in rich colors and tidy shaping make it both decorative and durable, while the solid base ensures stability for display.
Free Crochet Large Christmas Tree Pattern for Festive Home Decor
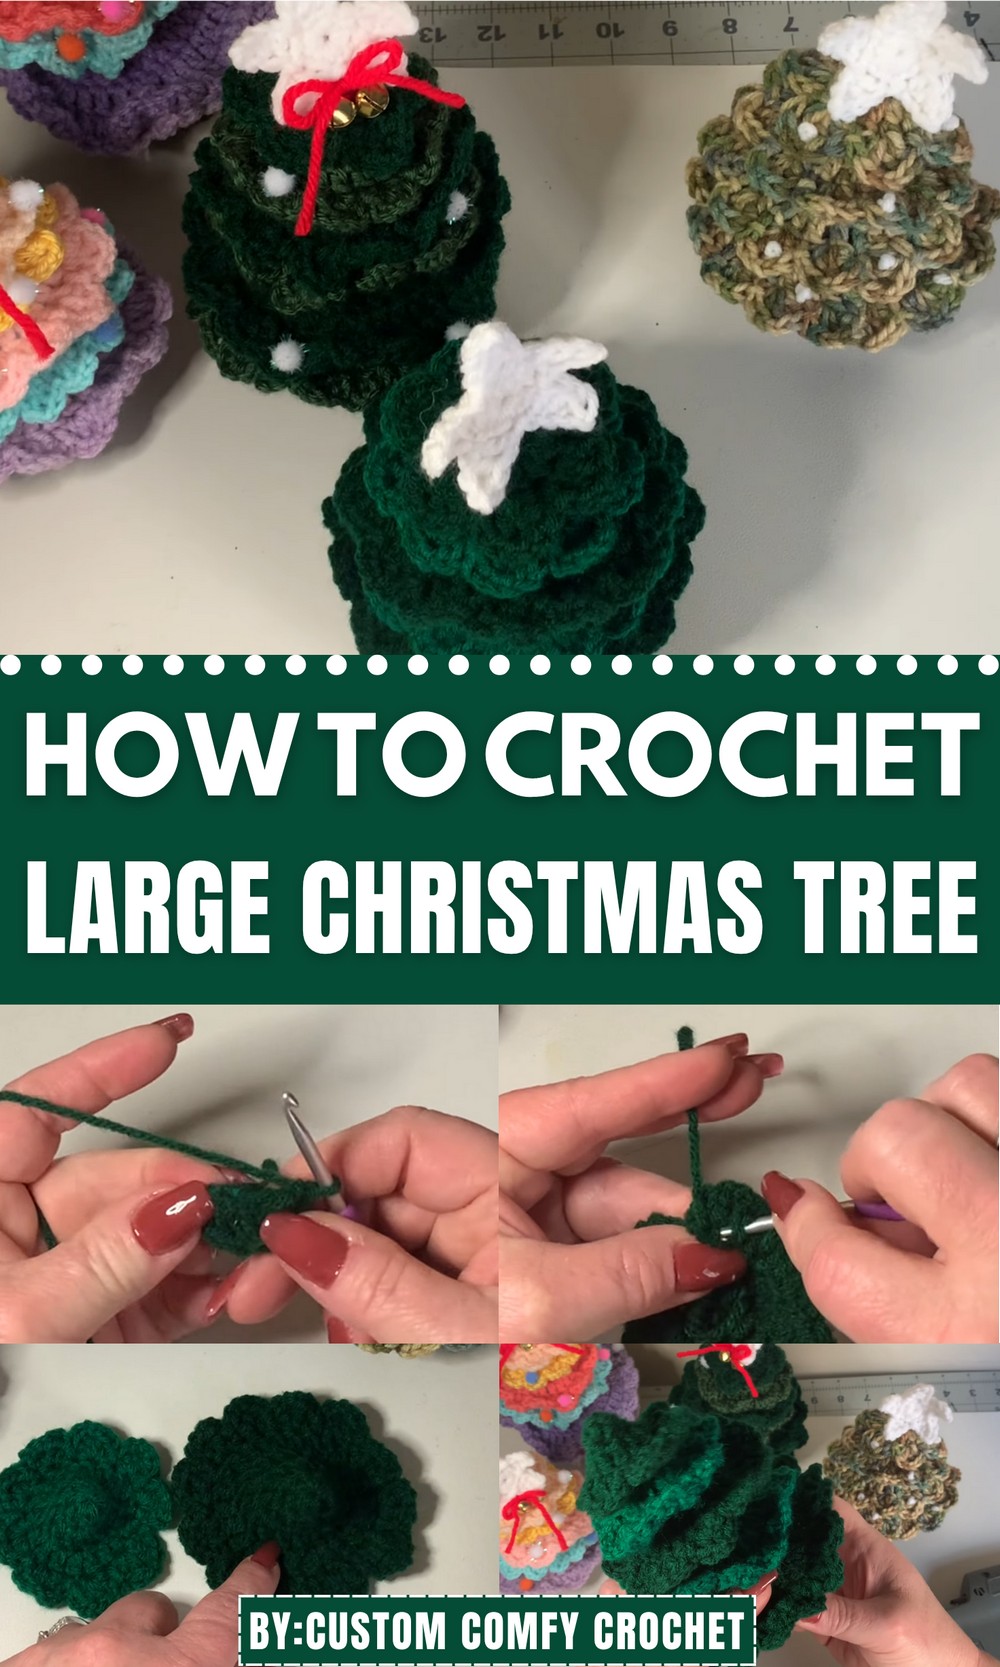
This pattern features stackable rings, adjustable height, and optional embellishments like mini baubles or a star topper, offering versatility and a personalized touch. One of the main benefits is that it allows you to crochet a bold statement piece or a charming complementary accent for mantels, tables, or floor displays. The clear step-by-step instructions and simple stitches make it accessible even for intermediate crocheters, making the project enjoyable rather than daunting.
With this pattern, you can create a reusable, customizable decoration that brings festive cheer year after year. It’s perfect for holiday décor, gifting, or crafting sessions with friends and family, combining creativity, charm, and practicality in one delightful crochet project.
Crochet Christmas Tree with Star Decoration Pattern
Finished Size
- The finished Christmas tree stands approximately 4-6 inches tall (including the pot), depending on your tension and yarn weight.
Materials Needed
- Yarn:
- Green acrylic 4-weight (medium) yarn for the tree layers.
- Dark brown or earthy color yarn for the tree base (pot).
- Yellow yarn for the star.
- Optional: Assorted colorful yarns or small decorative items for added embellishments (like red yarn for bows, mini pom poms, or bells).
- Crochet hook: 4mm (size G) crochet hook.
- Additional materials:
- Fiberfill stuffing for the pot (optional for stability).
- Hot glue gun (or fabric glue).
- A small wooden disc or base for extra support (optional).
- Scissors.
- Darning needle: For weaving in ends.
Gauge
- While gauge is not crucial for this project, you can achieve consistent sizing by ensuring:
- 12 double crochets (dc) = 4 inches.
- Adjust the hook size if your stitches are too tight or too loose.
Pattern Structure Summary
The project consists of 3 primary parts:
- Christmas Tree Layers.
- Tree Base (Pot).
- Topper (Crochet Star).
Detailed Step-by-Step Pattern
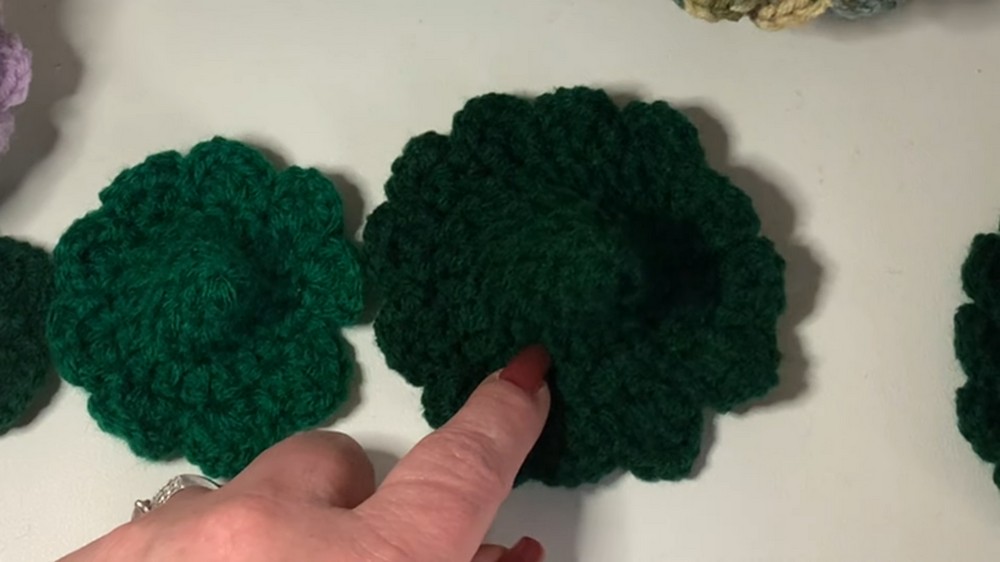
1) Christmas Tree Layers (Green)
Step 1: Top Tree Layer
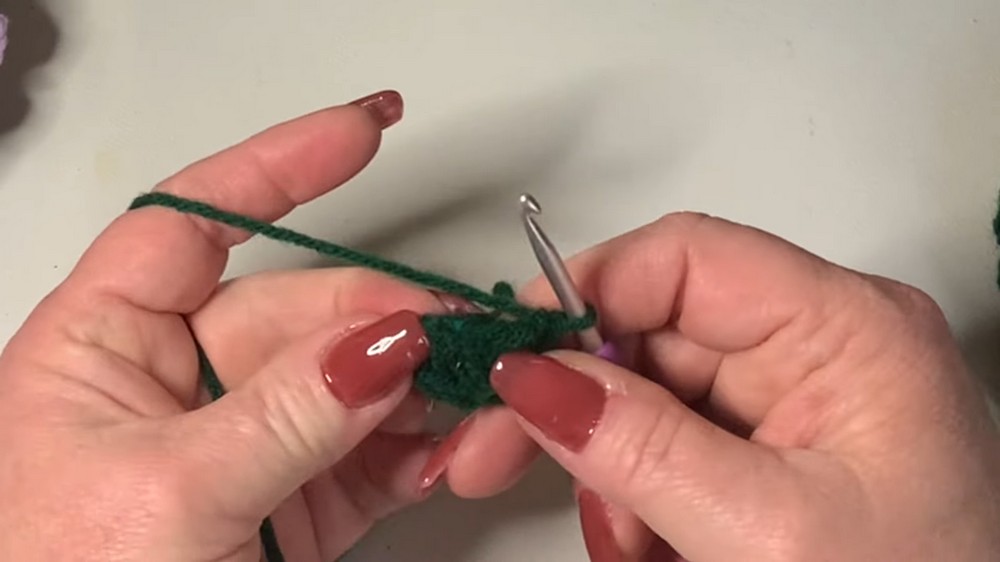
- Create a magic circle.
- Round 1:
- Chain 2 (counts as 1st double crochet).
- Work 5 double crochets (dc) into the magic circle (total 6 dc, including the ch-2 as the first dc).
- Pull the magic circle tight and join with a slip stitch (sl st) to the top of the ch-2.
- Round 2:
- Chain 2.
- In the same stitch as the ch-2, work 1 dc.
- Work 2 dc in each stitch around. (Total: 12 dc)
- Join with a sl st to the top of the ch-2.
- Round 3:
- Chain 2.
- Work 2 dc in the same stitch as the ch-2.
- Work 1 dc in the next stitch, followed by 2 dc in the next stitch. Repeat this pattern around. (Total: 18 dc)
- Join with a sl st to the top of the ch-2.
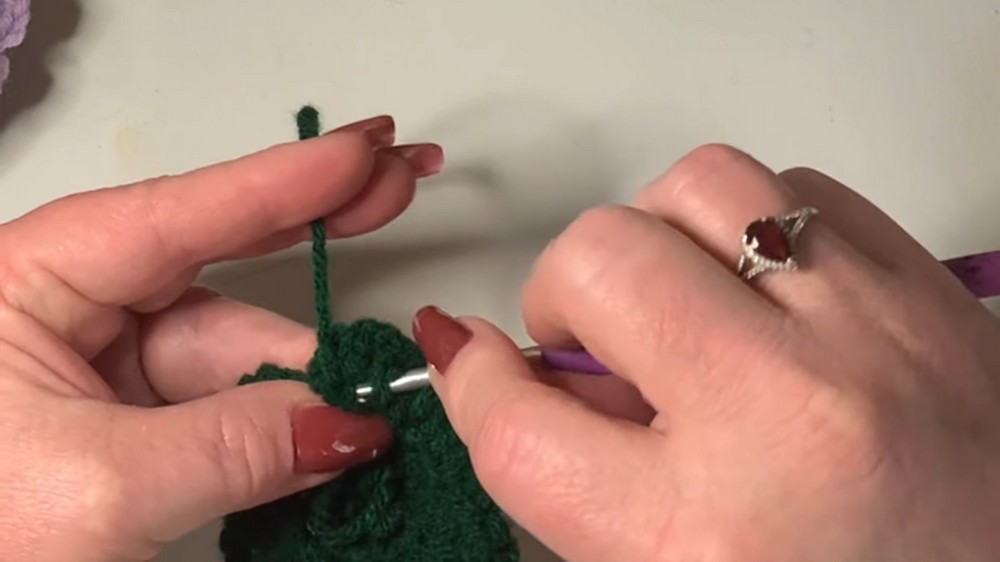
- Branches (Round 4):
- Chain 1.
- Into the first stitch, work: 2 dc, chain 2, 2 dc (all in the same stitch).
- Slip stitch in the next stitch.
- Repeat this branch pattern (2 dc, ch 2, 2 dc in one stitch, sl st in the next) around.
- Join with a sl st to complete the round.
- Fasten off and weave in ends.
Step 2: Middle and Bottom Tree Layers
- Follow the exact same instructions as above for each layer; however, continue increasing evenly in additional rows:
- Middle Layer:
- Add another round by working 1 dc in each of the next 2 sts and 2 dc in the next stitch around. (Total: 24 dc before branches).
- Bottom Layer:
- Extend the row increases to include 3 dc in a row followed by 2 dc in the next stitch. (Total: 30 dc before branches).
- Middle Layer:
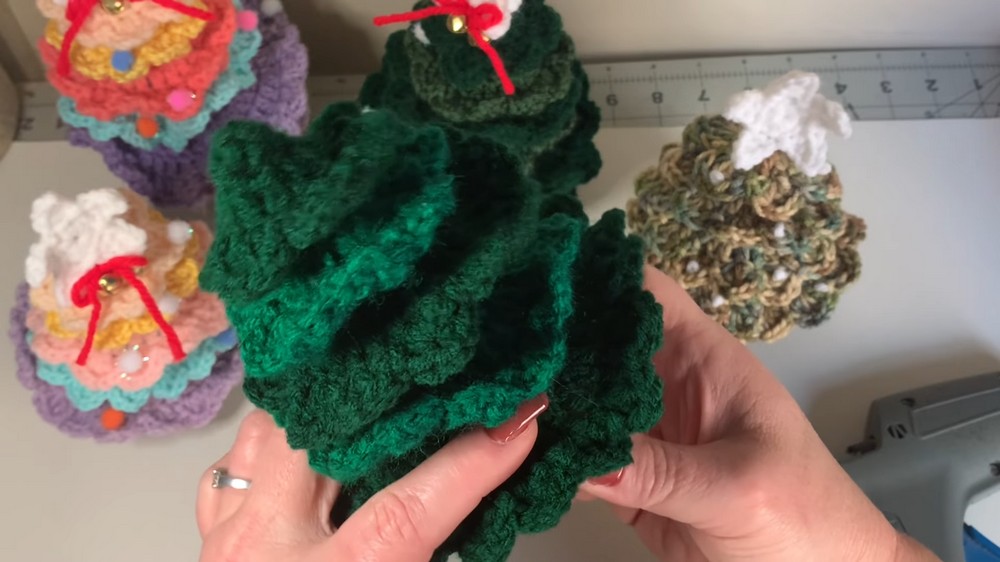
Step 3: Assembling Tree Layers
- Arrange the layers from smallest (top) to largest (bottom).
- Use a hot glue gun to attach the layers together. Apply glue around the top edge of each larger layer and press the smaller layer on top until secure.
- Allow the glue to dry completely.
2) Tree Base (Pot)
Step 1: Pot Bottom
- Create a magic circle.
- Round 1:
- Work 6 single crochets (sc) into the magic circle.
- Pull tight and join with a sl st to the first sc. (Total: 6 sc)
- Round 2:
- Chain 1.
- Work 2 sc in each stitch around. (Total: 12 sc)
- Join with a sl st to the first sc.
- Round 3:
- Chain 1.
- Work 1 sc in the first stitch, 2 sc in the next stitch. Repeat the pattern around. (Total: 18 sc)
- Join with a sl st to the first sc.
- Round 4:
- Chain 1.
- Work 1 sc in the next 2 stitches, 2 sc in the next stitch. Repeat the pattern around. (Total: 24 sc)
- Join with a sl st.
Step 2: Forming the Pot
- Chain 1.
- Work 1 half double crochet (hdc) in the back loops only (BLO) of each stitch around.
- Join with a sl st.
- Repeat 3 rounds of hdc, joining each round with a sl st.
- Fasten off, leaving a long tail for sewing.
Step 3: Top of the Pot
- Create a magic circle.
- Work the same pattern as in Step 1: Pot Bottom to get a flat circle with the same diameter (follow Rounds 1–4).
- Once finished, sew the flat circle to the open top of the pot (ensure it’s stuffed if desired) using the long tail of yarn from Step 2.
Step 4: Attach Pot to Tree
- Apply hot glue to the top of the pot and securely attach the bottom tree layer to the base.
3) Crochet Star (Topper)
- Create a magic circle.
- Work 10 sc into the circle.
- Pull tight and join with a sl st.
- Star Points:
- Chain 4.
- In the 2nd chain from the hook, work 1 sc.
- In the next chain, work 1 hdc.
- In the next chain, work 1 dc.
- Skip the next sc in the base circle and sl st into the following stitch.
- Repeat these steps to make all 5 points.
- Fasten off and weave ends.
- Attach the star to the top of the tree using hot glue.
Tips & Customization Ideas
- Yarn Choice: For a shimmering effect, use metallic or glitter yarn for the tree or star.
- Optional Decorations: Add mini ribbons, bells, laces, or pom-poms to enhance the festive look.
- Stable Base: For extra sturdiness, use a small wooden base and glue the pot to it.
- Bigger Trees: Use a heavier yarn and a larger crochet hook for a larger version of the tree.
Conclusion
This crochet Christmas tree is a perfect festive decoration or gift for the holiday season. Its versatility allows for customization in colors, sizes, and decorations. No matter how you choose to embellish it, its cozy and warm design will add cheer to any space. Share your versions on social media and spread the holiday spirit!