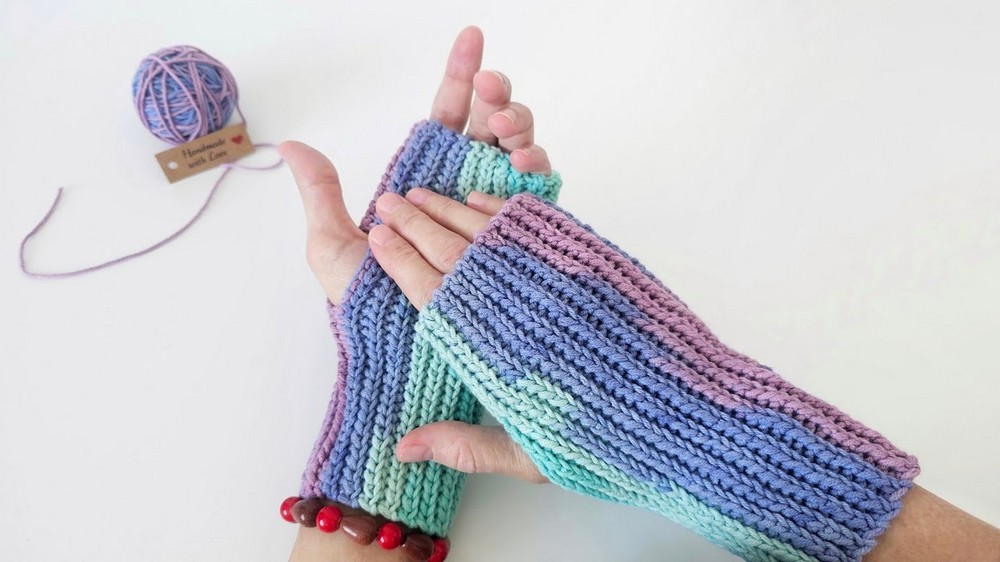
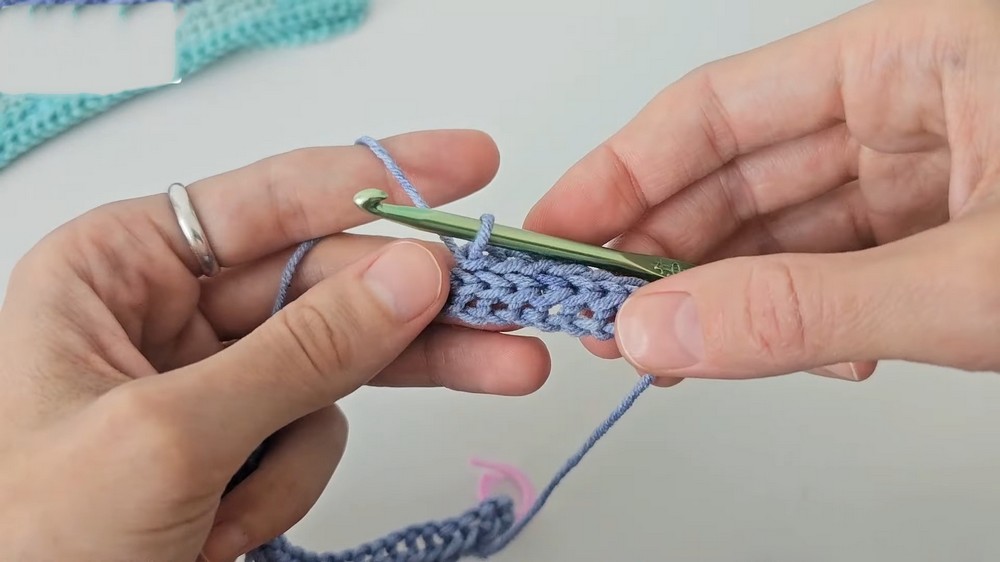
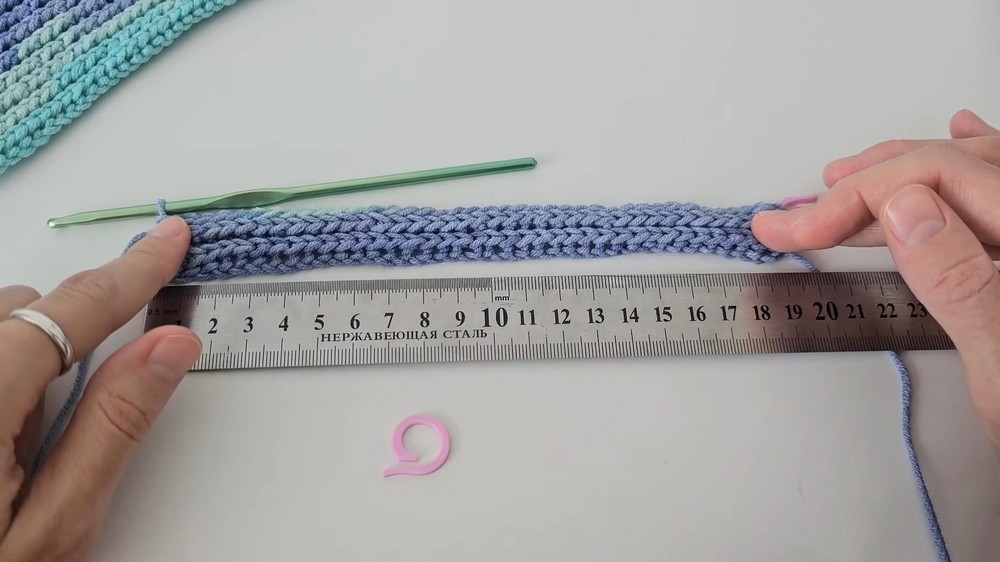
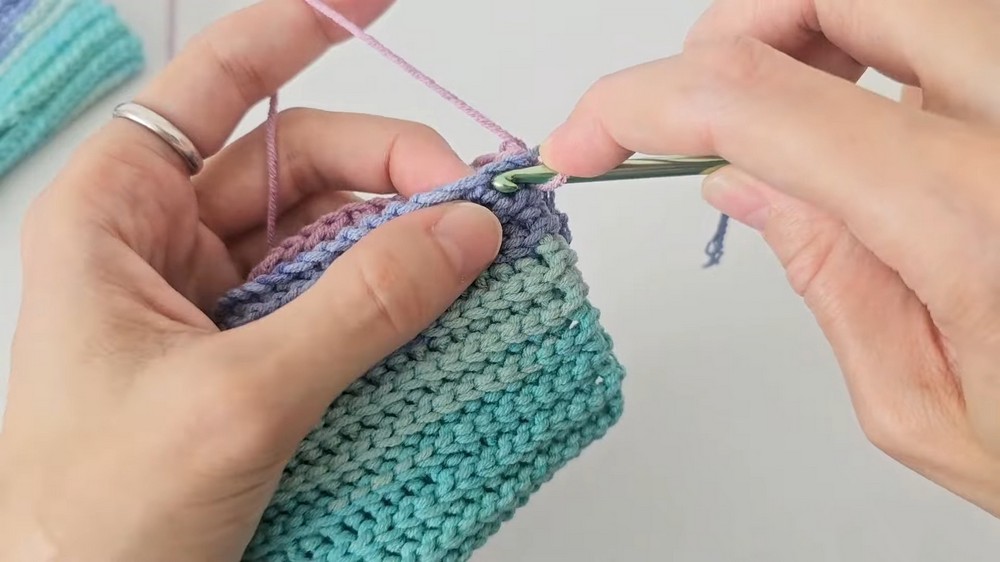
This masterclass demonstrates how to crochet colorful mittens using a simple two-row pattern for all skill levels. The mitts are knitted crosswise, starting with a rectangle that is later sewn to form the thumb hole. Following her step-by-step instructions, you’ll create mittens with a stretchy, textured fabric. The tutorial offers clear guidance, making it ideal for crochet enthusiasts of all levels.
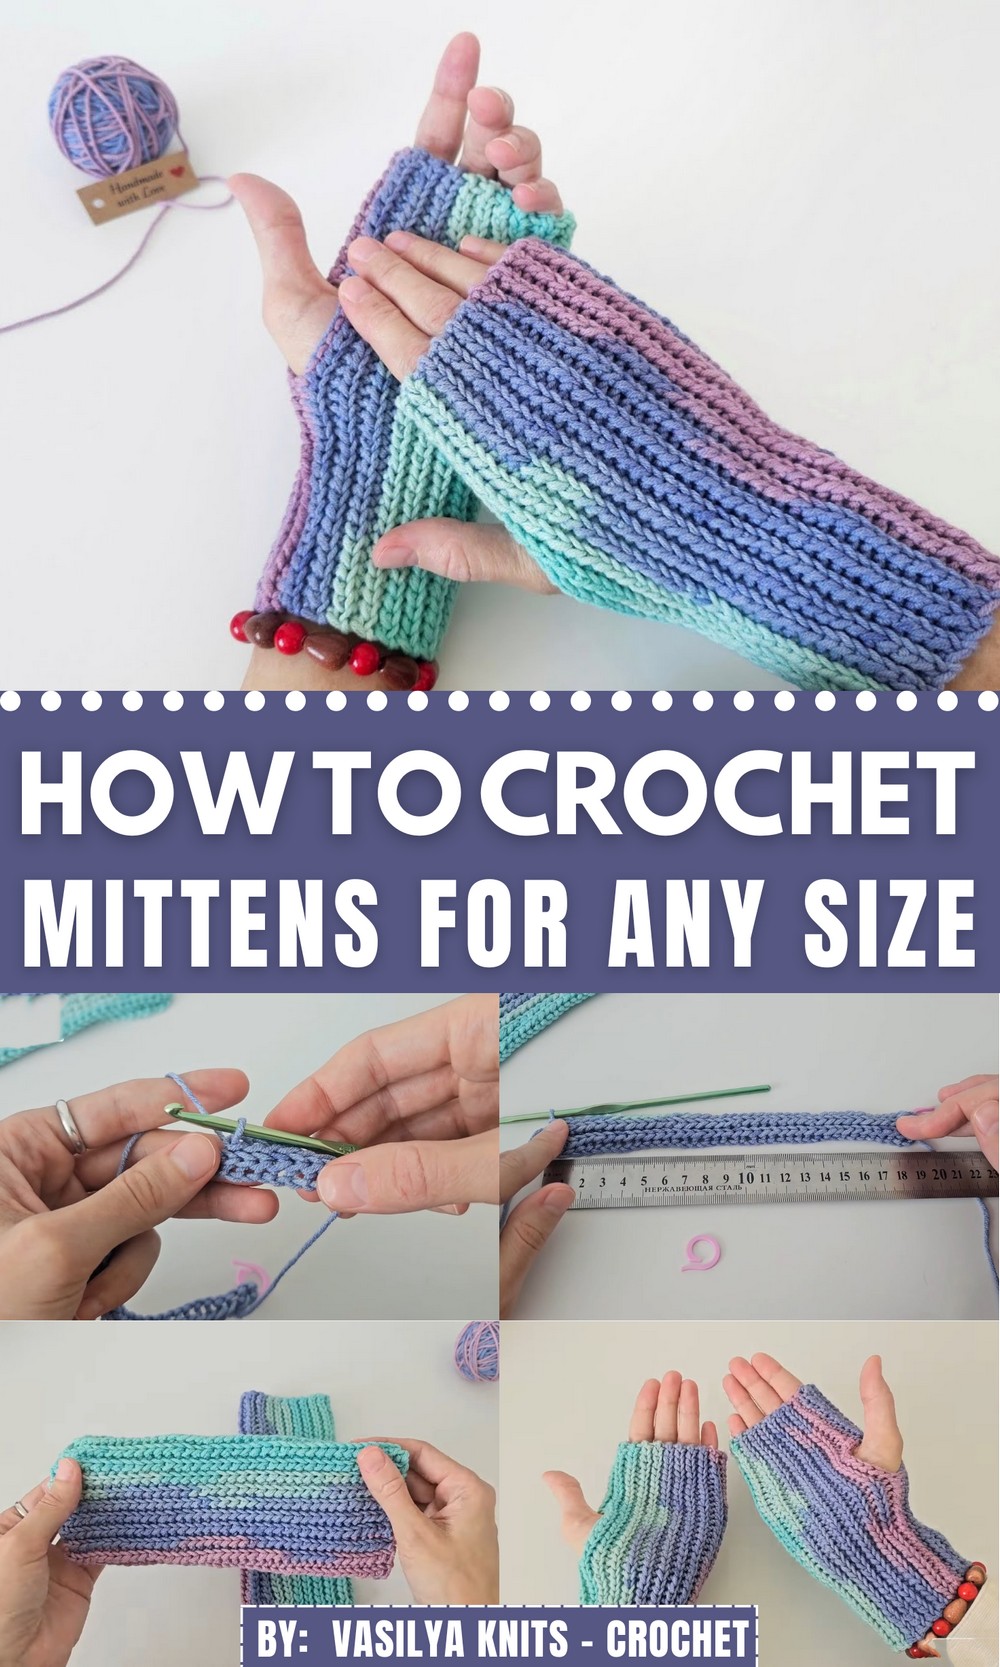
Crochet Mittens In Any Size Tutorial
Introduction to the Crochet Beanie Tutorial:
- The video is hosted by Emily Anne from Sasser House.
- The tutorial focuses on making a simple crochet beanie, perfect for beginners or as a handmade gift.
- Materials needed:
- A 5 mm crochet hook. She uses YarnArt Jeans Crazy (55% cotton, 45% acrylic) with a 4 mm hook, markers, and elastic thread to ensure durability.
- Size 4 weight yarn.
Process Overview:
- Starting the Beanie:
- Emily begins by teaching how to create a foundation for the beanie, including tips for starting with slip knots and chains.
- She stresses the importance of working in the back loop to achieve extra stretch and texture in the stitches, which is ideal for hats.
- Building the Beanie:
- The project involves working rows and gradually forming the beanie shape.
- Tips are provided for maintaining consistent tension and ensuring the hat size is flexible to fit various head sizes.
- Assembling the Beanie:
- Once the crochet portion is completed, Emily demonstrates how to assemble the beanie.
- She shares techniques for sewing the edges securely and cinching the top to create the signature beanie shape.

Closing Remarks and Practical Tips:
- Emily discusses ideas for customizing the beanie, such as adding embellishments or using different yarn colors for variety.
- She reinforces that the project is simple yet versatile, making it a thoughtful handmade gift or personal accessory.

Tip: Use a self-striping yarn!