Build a cozy crochet basket with lid that brings charm and order to any room, making storage both fun and beautifully simple to complete!
A basket with a lid helps keep your things organized and looks nice too. Made from soft yarn, this basket feels strong and cozy. The lid fits snugly on top, keeping your items safe and covered. You can pick bright colors to make it cheerful or gentle tones for a calm feeling. These baskets are great for holding toys, clothes, or small household items, making any space tidy.

Handmade Crochet Basket with Lid Pattern for Neat Interiors
Its round shape and smooth stitches give it a special homemade charm that’s both useful and pretty. Perfect for every room, it adds a warm and personal touch where you put it. Having one is like carrying a little bit of kindness and order into your daily life. Using this simple basket makes keeping things neat easy and pleasing to the eye, bringing calm and happiness into your home.


Heart-Shaped Crochet Basket with Lid Pattern
Skill Level
Intermediate: This project requires familiarity with basic crochet stitches (chains, slip stitches, single crochet), working around wooden bases, increases, and connecting rows with special stitches.
Materials
- Knitted yarn or polyester cord (example: Raspberry Yogurt pink for basket, Moonstone for lid)
- Wooden heart-shaped bottoms (15 cm) for base and lid
- Crochet hooks: size 6 for wooden base work, size 7 for the basket body
- Large-eye yarn needle
- Scissors
Special Features
- Wooden base provides stability and shape
- Unique textured pattern using slip stitches and single crochet
- Heart shape with precise increases for perfect curves
- Matching lid with sloped walls for secure closure
Step-by-Step Pattern
Step 1: Prepare Yarn and Base
- Measure approx. 150 cm of yarn to work around the whole wooden base, plus leave a 50 cm tail for finishing.
- Use hook size 6 for easy working through wooden holes.
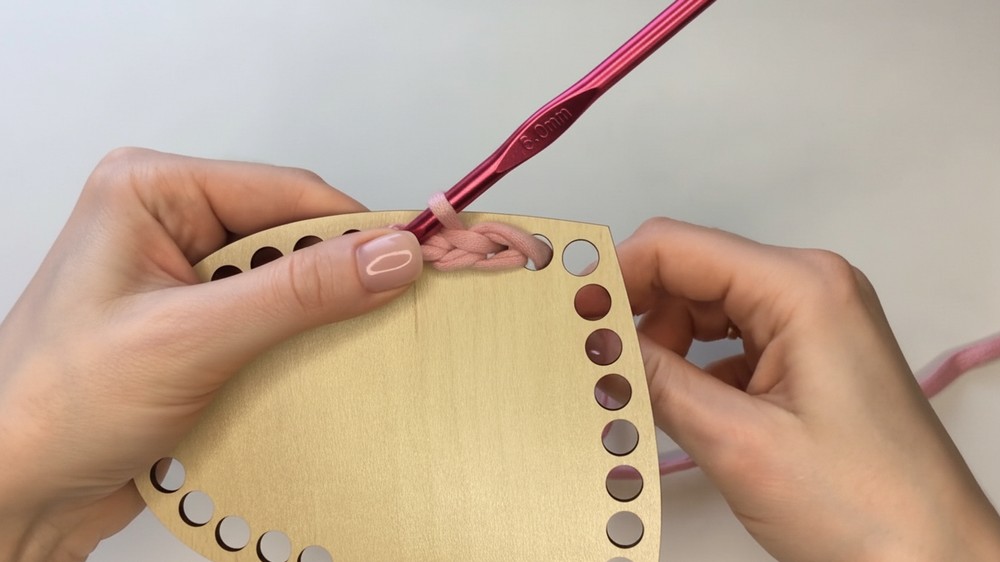
Step 2: Starting the Base – Slip Stitch Along Wooden Holes
- Begin from the central hole on the wooden heart base. Insert hook, grab yarn, and pull up a loop.
- Work slip stitches (sl st) through each hole all along the base perimeter, keeping stitches even and consistent in size.
- Finish the round and prepare for joining.
Step 3: Join Seam Using Yarn Tail
- Carefully remove hook leaving the last loop on it.
- Thread your yarn tail through a large-eye needle and mimic a slip stitch by wrapping the tail under and around the loops of the slip stitches worked on the base for an invisible join.
- Distribute the tail evenly along the bottom edge, hiding any gaps or exposed wood.
Step 4: Crochet Basket Base – Single Crochet Rounds with Increases
- Switch to hook size 7 for the next part.
- Starting from the second hole, work single crochet (sc) stitches between the “braids” made by the slip stitches.
- Make 3 increases: Do 2 sc in one stitch on narrow parts of the heart (located 6 holes from the center on each side) to shape curves.
- Continue working one sc in each stitch around the base to complete the first round of the basket body.
Step 5: Continue Base Rounds
- Keep working rounds of single crochet, making increases smoothly as before, until your working piece slightly bends upward, forming the basket base walls (approx. 1-2 rounds).
- Hide all yarn ends inside the stitches to keep your work tidy.

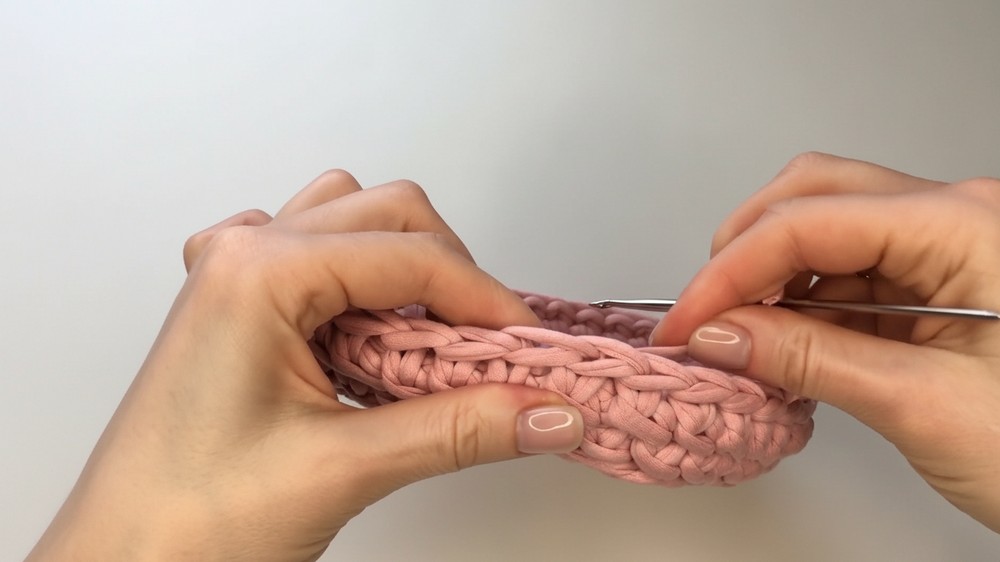
Step 6: Start Pattern Rows for Walls
- Work a special textured pattern:
- Insert hook between the two legs (split) of the previous stitch.
- Pull up a loop, then yarn over and pull the yarn through both loops on hook to make a single crochet in this “split”.
- Repeat this through rows, creating a braid-like textured surface.
- Keep tension moderate to allow the walls to gently curve upward.

Step 7: Work Pattern Rows on Walls
- Continue crocheting 6 rows of this stitch pattern, allowing the basket walls to rise and shape naturally.
- Avoid tightening loops too much – the flexibility is needed for the wall’s curve.
Step 8: Finish Basket Body and Close Off Top
- Complete the final row with connecting slip stitches and carefully hide the tail.
- Gently bend the basket walls upwards for form and function.
Step 9: Crochet the Lid – Base and Walls
- Follow Steps 1-5 to crochet the wooden lid base with slip stitches and single crochet rounds with increases, but stop earlier to keep the lid lighter.
- Work 6 rows of the same textured stitch for the lid walls.
- The first few rows should slope gently (not perpendicular) so the lid fits snugly over the basket.
- Gradually increase verticality on higher rows for wall formation.
Step 10: Finish Lid and Final Assembly
- End the lid crochet with a slip stitch row and hide all ends carefully.
- Slightly press or bend the lid walls inward to ensure a snug fit on the basket.

Tutor’s Suggestions
- Use stitch markers to keep track of increases and rows.
- Measure frequently to maintain the intended shape and size.
- Don’t pull stitches too tight, especially in the curved wall section.
- Practice the joining technique on scrap to perfect your invisible joins.
Uses
- Decorative storage for trinkets, craft supplies, jewelry.
- Handmade gift container with an elegant personal touch.
- Lovely home décor accent with practical functionality.
Tip
To ensure a perfect lid fit, gently shape the lid walls inward before finishing. This helps the lid close tightly without gaps or looseness.
Conclusion
This delicate heart-shaped basket features charming texture and sturdy wooden bases, combining form and function with soft colors. It’s an achievable yet satisfying project for intermediate crocheters looking for a beautiful gift or storage solution.