Spruce up kitchen basics using this Free Crochet Edge for Dishcloth Pattern with a clean, decorative finish that adds both charm and function.
Hand-edged dishcloths once signified a level of care that turned simple household tasks into meaningful routines. With that same timeless intent, the Free Crochet Edge for Dishcloth offers a subtle way to upgrade the everyday. This practical addition provides both durability and visual appeal, strengthening the fabric while giving it a clean, polished look.
Charming Crochet Edge for Dishcloth Pattern That Looks Store-Bought
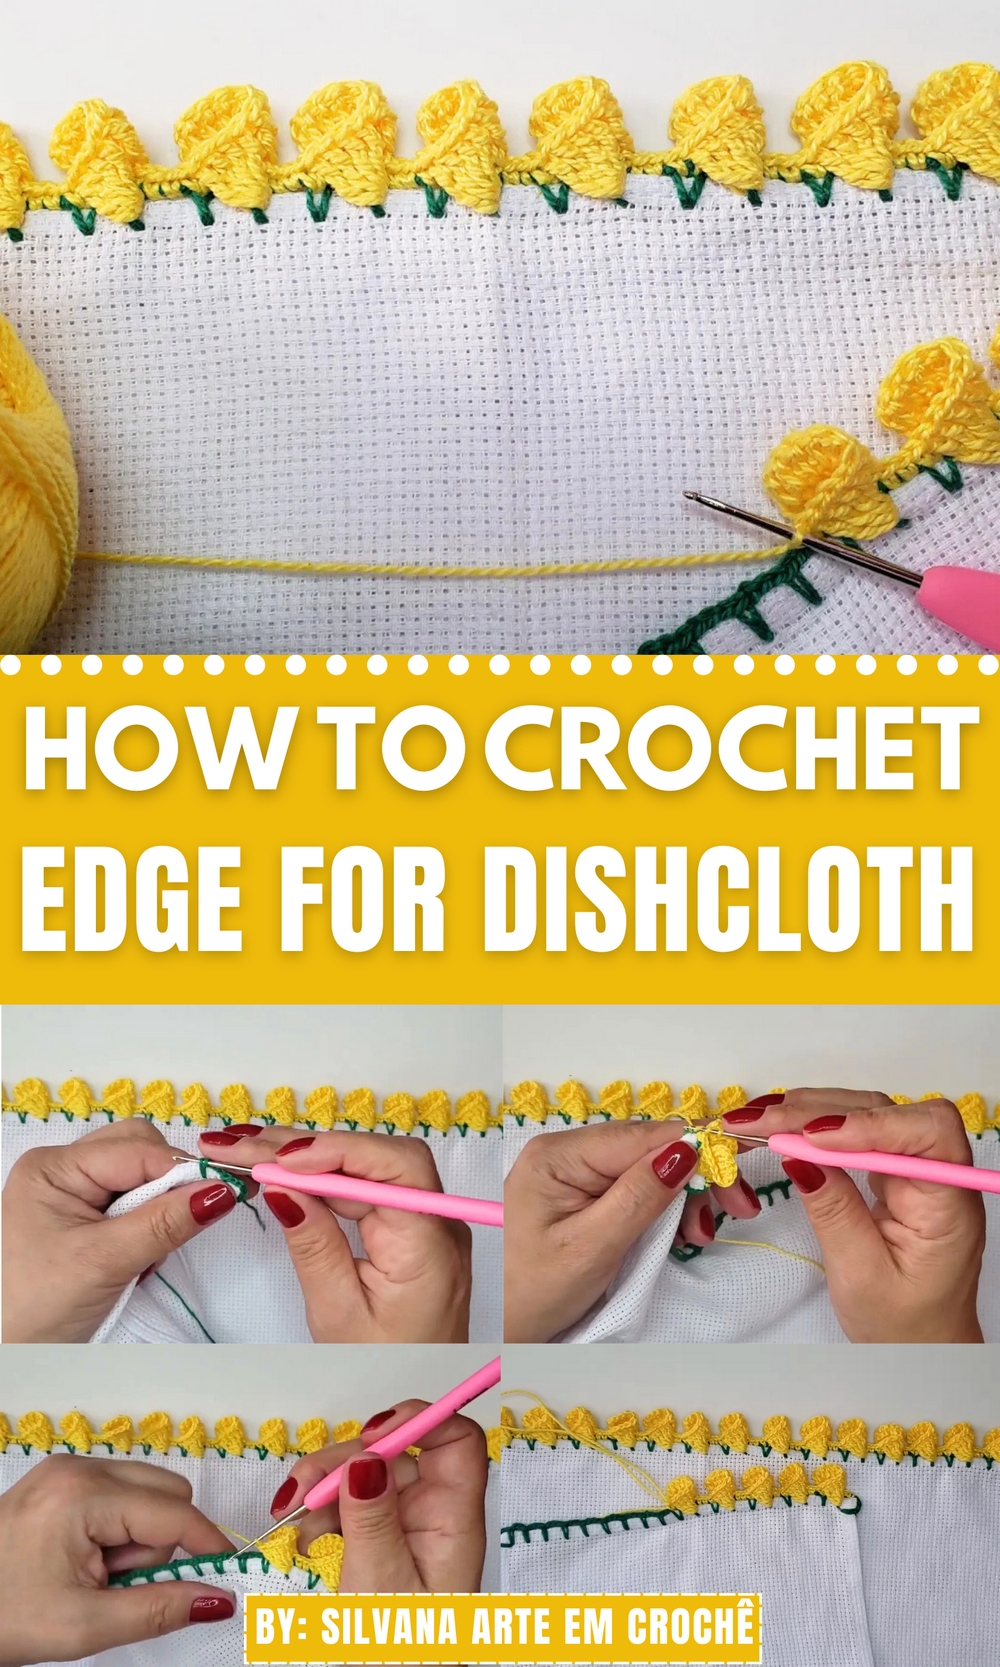
Whether you’re refreshing old dishcloths or finishing new ones, a thoughtfully placed edge can instantly refine the piece. It adds structure to prevent curling, helps retain shape through repeated washes, and introduces a gentle elegance to even the simplest cloth. From narrow scallops to soft loops, the edging options can vary in texture and finish, allowing your project to match any kitchen style or gifting need.
Easy to integrate yet impactful in result, this pattern is perfect for anyone wanting a reliable finishing touch without excess detail. It’s a small choice that brings lasting value, blending function with a subtle decorative charm that quietly enhances daily routines.
Step-by-Step Guide
Step 1: Preparing the Base
- Start with the thread and fabric:
- Pass the thread through the corner of the cloth.
- Make a knot to secure the thread.
- Begin with buttonholes:
- Create two chain stitches.
- At the corner of the cloth, insert the needle to create a small hole and work a single crochet stitch.
- Add two more chain stitches and another elongated single crochet stitch into the same hole.
Step 2: Create the Buttonholes Across the Edge
- Create three chain stitches.
- Skip some space along the fabric and insert into another point where you repeat:
- An elongated single crochet stitch, followed by three more chain stitches.
- Continue this alternating pattern of chain stitches and single crochet stitches until reaching the edge of the cloth or completing the desired length/design.
- If you’re working around the full cloth, repeat this process on all sides.
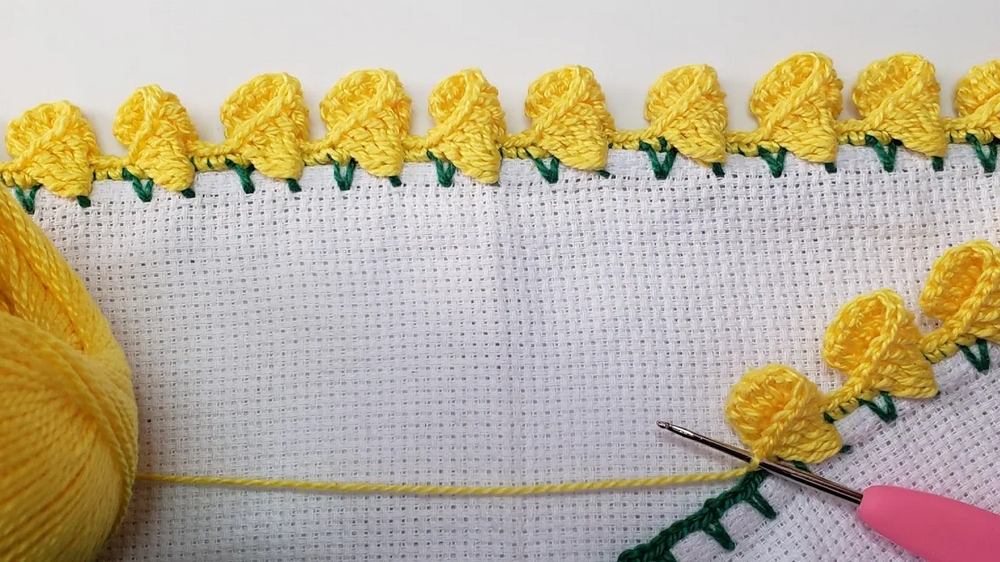
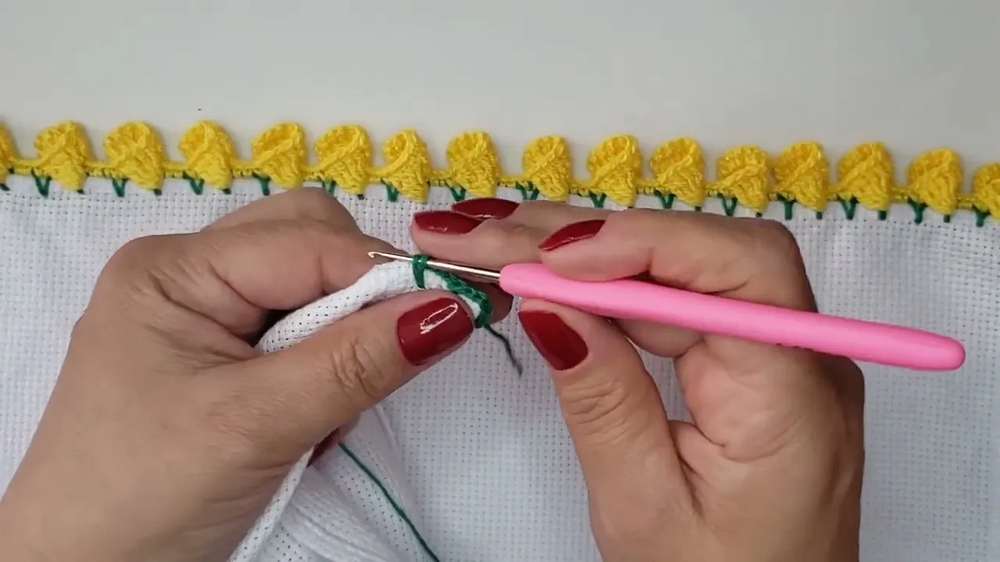
Step 3: Adding the Contrast Color Design
- Use a second thread (in this case, yellow for contrast).
- Secure the thread at the edge by tying a knot, then trim the extra thread to avoid interference.
- In the first buttonhole, create:
- Two single crochet stitches on the first chain.
- One on top of the elongated single crochet stitch to secure the base.
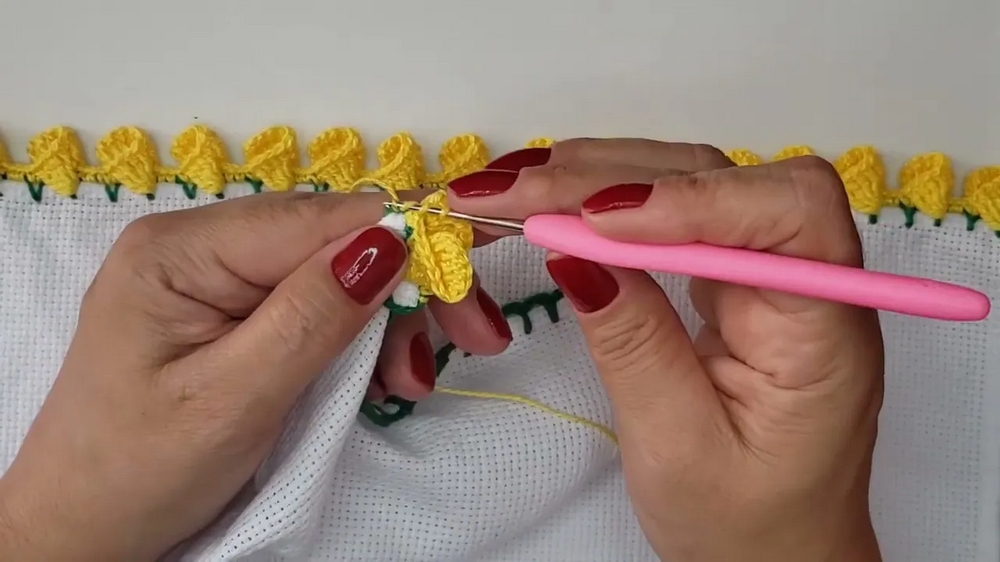
- Create the Flower Motif:
- Make four chain stitches.
- In the next buttonhole, secure with a single crochet stitch.
- Turn your work and make three chain stitches.

- Create six double crochet stitches in the chain space. Remember:
- For double crochet: Yarn over twice, pass through the chain, pull the thread, release two loops, release two more, and continue.
- Anchor the flower by inserting the needle below the elongated single crochet stitch and creating four double crochet stitches.
- Complete the Flower:
- Make a single crochet stitch where the flower connects to the buttonhole.
- Repeat for the next buttonhole, alternating between stitches until the entire edge is finished.

Special Features
- Scalloped Flower Design: The border forms beautiful scalloped flowers, giving a delicate and unique appearance.
- Customizable: The design can be adapted for single-colored or multi-colored threads, based on the user’s preference.
- Multi-Purpose: It’s applicable for various fabric edges like tablecloths, handkerchiefs, or decorative linens.
- Two-Stage Process: Delivers depth and detail by combining the base buttonhole pattern with a secondary contrasting flower motif.
Level of Difficulty
- Beginner to Intermediate:
- While the base stitches (chain stitch, single crochet, double crochet) are easy for beginners, some techniques like handling elongated single crochet stitches and achieving uniformity in flower motifs may require practice.
Tutor’s Suggestions
- Start with a small piece of fabric: Practice the technique on a smaller piece to get comfortable before applying it to a bigger project.
- Use contrasting thread colors: While it’s possible to use a single color, contrasting colors enhance the design’s visibility and overall appeal.
- Pay attention to tension: Ensure uniform tension while crocheting to maintain consistency in the design.
- Repeat carefully: This design largely revolves around repeating the same steps, so maintaining accuracy during repetition ensures a clean and professional finish.
Uses and Materials
Uses:
- Suitable for:
- Enhancing tablecloths, napkins, or other home decor.
- Decorating clothing edges.
- Adding fine details to hand-made gifts.
Materials:
- Threads: Use two different colors for added contrast and elegance.
- Needle: A crochet needle suitable for the thread size.
- Fabric: Any cloth you’d like to decorate (e.g., linen, cotton).
Bonus Tip
- Experiment with Thread Types: Use metallic or glittered threads for a festive look. Thicker threads work well for a bold, chunky design, while thinner threads result in a more delicate and intricate appearance.
Conclusion
This pattern presents a creative and accessible way to elevate the look of various fabric edges. By combining basic crochet techniques with careful attention to detail, this project allows you to produce a charming flower-border design. It’s an excellent way to practice your crochet skills while creating something uniquely beautiful.