
Style your look with a cute crochet strawberry bag that adds a fun touch and brightens up any outfit with its cheerful colors.
Crochet with katie 🧶 presents a delightful accessory that’s sure to brighten your day. The Crochet Strawberry Bag is a charming little bag shaped like a juicy strawberry, complete with a bright red body, tiny yellow “seeds,” and a fresh green leafy top. It’s perfectly sized to carry small essentials such as your phone, keys, or wallet, blending fun design with everyday practicality.
Free Crochet Strawberry Bag Pattern With A Playful Touch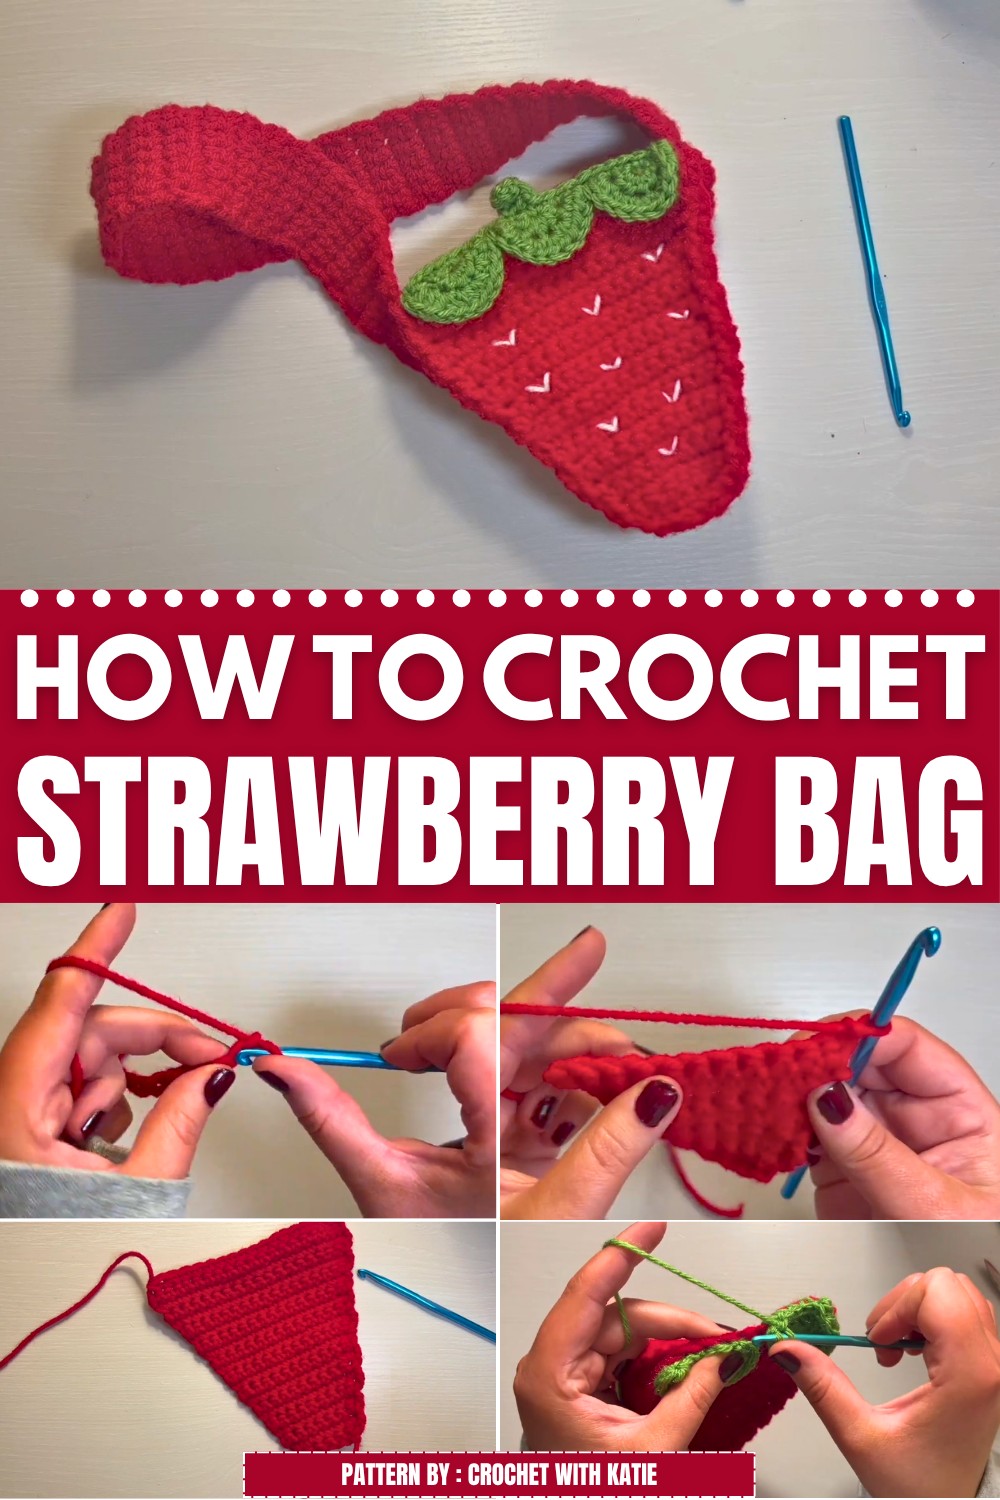

The soft, crocheted texture makes it comfortable to wear on your shoulder or as a crossbody bag. Its compact size is ideal for casual outings, trips to the park, or festivals where you want to keep your hands free. With its playful strawberry shape, this bag brings a splash of whimsy and color to any outfit, appealing to both kids and adults.
An easy-to-follow free pattern invites crocheters of all skill levels to create their own Crochet Strawberry Bag. Whether you’re new to crocheting or looking for a quick and rewarding project, this pattern guides you through crocheting a handmade, eye-catching accessory. It also makes a thoughtful gift for friends and family who love unique and fun designs.
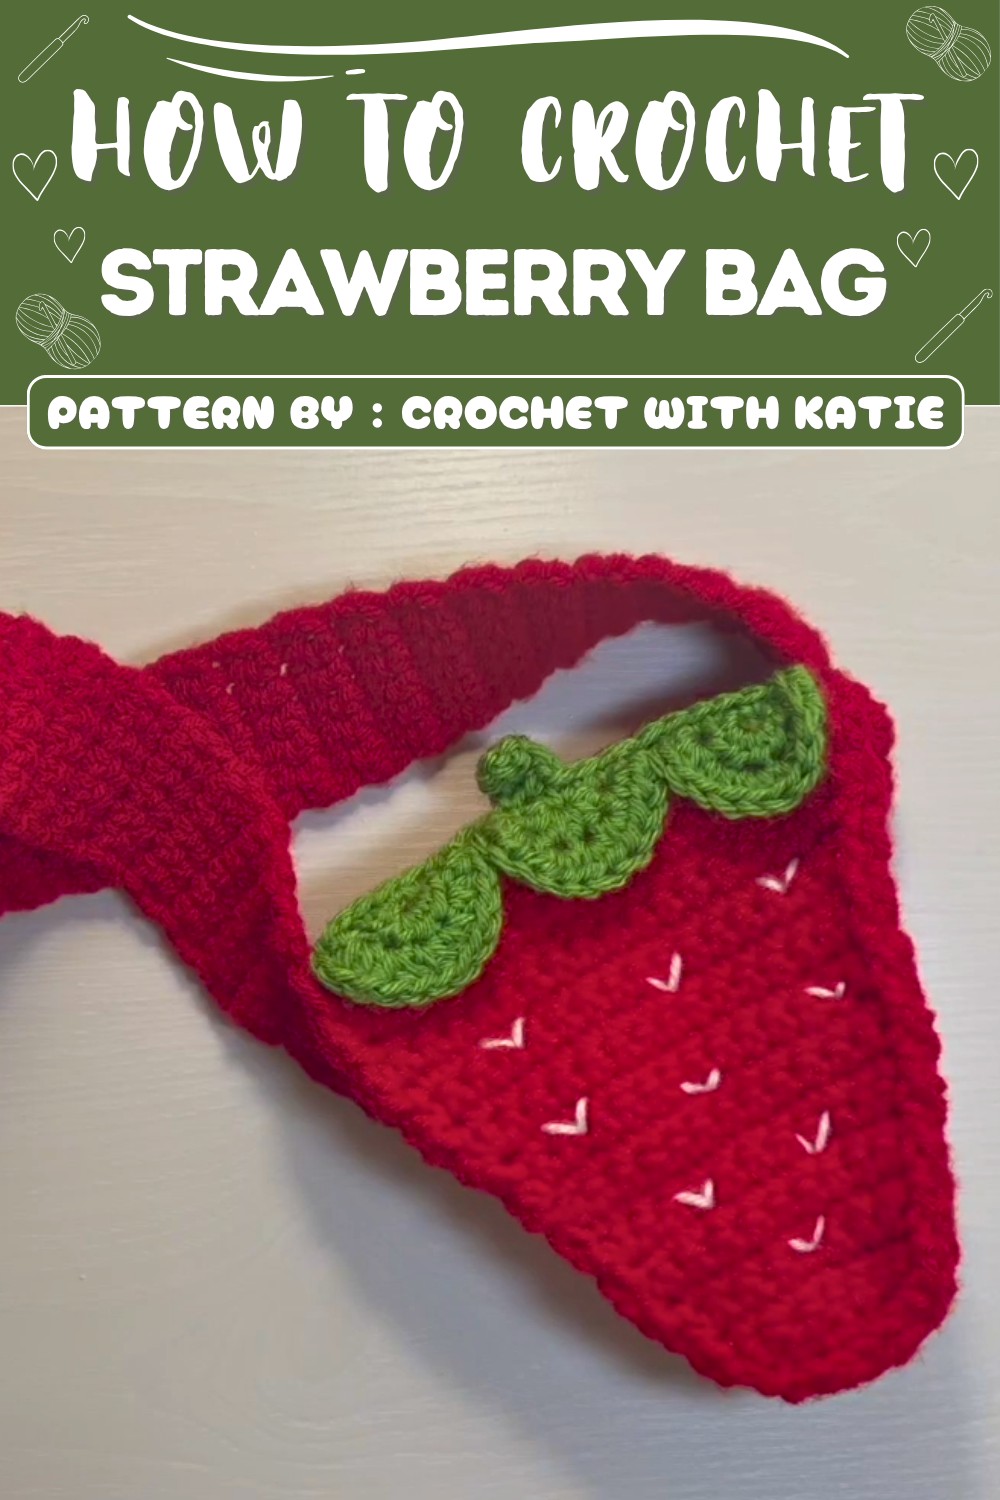 If you’re ready to add a fruity twist to your wardrobe, be sure to check out the free pattern and start making your own Crochet Strawberry Bag today.
Crochet Strawberry Purse Pattern
This easy and fun project creates an adorable strawberry-shaped purse, complete with leaves, a stem, embroidered seeds, and a customizable strap. Designed to be beginner-friendly, this purse works up quickly—ideal as a charming addition to any accessory collection or a delightful gift. The design uses basic single crochet, increases, and decreases; clearly laid out steps guide you from start to finish.
Pattern Basic Points
Highlights:
- Basic stitches: single crochet, slip stitch, half double crochet, double crochet.
- Worked flat and seamed later.
- Makes two identical strawberry panels, three leaves, and one strap.
- Leaves and strap are attached using single crochet and sewing.
- Hand embroidery is used for the seeds.
Special Notes
- Seamless joining is not required except for specific assembly spots.
- Stitch markers can help position the leaves accurately.
- Instructions allow you to customize the strap length.
- Gauge is not crucial for this project, but consistent stitch size yields a neat finish.
- Optional: Lining can be added for structure.
Skill Level
Beginner
Knowledge of basic stitches, increasing, and decreasing is recommended. Clear photo or video references may be helpful for absolute beginners.
Materials
- Worsted weight yarn in:
- Red (main strawberry)
- Green (leaves and stem)
- White or yellow (embroidery for seeds)
- Crochet hook (typically 4.0 mm/G or as suitable for your yarn)
- Tapestry needle
- Scissors
- Stitch markers (optional)
- Measuring tape (optional)
Measurements / Sizing
- Each strawberry panel: Large enough for child-size purse (finished size approx. 6–7″ tall)
- Strap: Fully customizable; sample shown uses 112 rows for a child-length crossbody strap
- Leaves: About 2–3″ in diameter after assembly
Gauge
Not critical.
For reference:
- 7 stitches x 7 rows = 2×2″ square in single crochet using worsted weight yarn and 4.0 mm hook
Stitch Abbreviations
| Abbreviation | Meaning |
|---|---|
| ch | chain |
| sc | single crochet |
| hdc | half double crochet |
| dc | double crochet |
| inc | increase (2 in same st) |
| dec | decrease (sc2tog) |
| sl st | slip stitch |
| st(s) | stitch(es) |
| MR | magic ring |
Special Stitches
- Increase (inc): Work 2 sts into the same stitch.
- Decrease (dec): Single crochet two stitches together (insert hook into the next st, yarn over and pull up a loop, insert hook into next st, yarn over and pull up a loop, yarn over, pull through all 3 loops on hook).
- Magic Ring (MR): Adjustable ring to begin a project in the round.
- Slip Stitch (sl st): Insert hook into specified stitch, yarn over, pull through both stitch and loop on hook to join or end a round/neaten an edge.
Strawberry Purse Pattern
Strawberry Panels (Make 2)
Row 1:
- Using red yarn, make a slip knot.
- Ch 7.
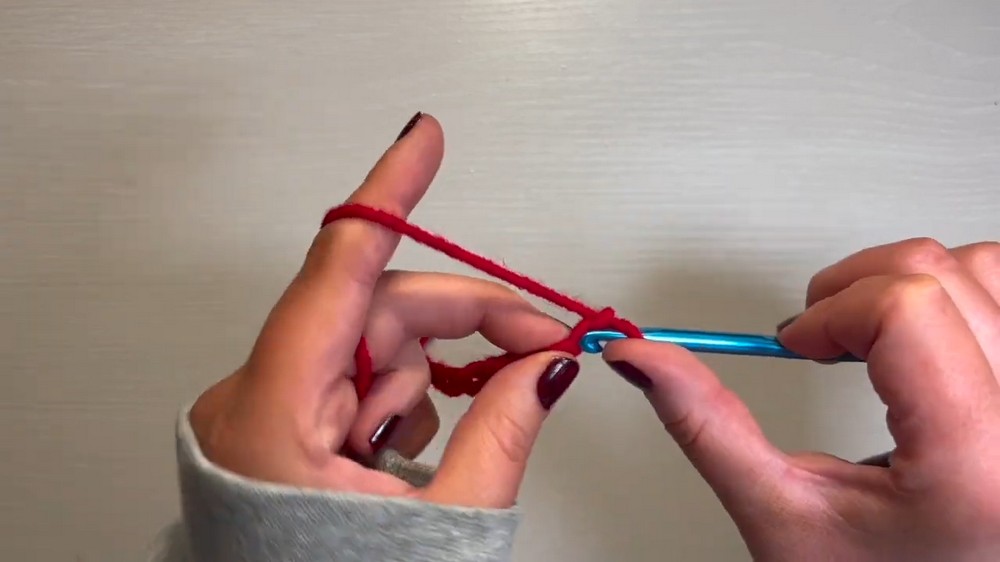
- In 2nd ch from hook, sc.
- Sc across each ch (6 sc).
Row 2:
- Ch 1, turn.
- Sc across (6 sc).
Row 3:
- Ch 1, turn.
- Inc in first st (2 sc in first st).
- Sc in next 4 sts.
- Inc in last st (2 sc in last st). (8 sts)
Rows 4–5:
- Ch 1, turn.
- Sc across each st (8 sc).
Row 6:
- Ch 1, turn.
- Inc in first st.
- Sc in next 6 sts.
- Inc in last st (10 sts).
Rows 7–8:
- Ch 1, turn.
- Sc across each st (10 sc).
Row 9:
- Ch 1, turn.
- Inc in first st.
- Sc in next 8 sts.
- Inc in last st (12 sts).
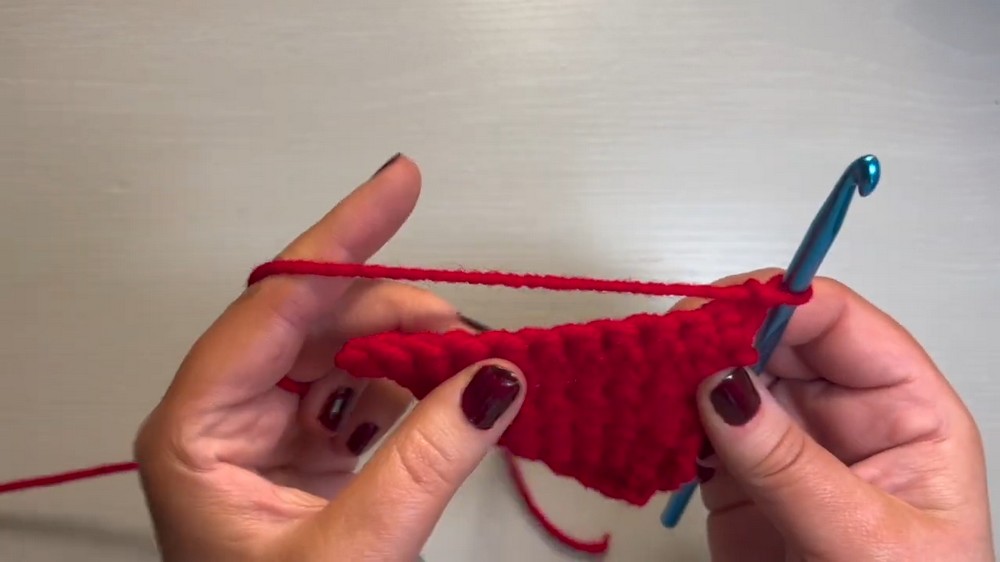
Rows 10–11:
- Ch 1, turn.
- Sc across each st (12 sc).
Row 12:
- Ch 1, turn.
- Inc in first st.
- Sc in next 10 sts.
- Inc in last st (14 sts).
Rows 13–14:
- Ch 1, turn.
- Sc across each st (14 sc).
Row 15:
- Ch 1, turn.
- Inc in first st.
- Sc in next 12 sts.
- Inc in last st (16 sts).
Rows 16–17:
- Ch 1, turn.
- Sc across each st (16 sc).
Row 18:
- Ch 1, turn.
- Inc in first st.
- Sc in next 14 sts.
- Inc in last st (18 sts).
Rows 19–20:
- Ch 1, turn.
- Sc across each st (18 sc).
Row 21:
- Ch 1, turn.
- Inc in first st.
- Sc in next 16 sts.
- Inc in last st (20 sts).
Row 22:
- Ch 1, turn.
- Sc across each st (20 sc).
Row 23: (Decrease Row)
- Dec over next 2 sts.
- Dec over next 2 sts (2 decreases made).
- Sc in next 12 sts.
- Dec over next 2 sts.
- Dec over last 2 sts (16 sts in total).
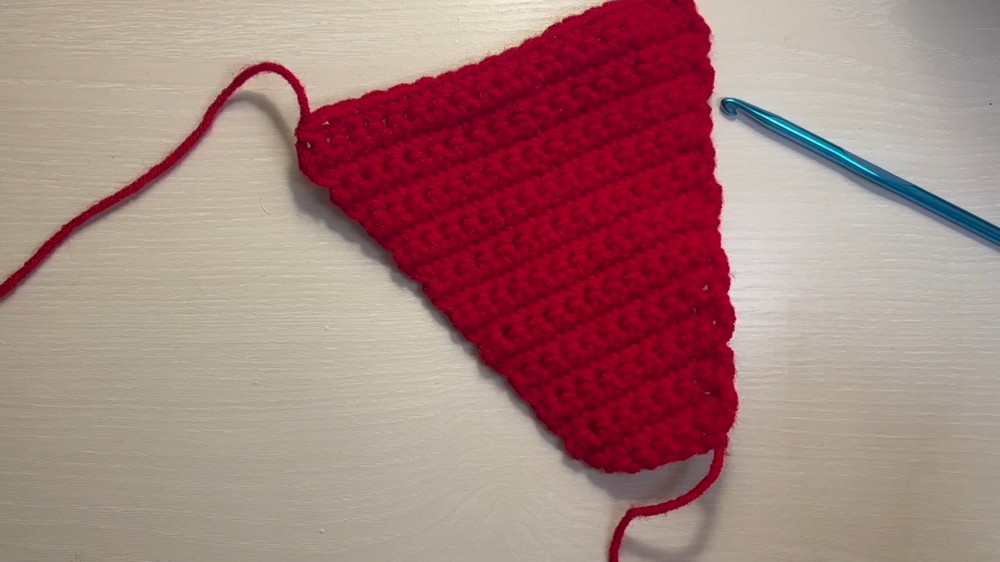
Finish off, leaving short tails to be woven in.
Make a second panel in the same manner.
Leaves (Make 3)
Round 1:
- With green yarn, make a MR (or ch 2, work all sts into first ch).
- Place 6 hdc into ring. Do not join.
Row 2:
- Ch 2, turn.
- In each st around, place 2 hdc (12 sts in total).
Fastening Off:
- First two leaves: finish off, leaving a tail for sewing.
- Last (third) leaf: Do not cut yarn; leave attached for assembly.
Attaching Leaves
- Position all 3 leaves at the top curve of one strawberry panel.
- Use stitch markers to hold in place if desired.
- Using the yarn tail attached to the third leaf:
- Insert hook through leaf and panel.
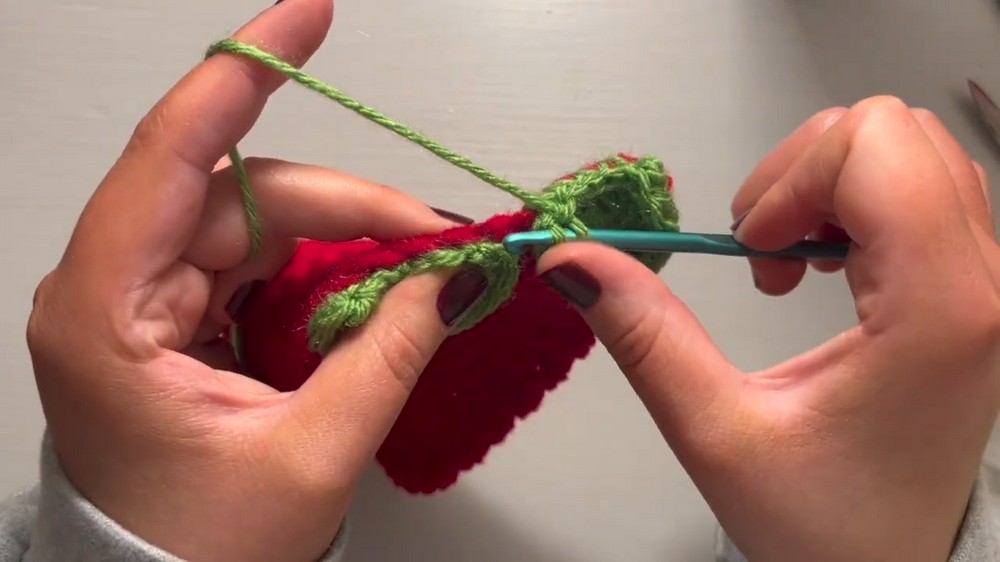
- Single crochet together across, joining leaves to the top edge.
- When halfway (centered), pause to add stem.
Strawberry Stem
- At midpoint, after sc through both layers:
- Ch 4.
- In 2nd ch from hook: dc.
- In next ch: 2 dc (increase).
- In next ch: dc.
- Continue to sc join the leaves to the panel.
Finish off and weave in ends.
Embroidering Seeds
- With white or yellow yarn and a tapestry needle, embroider small “V” shapes, evenly on the surface of the strawberry panel with leaves attached.
- Secure and hide thread ends neatly on the panel’s wrong side.
Strap
Row 1:
- With red yarn, make a slip knot.
- Ch 7.
Row 2:
- In 2nd ch from hook, sc.
- Sc across (6 sc).
Rows 3–desired length:
- Ch 1, turn.
- Sc across (6 sc).
Continue until the strap is your desired length. (Sample uses 112 rows for a child-length strap.)
Note: Do not cut the yarn at the end; leave it attached for assembly.
Assembly & Finishing
Attaching Strap to Strawberry Panel
- Starting at one top corner, position the short end of the strap at the top of the strawberry panel (on the side with the leaves attached).
- With attached yarn and hook:
- Sl st through both strap and top edge of panel.
- Continue sl st across the top to join the full width of the strap.
- Cut yarn, leaving a very long tail for sewing around to the other side.
Sewing Second Panel & Final Assembly
- Thread the long yarn tail onto a tapestry needle.
- Lay the second strawberry panel behind the first, aligning all edges neatly.
- With yarn needle:
- Whipstitch (or sew) evenly around the edge, joining both panels from the end of the strap, around the curved edge, leaving the top opening free.
- Reinforce the seam at the start and end.
- When you reach the end, attach the remaining strap end to the opposite top side using the same sewing method.
- Weave in all ends securely.
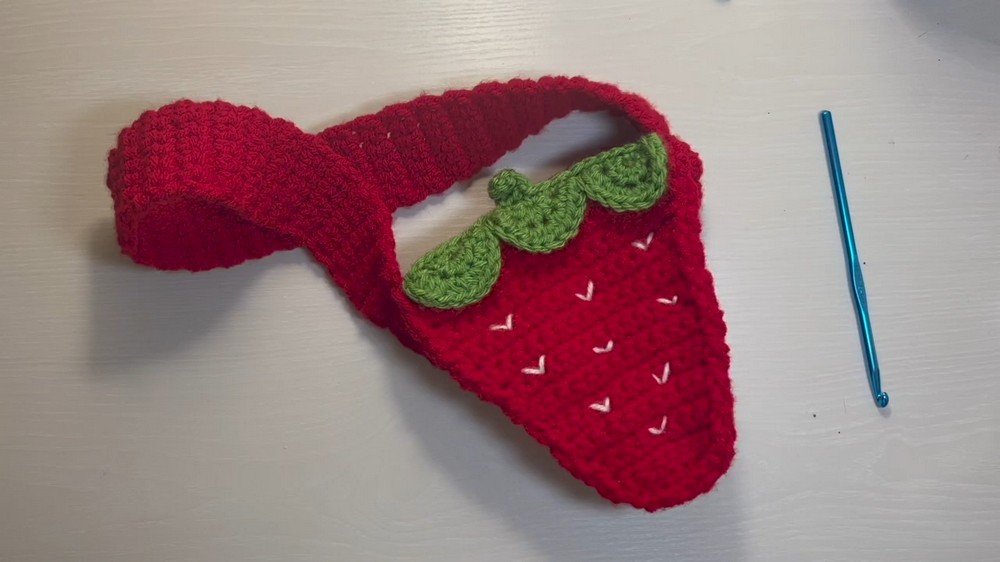
Optional: Add fabric lining before final seaming for extra structure.
Finished Size
- Approximate dimensions: 6–7″ tall, width varies by yarn and gauge.
- Strap length is fully adjustable.
Conclusion
This strawberry purse is a straightforward and enjoyable crochet project, perfect for those seeking a quick accessory or gift. Its whimsical design paired with practical construction techniques provides an opportunity to practice foundational skills such as shaping, working increases/decreases, and basic hand sewing for assembly. The purse can be easily customized with different colors, or by adding decorative details. With clear structure and room for creativity, this project suits those new to crochet as well as crocheters looking for a pleasant, rewarding experience. Enjoy making and using your berry-sweet creation!
