
Add some colorful flair to your style by making a crochet granny shoulder bag with this easy, free pattern that’s great for beginners and everyday use.
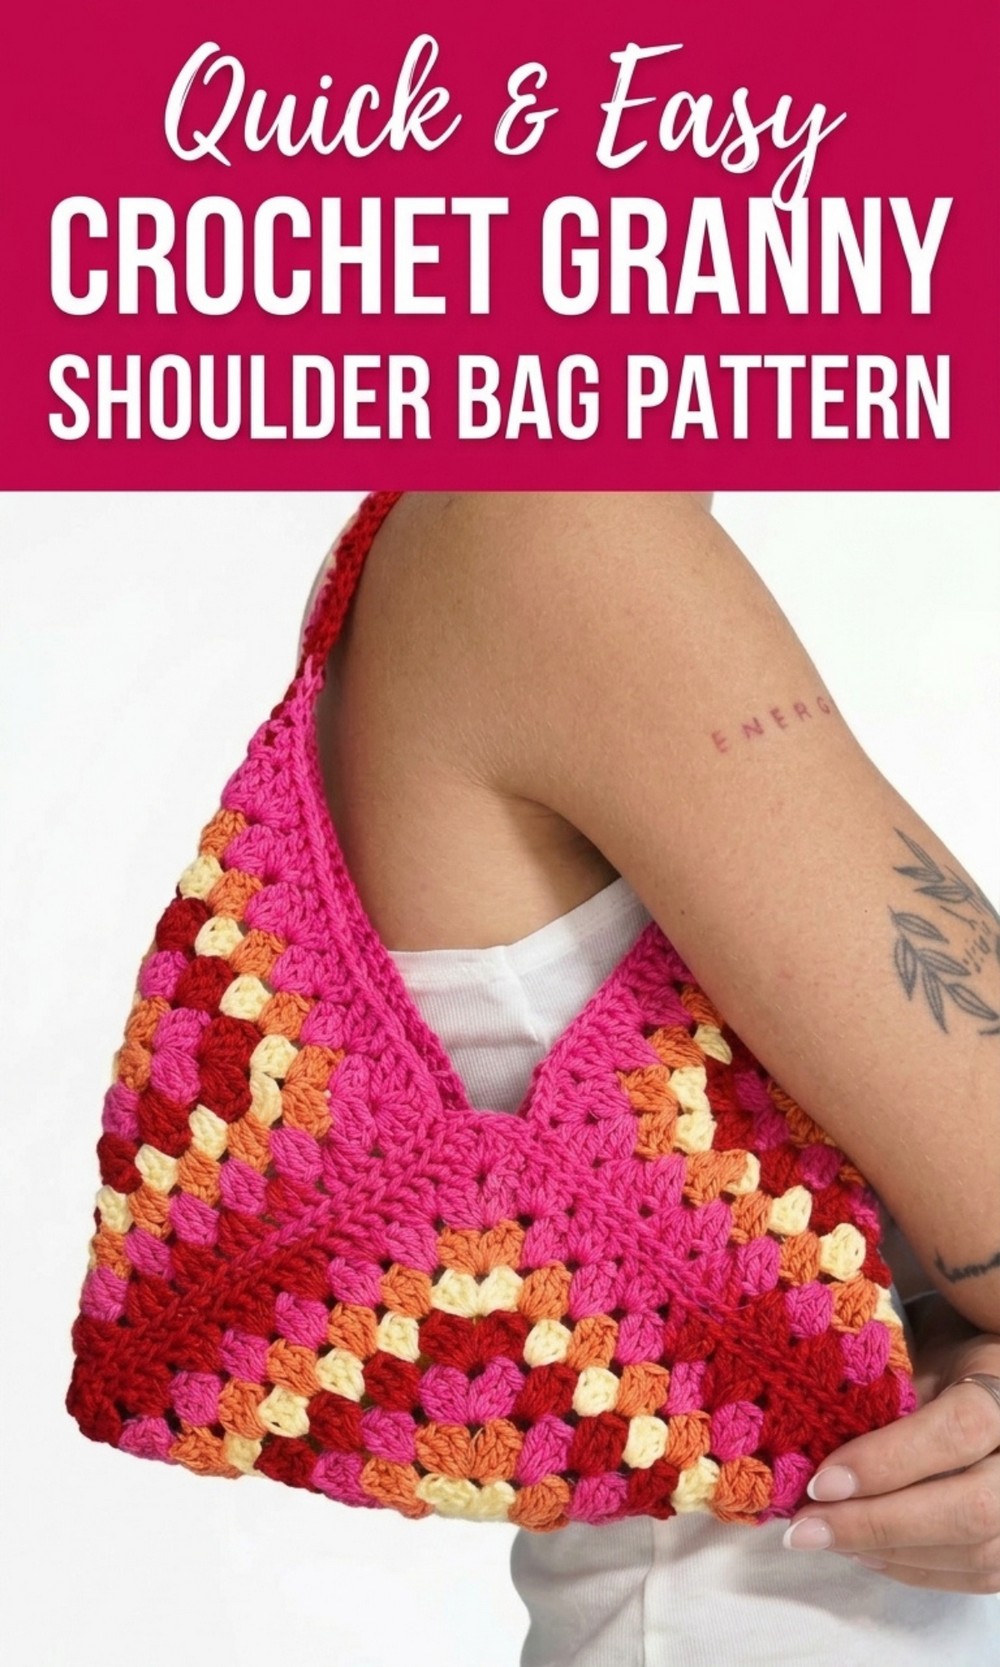
Stunning Free Crochet Granny Shoulder Bag Pattern You’ll Want to Carry Everywhere
It’s a simple and stunning project that lets you create a beautiful and colorful accessory – the Crochet Granny Shoulder Bag Pattern. Made using vibrant granny squares, this bag is not only pretty to look at but also very practical. The unique designs and bright colors make it a stylish statement piece that you can customize with your favorite shades. The soft texture and lightweight feel of the bag make it perfect for daily use.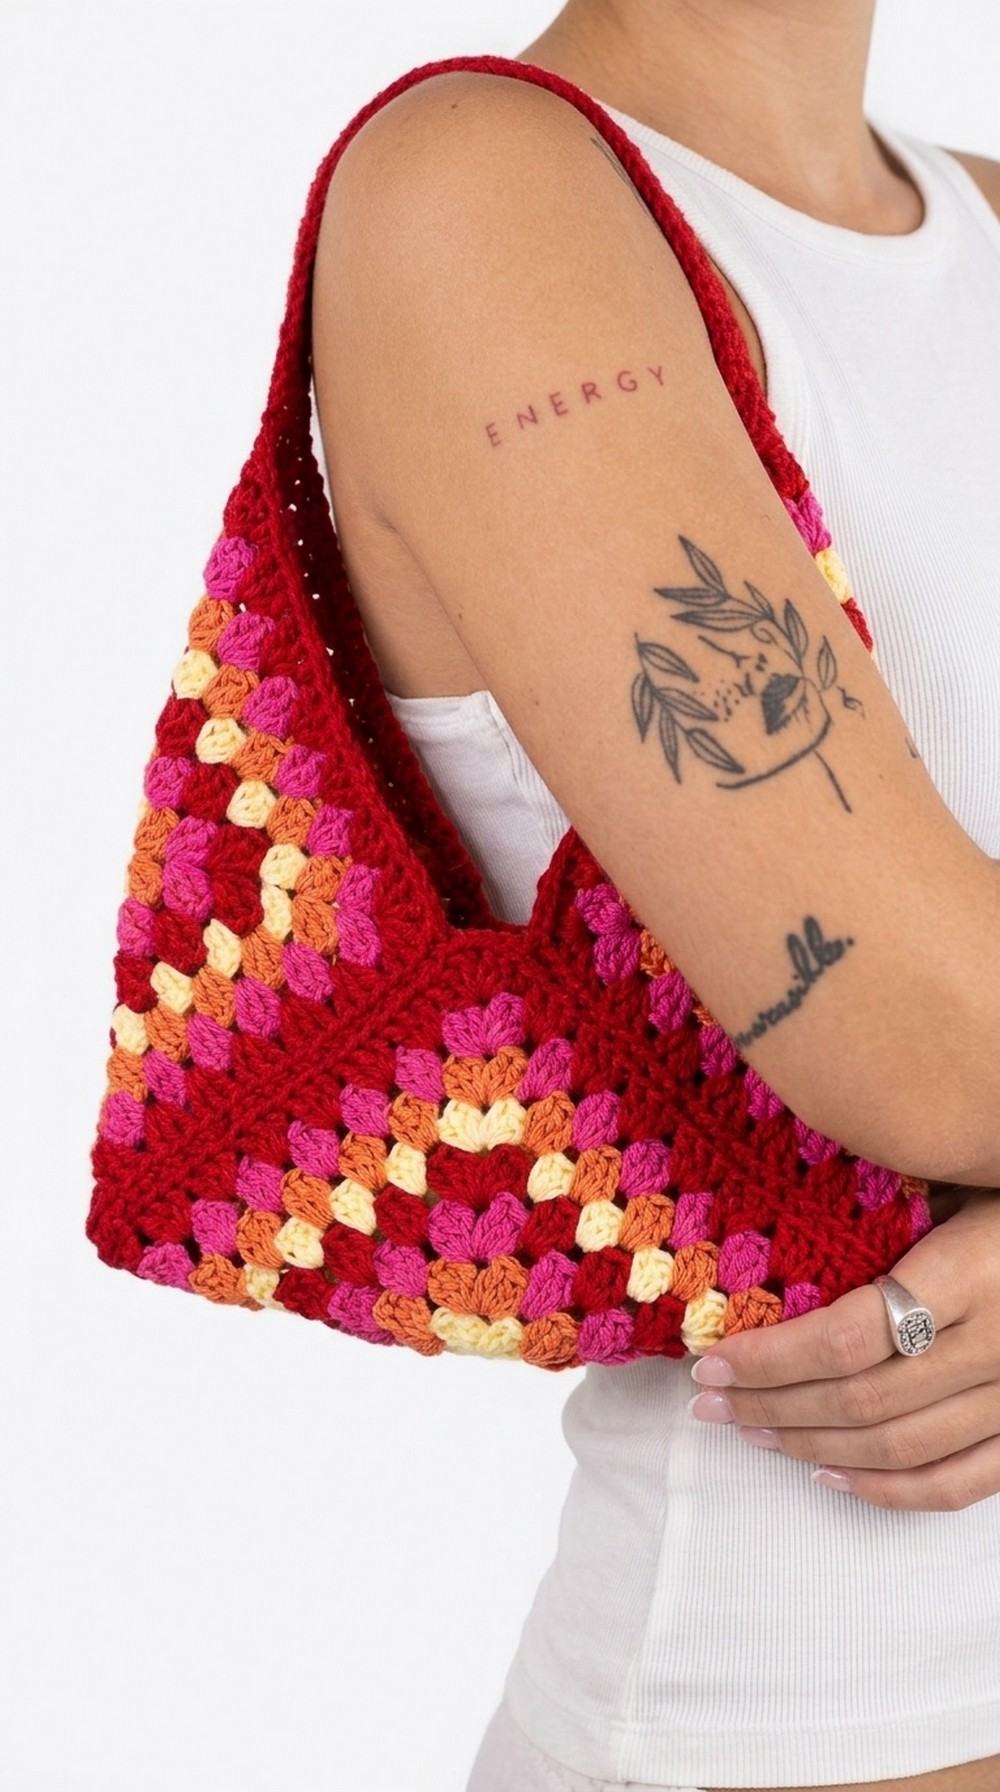 You can carry small essentials like a phone, wallet, keys, or even a book, making it an excellent choice for casual outings or fun trips to the beach. The adjustable shoulder strap ensures a comfortable fit, regardless of your preferred length.
This bag is easy to make with basic crochet skills and is a wonderful way to create a handmade item you’ll love to use or gift to someone special. With this free pattern, anyone can crochet a trendy and practical accessory in no time.
Bright Crochet Granny Shoulder Bag Pattern
Finished Size
- Width: Approximately 23 cm (9 inches)
- Height (usable part): Approximately 11 cm (4.3 inches)
- Strap length: Adjusted in the instructions; can be customized.
Materials Needed
- Yarn: Cotton yarn in 4 different colors of your choice. (Yarn weight: fingering to sport weight recommended).
- Ensure the colors harmonize for a summer inspired or contrasting look.
- Hook Size: 3.0 mm crochet hook (adjust according to your yarn weight to match gauge).
- Other Tools:
- Tapestry needle (lanera): To weave in ends and sew parts together.
- Scissors: To cut the threads cleanly.
- Stitch Markers (optional): To keep track of specific stitches or rounds, particularly in corners.
Gauge
- For this pattern, the granny square motif works up with a firm texture. Work up a trial piece of 4 rounds of the granny square with selected materials.
- Gauge: 10 cm (4 inches) = 8 rows of the granny pattern.
Special Stitches & Techniques
- Slip Stitch (SS): Insert hook into stitch, yarn over, pull through both loops on hook.
- Chain (CH): Yarn over and pull through the loop on the hook.
- Double Crochet (DC): Yarn over, insert hook into stitch, yarn over, pull loop through, yarn over, pull through 2 loops, yarn over, pull through remaining 2 loops.
- Granny Square Pattern: A motif constructed with alternating blocks of 3 double crochets and 2 chain spaces in corners.
- Seaming Technique: Use the outer loops of stitches to create a neat invisible join.
Pattern Instructions
Step 1: Create the First Granny Square
This will serve as the base design of the bag.
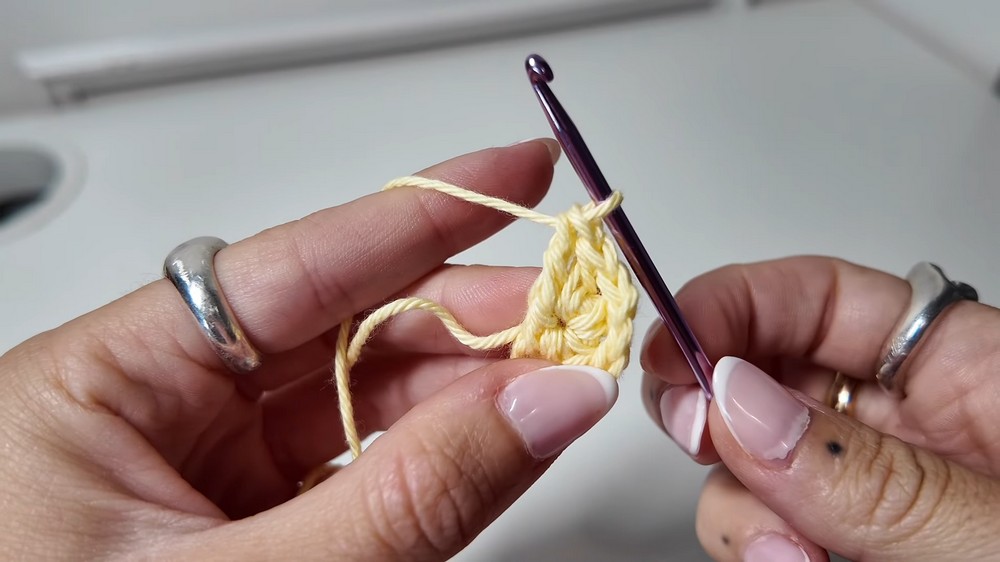
- Start a Magic Circle: Create a slipknot on your crochet hook.
- Round 1:
- CH 4.
- Make 3 DC into the magic circle.
- CH 2, then make 3 DC into the circle.
- Repeat (CH 2, 3 DC) until you have 4 DC clusters separated by CH 2 spaces.
- Join the round with SS to the top of the initial CH 3.
- Round 2:
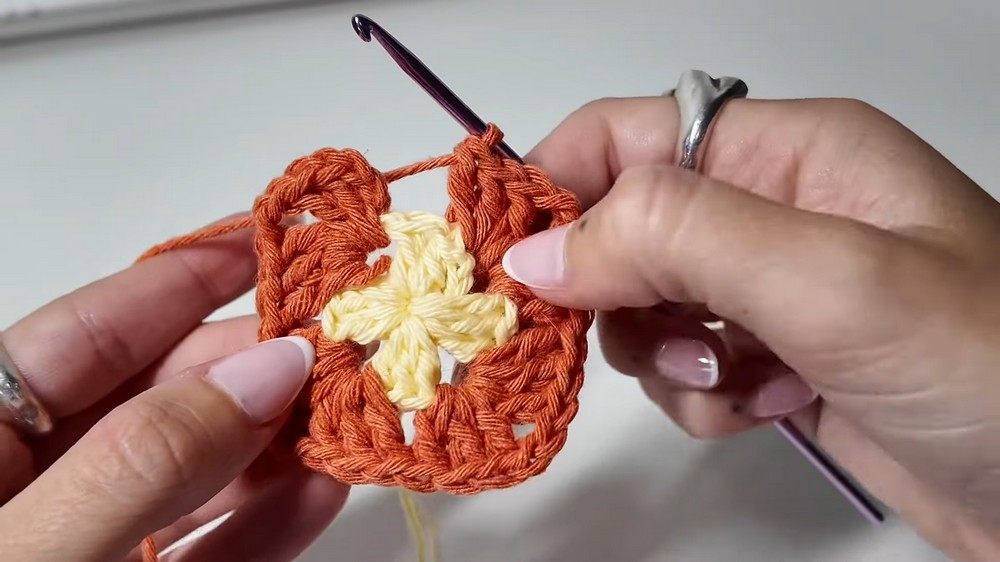
- Change color (optional). Attach a new color to one of the CH 2 corner spaces.
- CH 3 (counts as 1 DC). Make 2 DC into the same CH 2 space, CH 2, make 3 DC into the same CH 2 space. (Corner made.)
- In the next CH 2 corner, work 3 DC, CH 2, 3 DC.
- Repeat this corner pattern for all CH 2 corners.
- Join with SS to the top of the initial CH 3.
- Round 3:
- Change to a new color. Attach yarn to any corner CH 2 space.
- CH 3. Make 2 DC into the corner space, CH 2, and 3 DC into the same space (corner).
- In the spaces between clusters of the previous round, make 3 DC stitches.
- Work your corners with 3 DC, CH 2, 3 DC. Repeat for all corners.
- Join with SS to the initial CH 3.
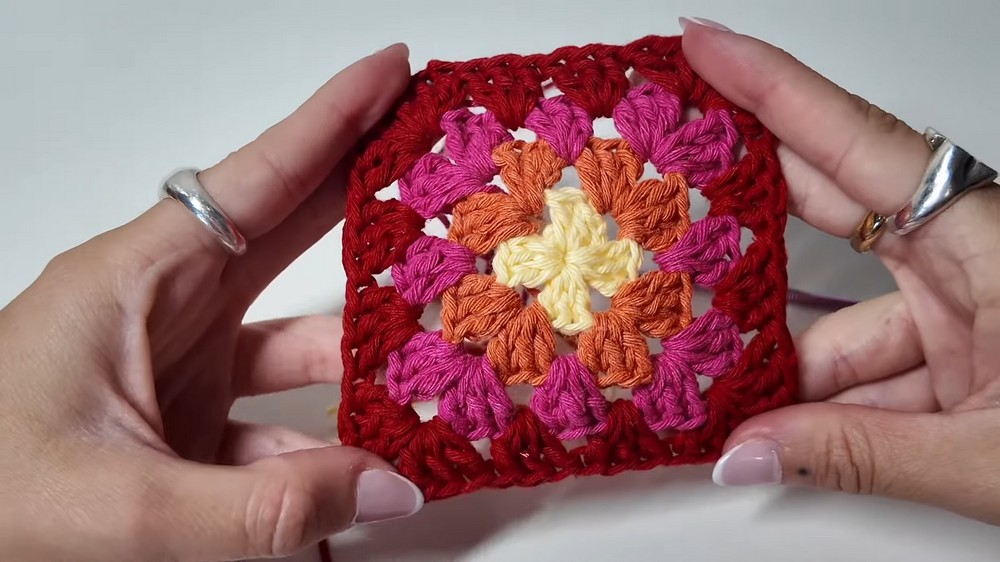
- Round 4 to 8:
- Continue adding rounds. Follow the same pattern: 3 DC in spaces between clusters, and 3 DC, CH 2, 3 DC in corners.
- Ensure to change colors for each round to create a striped look as desired.
Step 2: Make Two More Granny Squares
Repeat the same steps above to crochet two additional granny squares for the front, back, and bottom of the bag.
Assembly Instructions
Step 3: Weave In Ends
- Use a tapestry needle to weave in all the loose ends from each granny square for a finished look.
- Make sure no loose ends are visible.
Step 4: Join the Granny Squares
- Place the three granny squares together:
- Fold each of the three granny squares in half.
- Ensure that the wrong sides (the side with woven in ends) are facing outwards.
- Arrange them neatly, with the folded squares forming the seams.
- Seam Using a Tapestry Needle:
- Using yarn in the color of the outermost round, thread your needle.
- Starting at one corner, insert your needle into the outer loops of the stitches on both edges you are joining. Pull the needle through and continue working along the seam, ensuring it is secured but flexible.
- Fasten off securely and weave in any remaining threads.
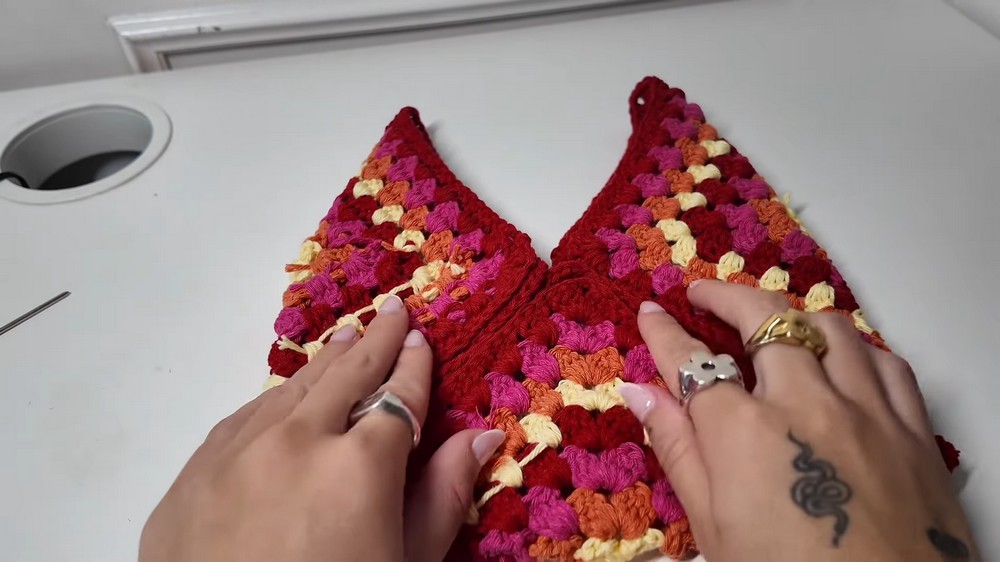
- Repeat for both sides of the bag.
Step 5: Attach the Strap
- Take yarn in the color of your outermost round for the strap.
- Create the Strap:
- Attach the yarn to one corner of the bag.
- CH 3. Work 4 DC stitches.
- Turn and CH 3, then work 4 DC in the row below. Repeat this process back and forth until the strap is your desired length. For a shoulder bag, 18 rows should be appropriate, but this length can be adjusted.
- Attach the Other End:
- Using a tapestry needle, attach the other end of the strap to the opposite corner of the bag.
- Secure the stitches by making multiple passes and tying off securely.
Customization Ideas
- Color Palette: Experiment with gradients, pastel shades, or contrasting bold colors to create a unique look.
- Strap Variation: Consider making an adjustable strap or attaching a leather strap for a different design style.
- Closure: Add a button and loop, magnetic snap, or zipper to secure the bag’s opening.
- Lining: Sewing a fabric lining inside the bag can add durability and a professional finish.
Final Look and Assembly
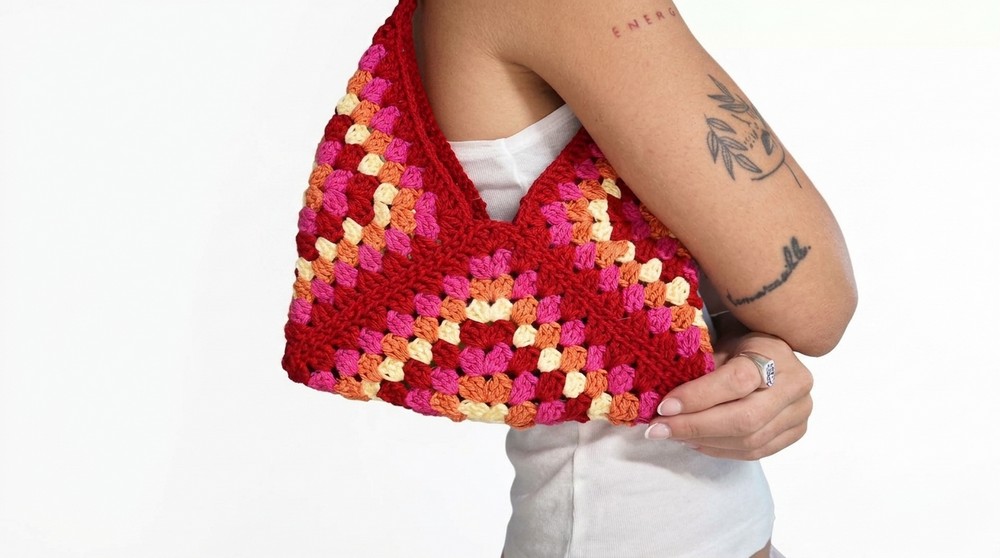
- Once the bag body and strap are assembled, turn the whole bag inside out so the “good side” of the granny square is facing out.
- Flatten the edges and adjust the strap to ensure symmetry.
Important Remarks
- Ensure your tension stays consistent across all rounds and granny squares to maintain symmetry.
- Securely weave in all ends to prevent fraying.
- Personalize this project by mixing and matching colors or adding embellishments such as tassels or fringe.
Congratulations, You now have a handmade, vibrant, and cozy shoulder bag perfect for summer outings. It’s functional, stylish, and made with love. If you enjoy the process, consider creating matching accessories like a small wallet or keychain using the same granny square design.
