Ocean-inspired cuteness shines through this Crochet Whale Keychain Pattern, bringing the charm of a tiny whale to life as a perfect accessory for daily adventures and moments of fun.
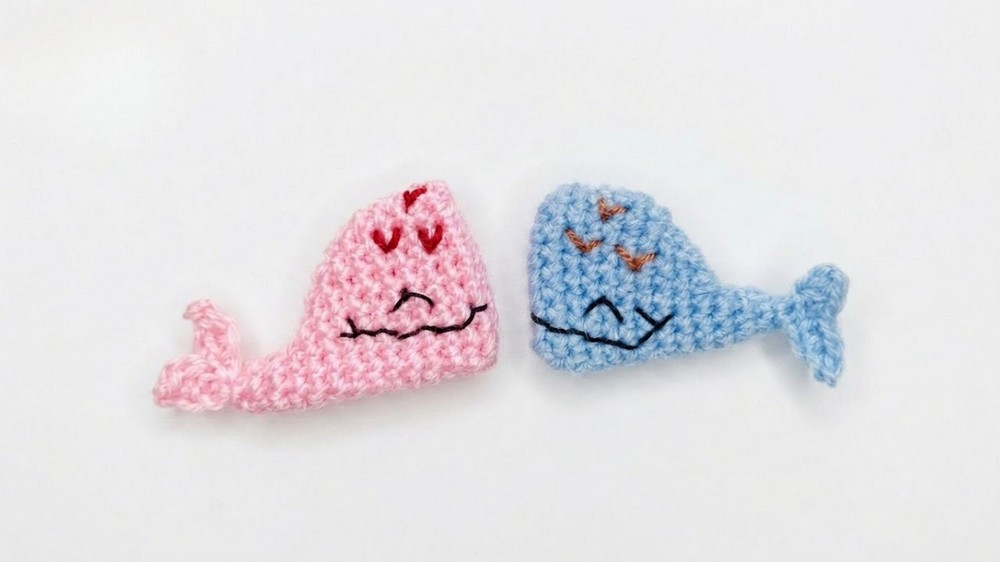
Small in size but full of charm, this enchanting pattern lets you create a lovable and cheerful whale that is perfect for brightening up your accessories. Designed with a playful and happy look, its colorful body, curved tail fin, and sweet smiling face make it an irresistible project for anyone who enjoys handmade creations. This delightful whale is simple to make and requires very little time, making it a fantastic choice for beginners or those looking to crochet something quickly.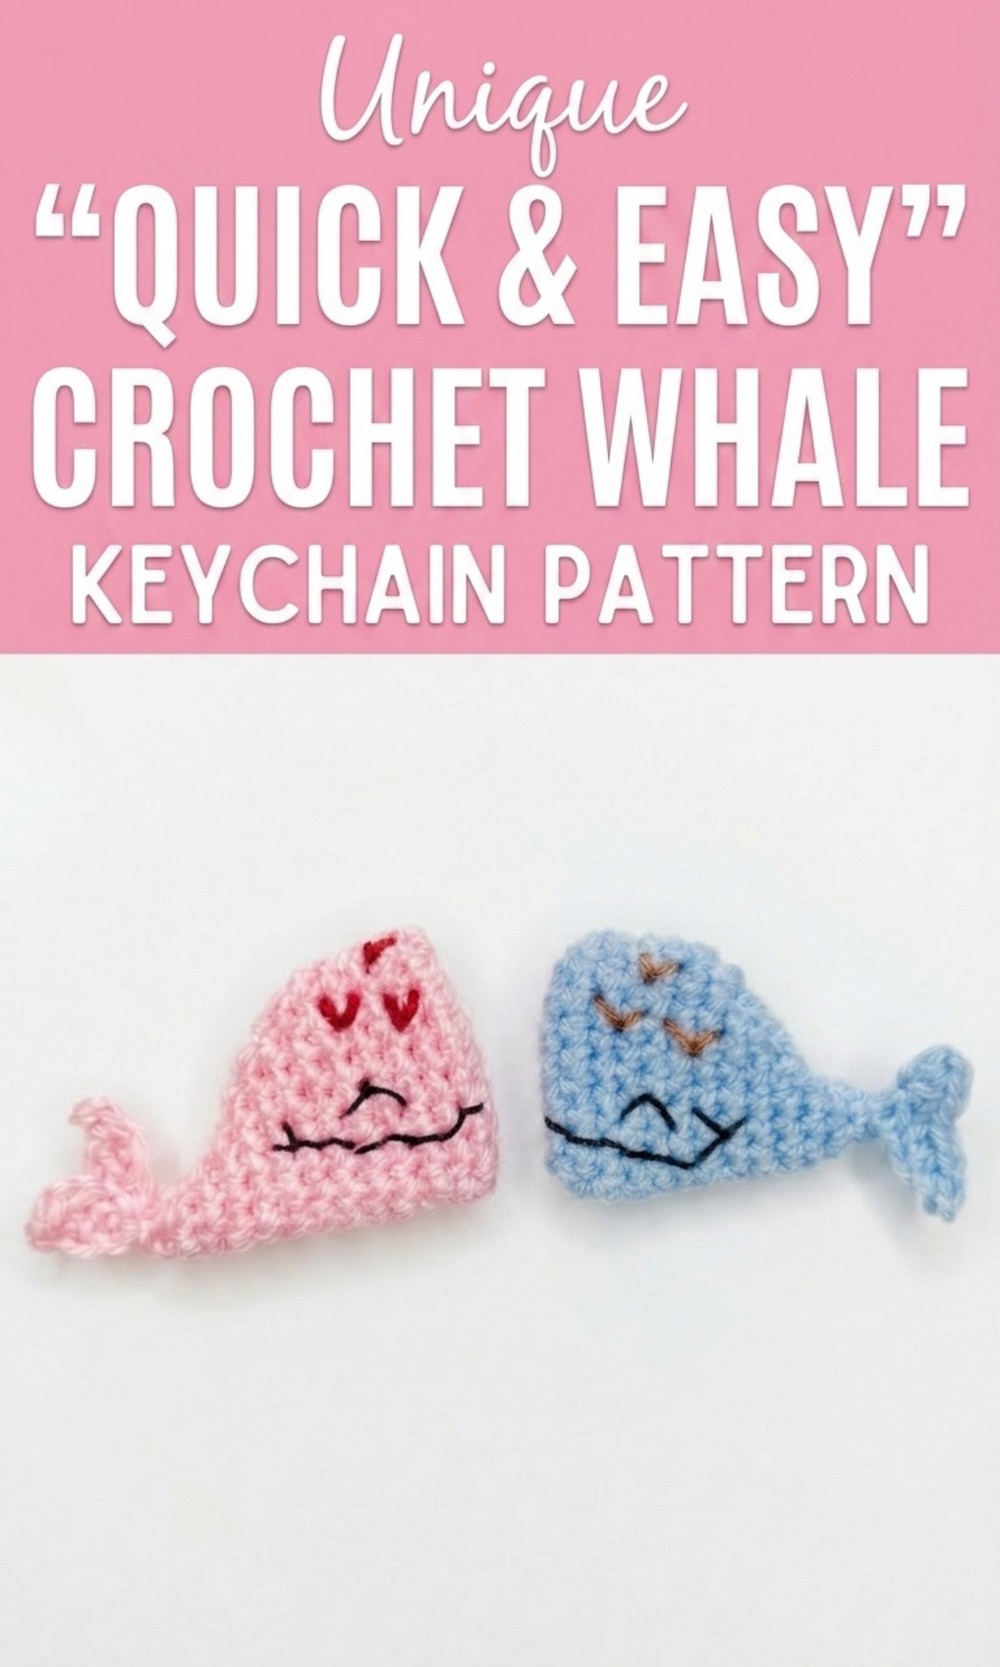
The finished design is not just cute but also practical. With its compact size, it fits perfectly as a bag charm, a keychain, or even as a lovely gift for someone special. Its versatility means you can customize your whale using your favorite colors or add extra details like tiny embroidered to make it unique and extra special. You can crochet whales in pink, blue, or any shade you love, creating a little army of colorful companions.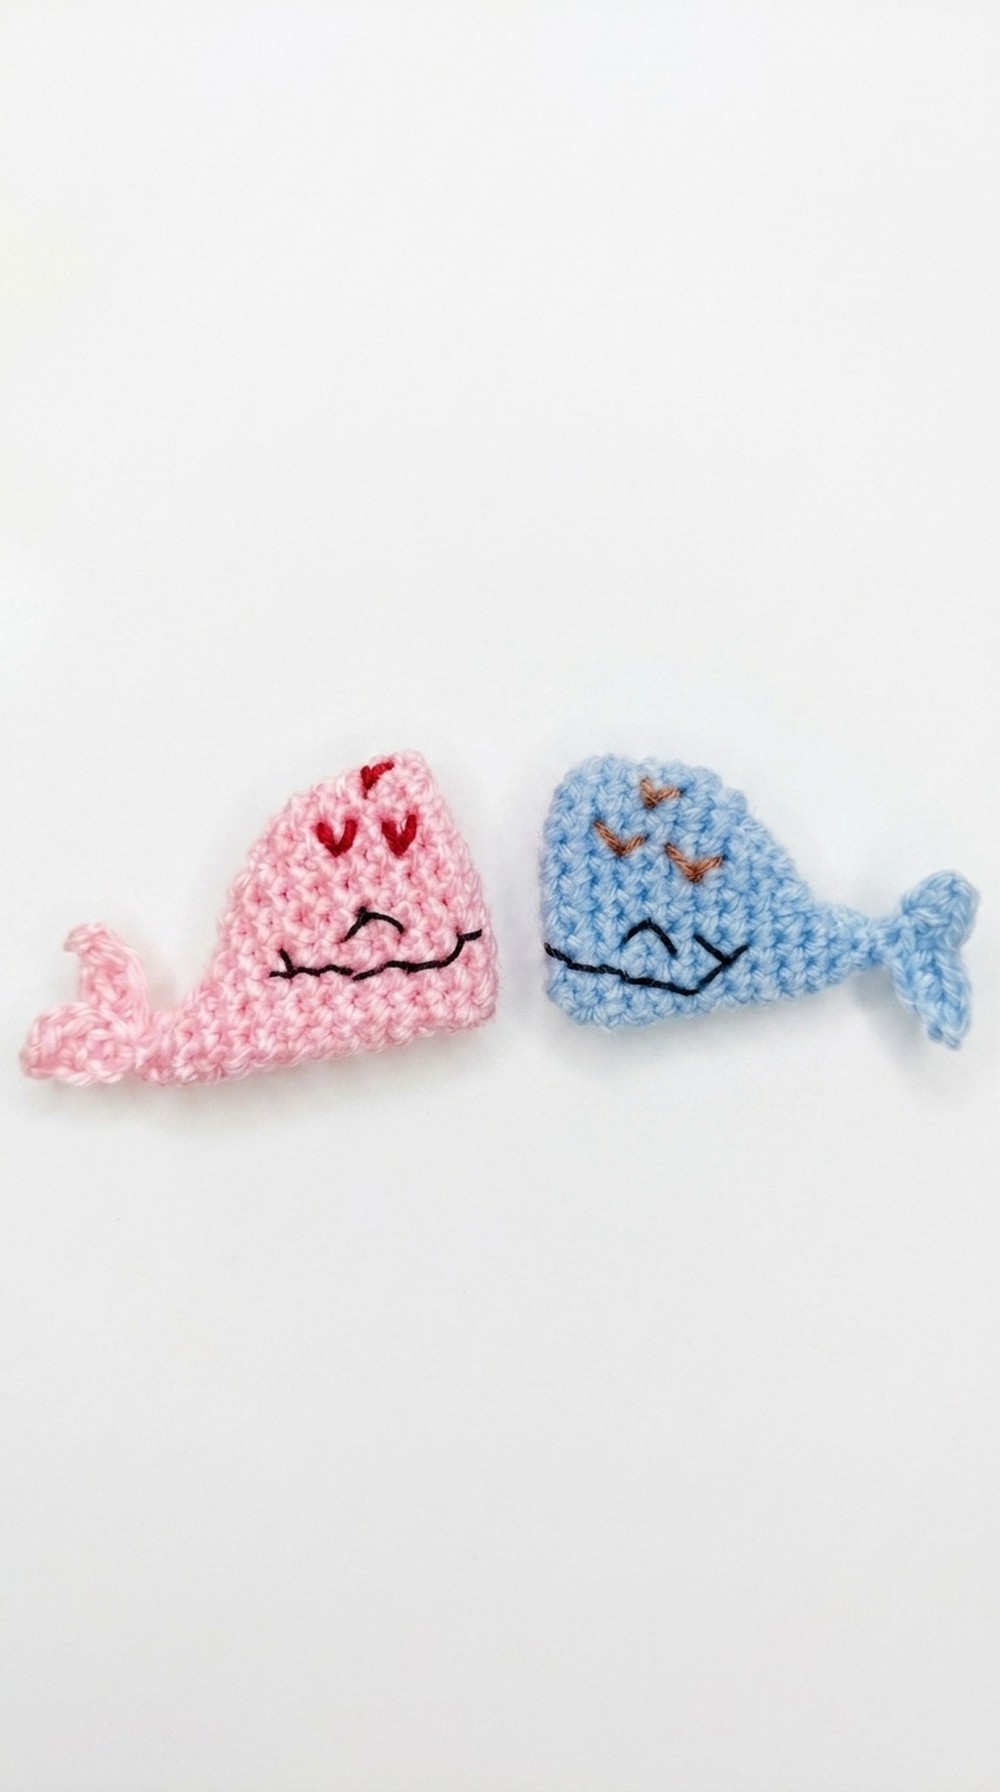 The crochet whale isn’t just about fun; it’s also a meaningful way to bring creativity into your everyday life. Every time you use your keychain or glance at your bag, this homemade accessory will make you smile and brighten your day.
Whether you’re making it for yourself, your friends, or even selling it as part of your crochet collection, this project teaches the beauty of handmade art while being easy and exciting to make. Your whale will surely bring joy with its charming design and practical use.
Crochet Whale Keychain Free Pattern – Step By Step Guide
Finished Size
- Approximately 4 to 5 cm in height and width.
- Small enough to function as a keychain or bag charm.
Materials Needed
- Yarn: Pink cotton yarn for the whale’s body. (Any DK weight yarn or similar will work.)
- Hook: 2.75 mm crochet hook.
- Black Thread: Thin black thread or embroidery floss for facial details.
- Red Thread: Thin red thread for decorative hearts (optional).
- Stuffing Material: Polyester fiberfill for shaping the whale.
- Keychain Hook or Ring: To transform the whale into a keychain.
- Yarn Needle: For assembling and embroidery.
- Scissors: For trimming leftover threads.
Gauge
- Gauge is not especially important for this project. However, your stitches should be tight to ensure the stuffing does not show through the fabric.
Tips for Success
- Use tight stitches: This ensures your whale looks neat and doesn’t lose its shape over time.
- Customize colors: Try other colors for a personalized look, such as blue, gray, or rainbow hues.
- Use a stitch marker: Track where each round begins and ends to prevent losing count in spiral rounds.
Pattern Instructions: Crochet Whale
Part 1: The Whale Body
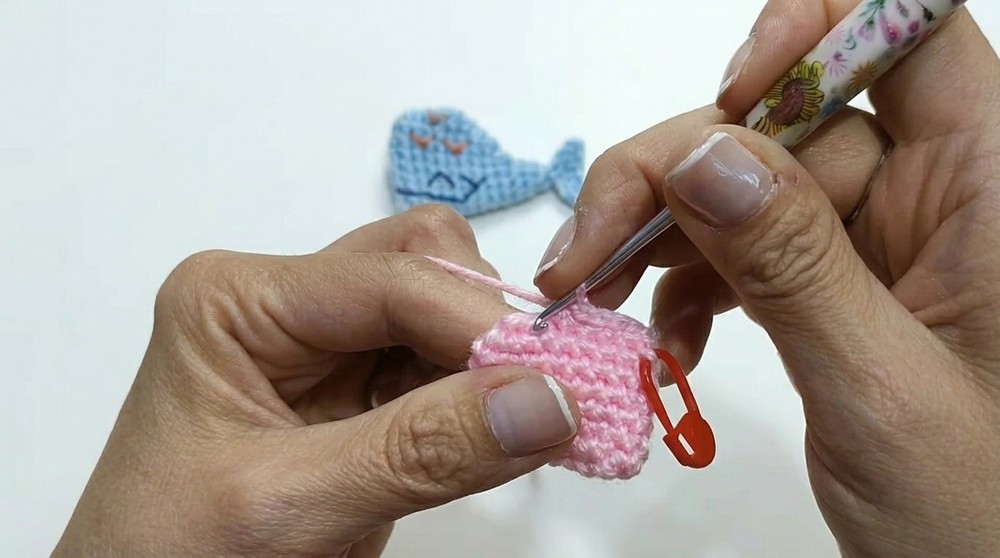
- Step 1: Start with an oval base.
- Begin with a magic circle or chain 10 foundation chains.
- Starting in the second chain from the hook, crochet 8 single crochets (SC).
- Work 3 single crochets into the last chain to form a rounded edge.
- Continue along the opposite side of the chain by crocheting 8 single crochets, and finish with 3 single crochets in the last chain.
- You should now have 22 stitches in total.
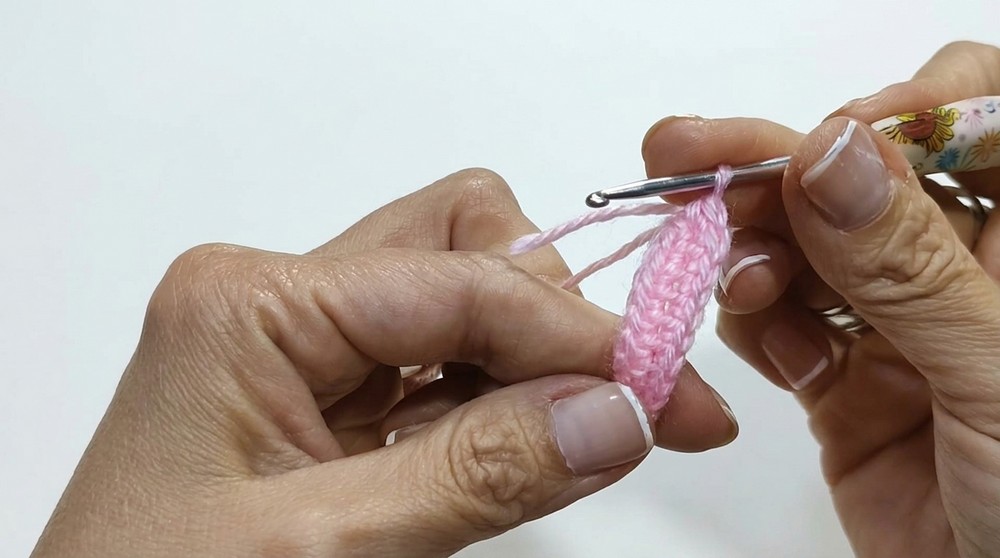
2. Step 2: Continue increasing for shaping.
- Round 2: Work in the round without joining:
- SC 8, increase in the next 3 stitches, SC 8, and increase in the next 3 stitches.
- You now have 28 stitches.
3. Step 3: Build up the body with even rounds.
- Rounds 3 to 6: Work 1 single crochet in each stitch, creating no increases.
- Use a stitch marker to help you work in a seamless spiral.
Part 2: Shaping for the Tail
4. Step 4: Taper the body as you approach the tail.
- Round 7:
- SC 8, [SC decrease] 4 times, SC 8, [SC decrease] 2 times.
- This reduces the total stitches to 22 stitches.
- Round 8:
- SC 7, decrease 3 loops together (special triple decrease), SC 7, decrease 3 loops together.
- Reduce to 16 stitches.
- Round 9: Taper further:
- SC 6, decrease 3 loops together, SC 6, decrease 3 loops together.
- You will now have 12 stitches left.
- Round 10: Repeat as the whale body becomes smaller:
- SC 4, decrease 4 loops together, SC 4.
- Reduce to 8 stitches.
5. Step 5: Close the opening at the tail.
- Round 11: Crochet 2 decreases over 3 loops, leaving only 4 stitches.
- Cut the yarn and fasten off, leaving a long tail for sewing.
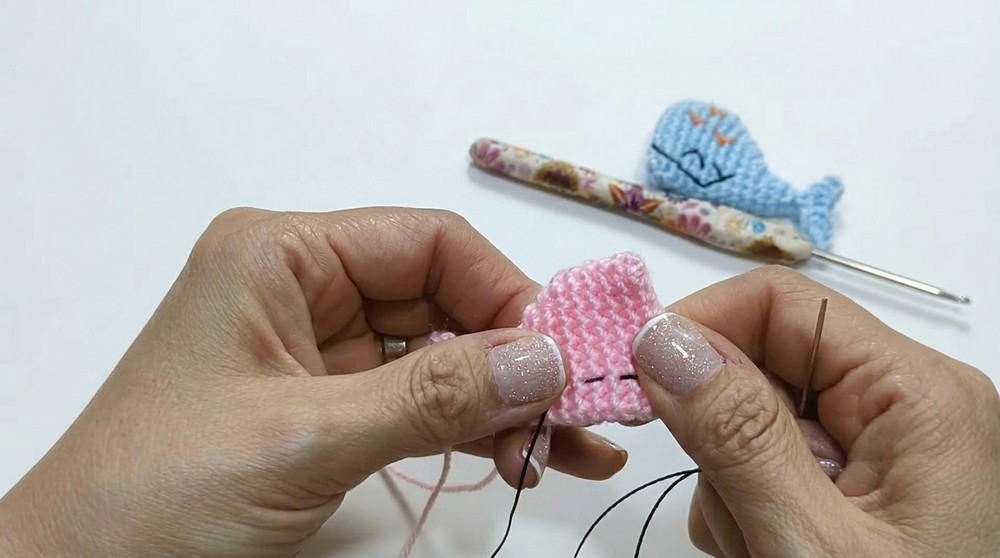
- Stuff the whale firmly with fiberfill before completely closing the small opening.
Part 3: The Tail Fin
6. Step 6: Crochet the tail fin.
- Using the same yarn color as the whale body:
- Start with a magic circle or chain 8 foundation chains.
- Slip stitch into the 7th chain (skip the last chain).
7. Step 7: Add details for structure.
- In the same stitch, work 2 half-double crochets (HDC).
- Skip 2 chains, and work another HDC increase (2 HDC in the same stitch).
8. Step 8: Shape the fin.
- Skip 3 chains, then make another HDC increase.
- Slip stitch into the last chain for a rounded finish. Cut off the yarn, leaving a long tail for sewing.
- Attach the fin to the narrow end of the whale’s body using your yarn needle. Use the long tail to sew securely.
Part 4: Adding Facial Details
- Eyes:
- Use black thread or embroidery floss to embroider two small oval-shaped eyes on the side of the whale’s face.
- Alternatively, small safety eyes can be used for a polished look.
- Smiling Mouth:
- With black thread, embroider a simple smile under the eyes using straight stitches. Begin embroidering from one side and curve slightly upward to form a cheerful expression.
- With black thread, embroider a simple smile under the eyes using straight stitches. Begin embroidering from one side and curve slightly upward to form a cheerful expression.
Part 5: Decorative Details (Optional)
- Red Hearts (Optional):
- Using red thread, embroider a small heart on the whale’s belly or near its side for decoration. Create smaller hearts by using diagonal straight stitches that connect into a “V” shape.
Part 6: Keychain Attachment
- Attach a keychain ring or hook to the back of the whale body.
- Use a strong thread or matching yarn color to securely sew the ring in place. Double-knot the yarn/thread to ensure it stays secure.
- Ensure the keychain hardware is firmly attached before use.
Customization Ideas
- Use alternating colors for stripes: Crochet alternating rows of different colors to create a striped whale.
- Add a bow or accessories: Sew on a tiny crocheted bow or bead to give the whale a playful, customized look.
- Try other yarn types: Experiment with metallic or variegated yarn for a unique styling effect.
Special Techniques
- Magic Circle: Used to start crocheting in the round neatly; ensures no gaps in the center.
- Triple Loop Decrease: Insert your hook into three loops, yarn over, and pull through all loops to create a clean decrease for tapered ends.
- Half Double Crochet (HDC): Yarn over, insert hook, yarn over, pull through loop, yarn over, pull through all 3 loops.
Conclusion
The Crochet Whale Keychain is a versatile, pocket sized project that can brighten anyone’s day. With its adorable design and simple construction, it’s perfect for crochet beginners or experienced crocheters looking for a quick and satisfying project. Whether you make one as a gift, a keepsake, or an item to sell, this little whale will surely charm everyone who sees it.
Important Remarks
- Secure stitches and hardware: Keychains endure frequent handling, so ensure all pieces are securely attached.
- Avoid overstuffing the whale, as it may distort the shape.
- Let your creativity shine through with playful color combinations and fun decorations.
The final look of your keychain should resemble an adorable, smiling whale with a little fin and cheerful details. Add it to your keyring or gift it to a friend for a handmade treasure.