
Turn colorful yarn into a buzzing little friend with this free crochet bee amigurumi pattern perfect for gifts collections and room decor.
Have you ever felt the excitement of bringing something adorable to life with your hands? This Crochet Bee Amigurumi Pattern is the perfect way to create a cute and cheerful little bee that’s bound to make everyone smile. Picture a tiny bee with soft pastel stripes—yellow, pink, lilac, and blue—that looks as happy and warm as a sunny spring day. The beauty of this bee with its sweet design and playful features. Its white wings add a delicate touch, while its small black safety eyes give it a charming expression. You can use it as a keychain, bag charm, or even a fun decoration. It’s so cute and lightweight that it fits perfectly wherever you want it.
Crochet A Buzzing Bee Amigurumi Free Pattern To Decorate Any Corner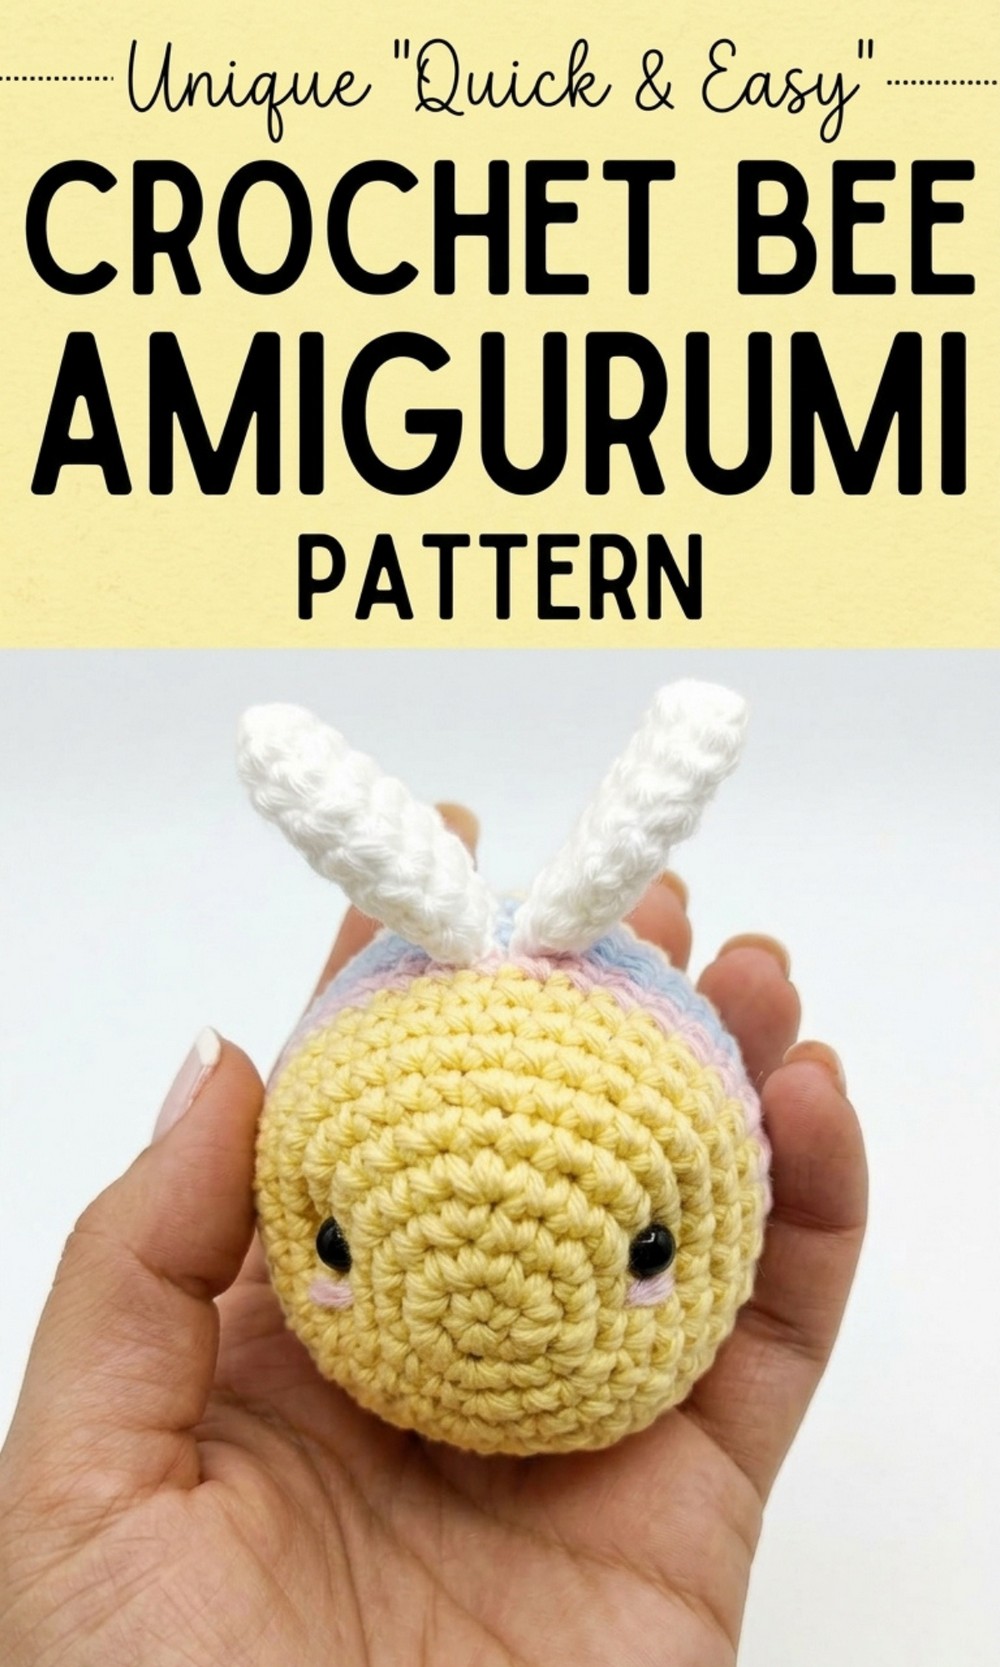

This pattern is simple enough for beginners but enjoyable for everyone, no matter your skill level. The materials are easy to find—cotton yarn, stuffing, safety eyes, and your favorite crochet hook. What’s even more fun is how customizable this bee can be. Switch up the colors or add personal details to make each one unique for gifts or keepsakes.
This tiny bee isn’t just a crochet; it’s a joyful creation that brings happiness to anyone who sees it. Whether it’s for yourself, as a gift, or something to sell, this crochet bee is a sweet little project you’ll love to make. It’s time to grab some yarn and let the buzzing fun begin.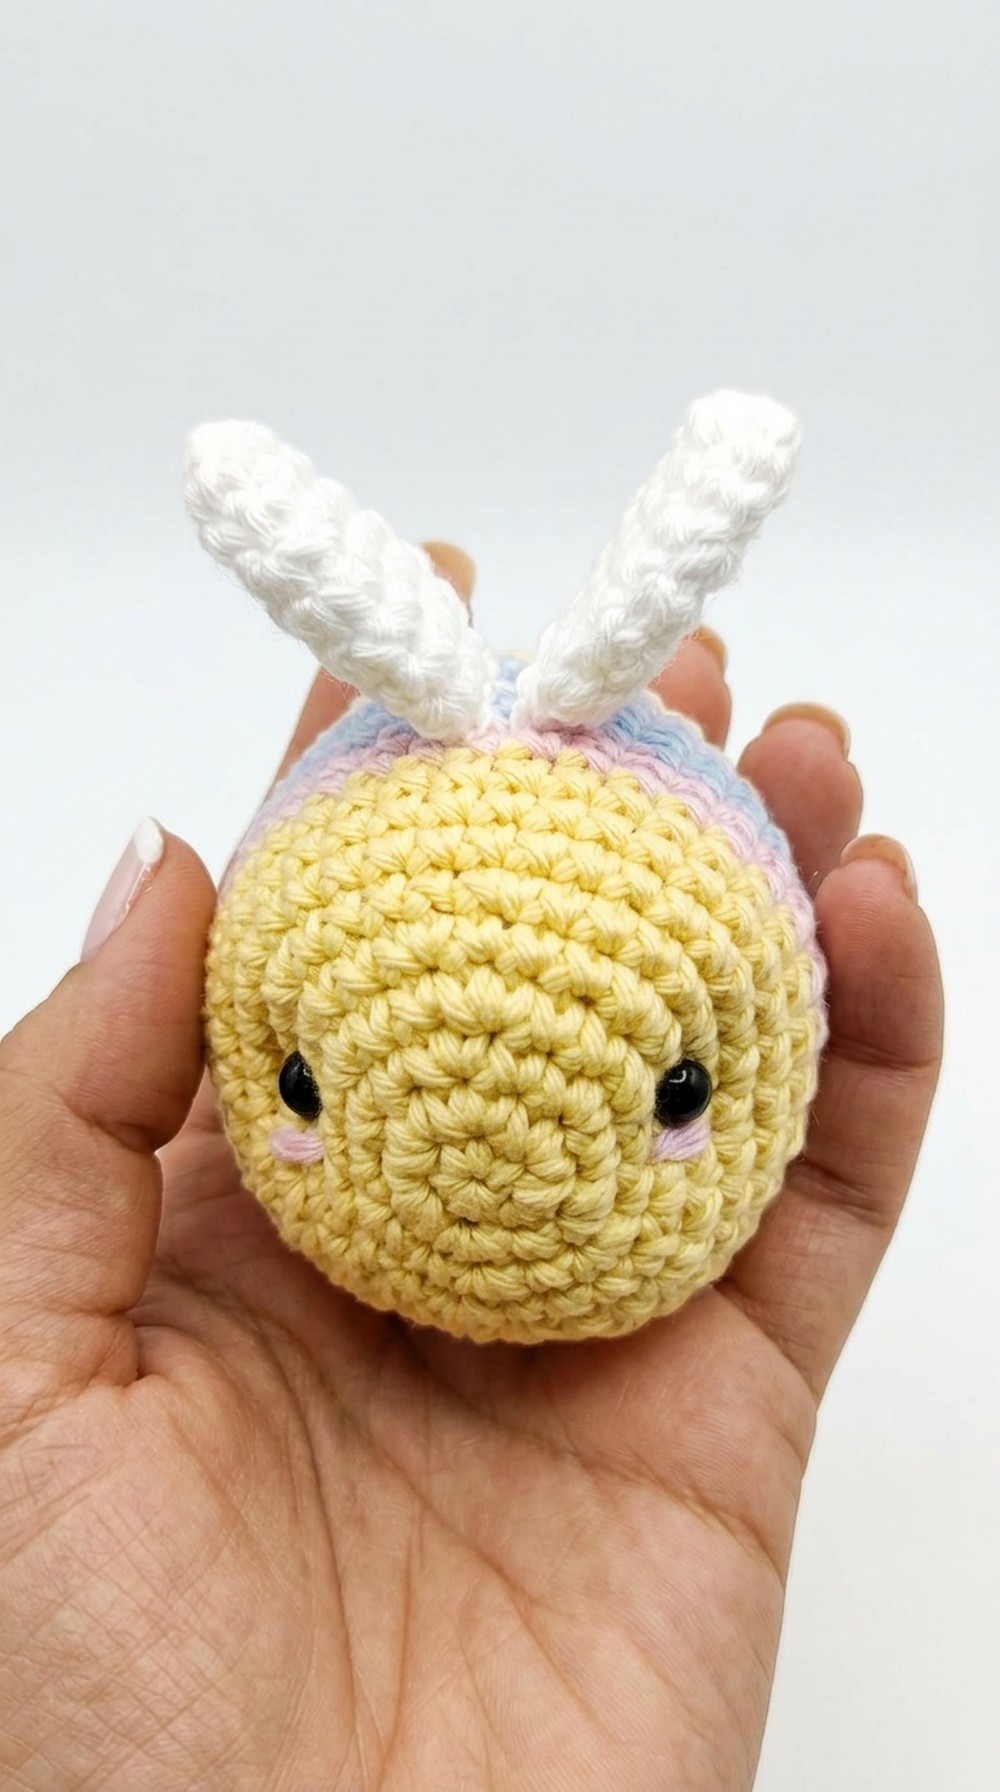
Crochet Bee Amigurumi Pattern
1. Materials
Use all yarns in cotton for a firm and neat finish.
Yarn (cotton, light worsted or similar):
- Yellow pastel
- Pink pastel
- Lilac pastel
- Light blue (celeste) pastel
- White (for wings)
Tools and accessories:
- Crochet hook: 3 mm
- Scissors
- Yarn needle (tapestry or darning needle)
- Stuffing: siliconized fiberfill or similar soft stuffing
- Safety eyes: 5 mm diameter
- Stitch marker
- Keychain ring or small metal chain
- If you do not have a ring, you can make a crochet chain loop instead
- Small amount of pink yarn or embroidery thread for cheeks
- Optional: craft glue or hot glue for fixing safety eyes more firmly
2. Special Techniques Used
You will need to know these basic amigurumi techniques:
- Magic ring / adjustable ring
- Single crochet (sc)
- Increase (inc)
- Decrease (dec)
- Working in rounds
3. Abbreviations
- mr = magic ring
- sc = single crochet
- inc = increase (2 sc in the same stitch)
- dec = decrease (invisible decrease recommended)
- st(s) = stitch(es)
- R = round
4. Body of the Bee Keychain
The body is worked from the top down in one piece, starting with yellow and changing colors to create pastel stripes.
With yellow yarn
R1:
- 6 sc in a magic ring.
Total: 6 sts.
Pull the tail to close the ring tightly and tie a small knot to secure.
R2:
- 6 inc (2 sc in each stitch around).
Total: 12 sts.
R3:
- (1 sc, inc) repeat 6 times.
Total: 18 sts.
R4:
- (2 sc, inc) repeat 6 times.
Total: 24 sts.
R5:
- (3 sc, inc) repeat 6 times.
Total: 30 sts.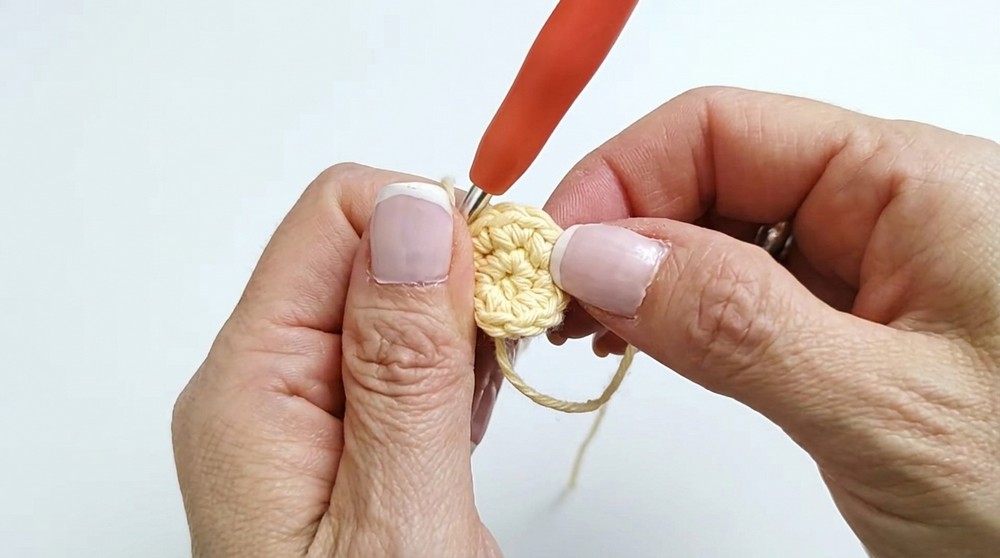
R6:
- 2 sc, inc, then
- (4 sc, inc) repeat around until the end of the round.
Total: 36 sts.
From now on you have a total of 36 stitches around.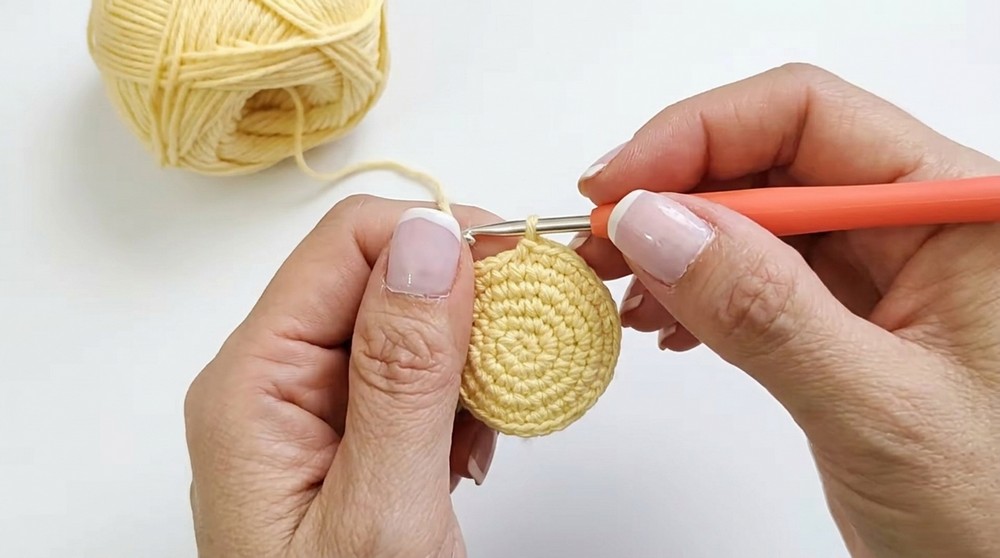
Straight rounds in yellow
R7–R9 (3 rounds):
- 1 sc in each st around (36 sc per round).
Total each round: 36 sts.
Place a stitch marker at the beginning of R7 to keep track.
Color change sequence (pastel stripes)
You will now change colors every two rounds.
Change to pink pastel
Cut the yellow yarn, leaving a small tail to tie. Attach pink pastel yarn.
R10–R11:
- 1 sc in each st around with pink.
Total each round: 36 sts.
Change to light blue (celeste)
Cut the pink yarn. Attach light blue (celeste) yarn.
R12–R13:
- 1 sc in each st around with light blue.
Total each round: 36 sts.
Change to lilac
Cut the light blue yarn. Attach lilac pastel yarn.
R14–R15:
- 1 sc in each st around with lilac.
Total each round: 36 sts.
Change back to yellow
Cut the lilac yarn. Attach yellow pastel yarn again.
R16–R17:
- 1 sc in each st around with yellow.
Total each round: 36 sts.
This completes the pastel stripe pattern on the body.
5. Shaping and Closing the Body
You now begin decreasing to close the body.
R18:
- 2 sc, 1 dec, then
- (4 sc, 1 dec) repeat around.
Total: 30 sts.
R19:
- (3 sc, 1 dec) repeat around.
Total: 24 sts.
R20:
- 1 sc, 1 dec, then
- (2 sc, 1 dec) repeat around.
Total: 18 sts.
At this stage the opening is smaller, and it is the right time to stuff the body.
Stuffing
- Fill the body with siliconized fiberfill.
- Pack the stuffing firmly so the bee feels solid and durable.
- Make sure the shape is even and rounded.
R21:
- (1 sc, 1 dec) repeat around.
Total: 12 sts.
R22 (final round of body):
- 6 dec (one decrease in each pair of stitches).
Total: 6 sts.
Fasten off, leaving a strand that you will use to close the remaining opening.
Closing the opening
- Thread the tail yarn onto the yarn needle.
- Insert the needle through the front loops of the remaining 6 stitches.
- Pull the yarn to close the hole neatly.
- Take the yarn through to another point on the body and weave it in securely.
- Leave a short tail if you plan to tie it later when attaching the wings; otherwise, weave it in completely.

Now the body of the bee is complete.
6. Wings (Make 2)
Use white cotton yarn.
R1:
- 5 sc in a magic ring.
Total: 5 sts.
Tighten the ring and secure with a small knot.
R2:
- (1 sc, 1 inc) repeat twice, then 1 sc.
Total: 7 sts.
R3:
- 2 sc, 1 inc,
- 2 sc, 1 inc,
- 1 sc.
Total: 9 sts.
R4:
- (2 sc, 1 inc) repeat 3 times.
Total: 12 sts.
R5–R6:
- 1 sc in each st around.
Total each round: 12 sts.
R7:
- (2 sc, 1 dec) repeat 3 times.
Total: 9 sts.
R8:
- (1 sc, 1 dec) repeat 3 times.
Total: 6 sts.
Fasten off:
- For one wing, leave a long tail for sewing it to the body and for joining the two wings together.
- For the second wing, you may leave a shorter tail.
You do not need to stuff the wings; they should remain flat.
7. Attaching the Wings
- Place the two wings side by side with the rounded parts facing out.
- Use the long tail from one wing and a yarn needle to stitch the wings together along their inner edges, so they form a pair.
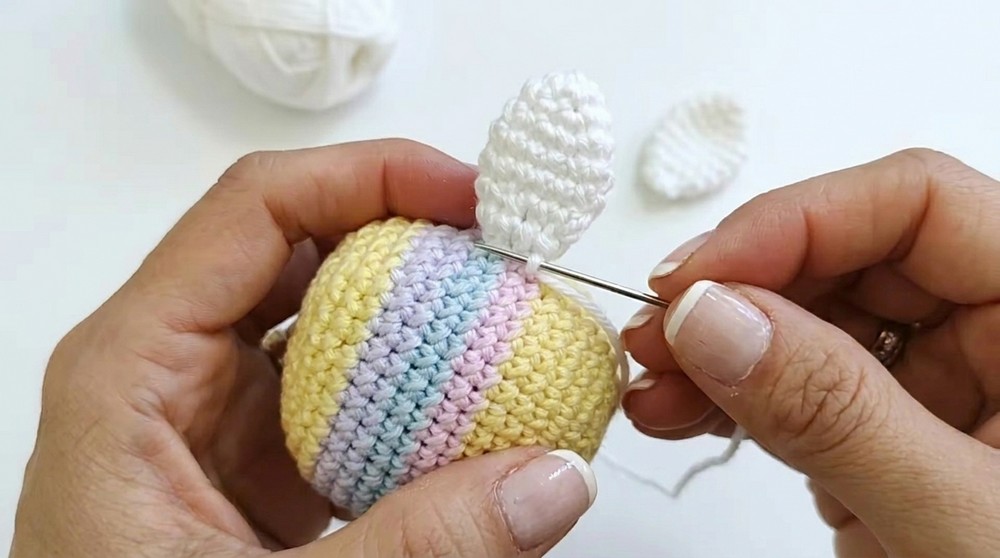
- Position the joined wings on the upper back of the bee.
- In the video, they are attached around rounds 10–12 of the body.
- Sew the wings firmly to the body, taking small, even stitches through both the wing and the body.
- Secure the yarn with a knot hidden inside and weave in the ends.
8. Eyes and Facial Details
Positioning the safety eyes
- Use 5 mm safety eyes.
- Place them between rounds 5 and 6 of the body, on the front.
- Make sure they are evenly spaced.
You may use a bit of glue (if you wish) after inserting the safety eyes from the front and locking them from the inside.
Cheeks
- Use a piece of pink yarn or embroidery thread.
- With your needle, make 2–3 small stitches just under each eye to form a small blush or “cheek” area.
- Pass the thread back through the same path so that both ends meet, tie a neat knot under the eye or inside the body, and weave in the tails so they are hidden.
This detail enhances the cute and soft look of the bee.
9. Adding the Keychain
You can choose one of two options:
- Metal ring or metal chain
- Insert a small metal ring or chain at the top of the bee’s body, passing it under one or two stitches at the center.
- Attach the keyring to the chain.
- Crochet chain loop
- With yellow yarn, join to the top center of the body.
- Chain enough stitches to form a loop (for example, 15–25 chains depending on desired length).
- Slip stitch back into the starting point to close the loop.
- Fasten off and weave in the ends securely.
- Attach the keyring to this loop if desired.
Ensure the loop or ring is well secured because, as a keychain, the piece will experience frequent movement and tension.
10. Finishing the Pattern
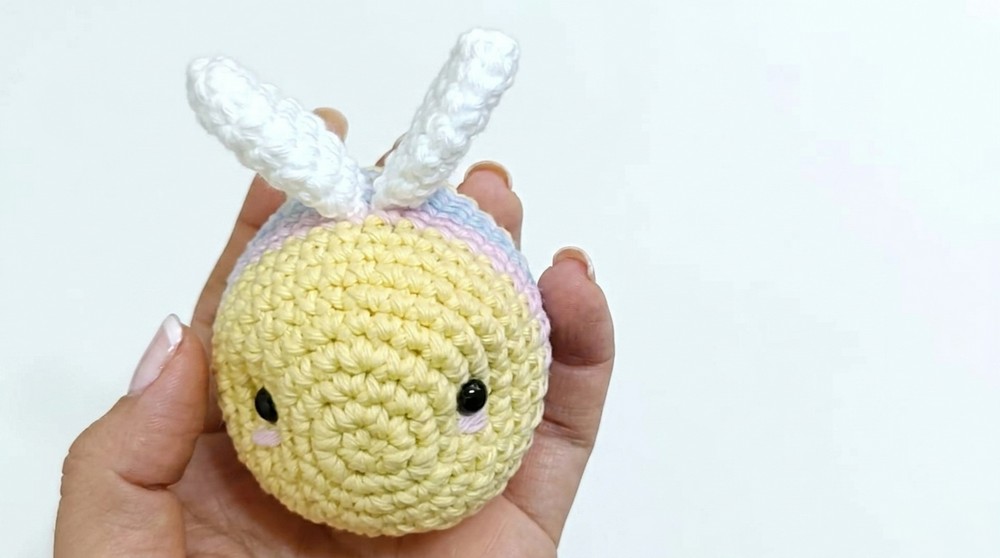
- Check all seams (wings, face details, keychain attachment) to ensure they are secure.
- Make sure there are no loose ends of yarn sticking out.
- Adjust the stuffing if the shape feels uneven; you can gently press and shape the bee with your hands.
- Trim any extra yarn tails that are already woven in.
11. Tips to Maintain the Pattern and the Finished Item
- Yarn choice
- Cotton yarn is recommended because it is strong, holds its shape, and resists pilling, making the keychain more durable.
- Stuffing firmness
- Stuff the body firmly so it does not deform with movement.
- However, do not overstuff to the point that stitches stretch excessively.
- Secure attachments
- Sew wings, loop or keychain ring, and facial embroidery very firmly.
- Keychains are handled often; strong stitching prevents pieces from loosening.
12. Final Words
This bee keychain pattern is designed to be simple yet charming, with soft pastel colors, a round and cuddly body, and cute wings and cheeks that make it very appealing.
