Spruce up your hairstyle with a free crochet scrunchie pattern to create soft, colorful, and stylish scrunchie, perfect for fun outfits or handmade gifts.
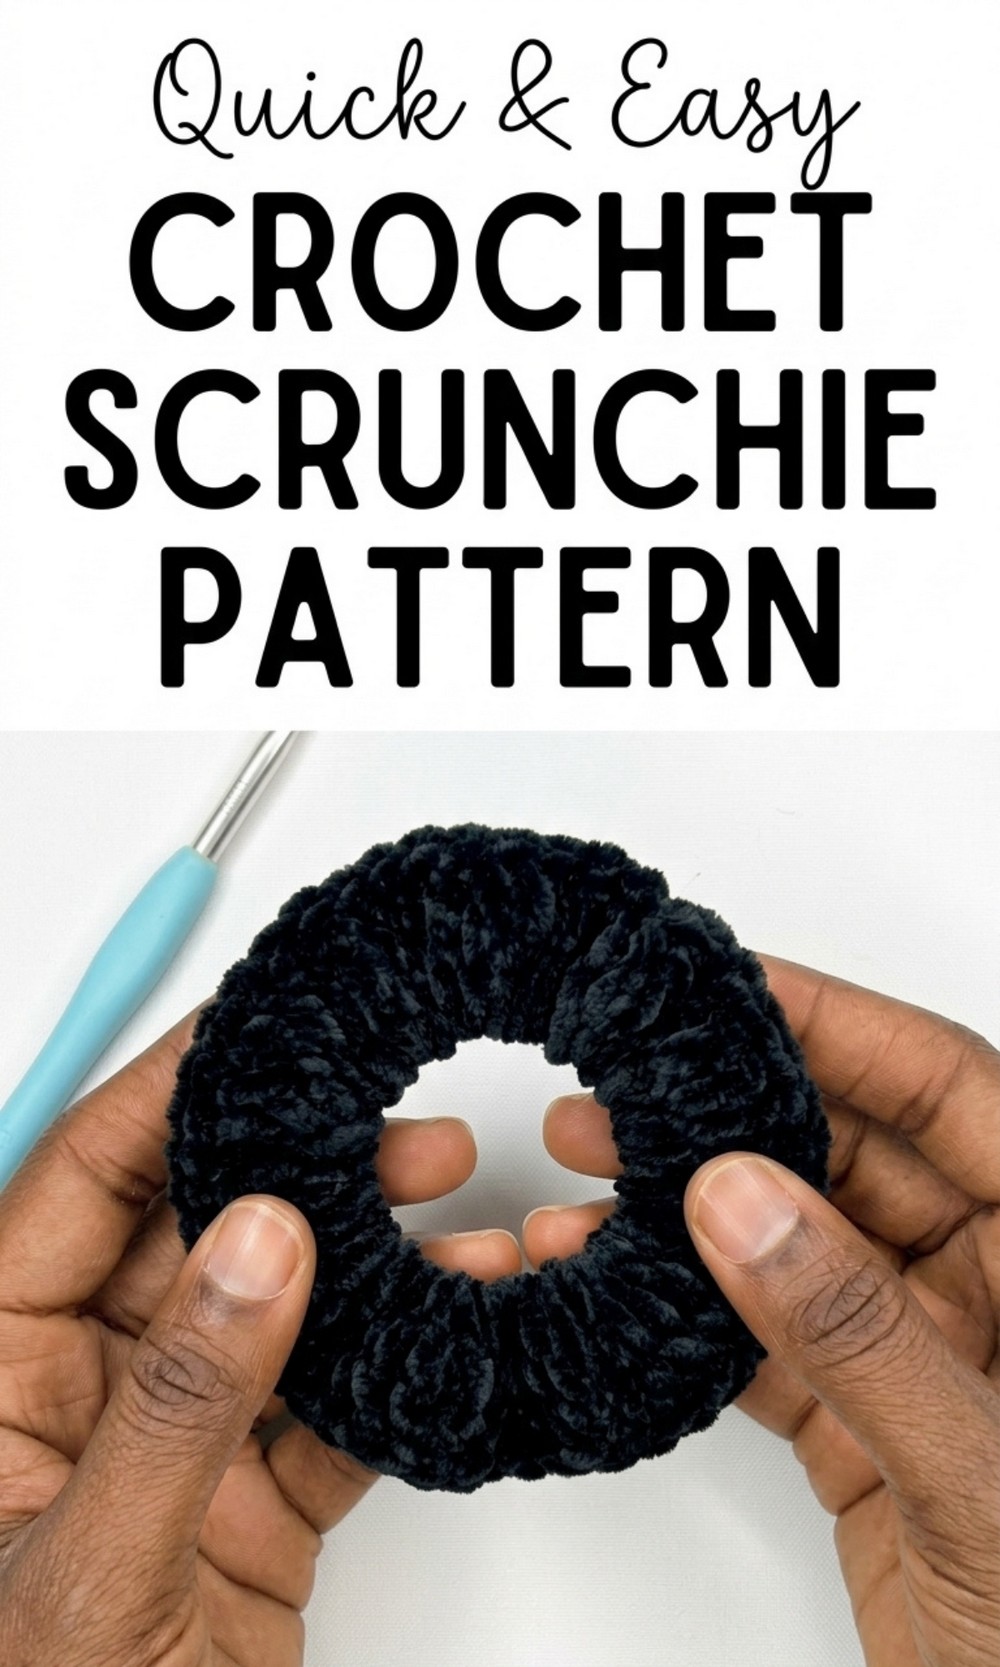
Free Crochet Scrunchie Pattern That’s Soft, Fun, and Cute
It is a soft, stylish hair tie that you can easily make with a free crochet scrunchie pattern. Using a stretchy elastic band and smooth velvet yarn, the scrunchie feels gentle on your hair and looks shiny and elegant. It fully wraps around the band, hiding it while giving a fluffy and trendy appearance. 
The pattern is beginner friendly, with simple steps like slip stitches and single crochets, making it fun and quick to create. It holds your ponytail or bun comfortably without pulling or hurting your hair, making it perfect for school, home, or parties.
Its beauty and softness make it a popular choice, and it can match any outfit. It’s also a thoughtful, handmade gift for friends and family, showing your creativity while giving them something they’ll love.
Stunning Crochet Scrunchie Pattern
Materials
- Crochet Hook: 5.5 mm
- Elastic Hair Band: Ensure it is very stretchy for the best results.
- Yarn: Velvet yarn (or any soft and slightly thick yarn of your choice).
- Scissors: For cutting the excess yarn.
- Tapestry Needle: For weaving in the yarn ends.
Special Techniques
- Slip Stitch (sl st): Insert the hook into the stitch, yarn over, pull through the loop and the loop on the hook.
- Single Crochet (sc): Insert the hook into the stitch, yarn over, pull through the loop (two loops on the hook). Yarn over and pull through both loops.
- Double Crochet (dc): Yarn over, insert the hook into the stitch, yarn over, pull through (three loops on the hook). Yarn over, pull through the first two loops, yarn over, and pull through the remaining two loops.
Step by Step Pattern
Step 1: Preparing the Yarn and Elastic Band
- Start by removing a little bit of the fluff from the tip of the velvet yarn to expose the thread. This will make it easier to work with.
- Hold your elastic hair band in one hand and the end of your yarn in the other.
Step 2: Starting the Scrunchie
- Make a Slip Knot: With the yarn and hook, create a slip knot on your hook. Secure the yarn to the elastic band by pulling it through.
- Secure the Yarn to the Band: After pulling the yarn through the band, create one chain to secure the yarn tightly around the band.
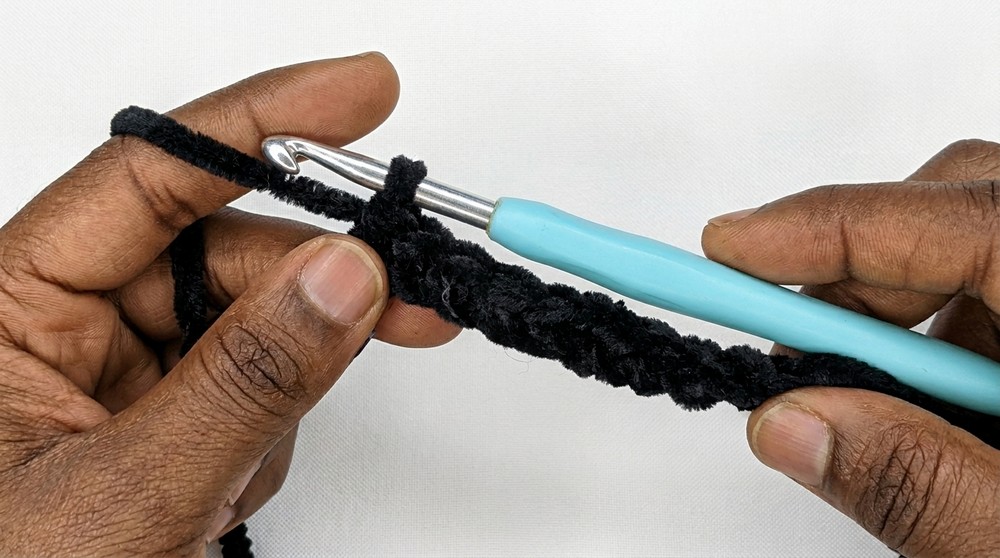
Step 3: First Row – Single Crochet Around the Band
- Begin working Single Crochet (sc) stitches around the elastic band.
a. Insert the hook under the elastic band and yarn over.
b. Pull the yarn through to create a loop on your hook (two loops now on the hook).
c. Yarn over again and pull through both loops on the hook to complete one single crochet. - Repeat this step to create 40 single crochets around the entire elastic band. Be sure to pull the stitches snug but not too tight.
- Adjust if Needed: If you notice the yarn is not covering the entire band or there isn’t enough space for 40 single crochets, gently pull the yarn back to create more room on the band. Add the remaining single crochets to reach your total of 40.
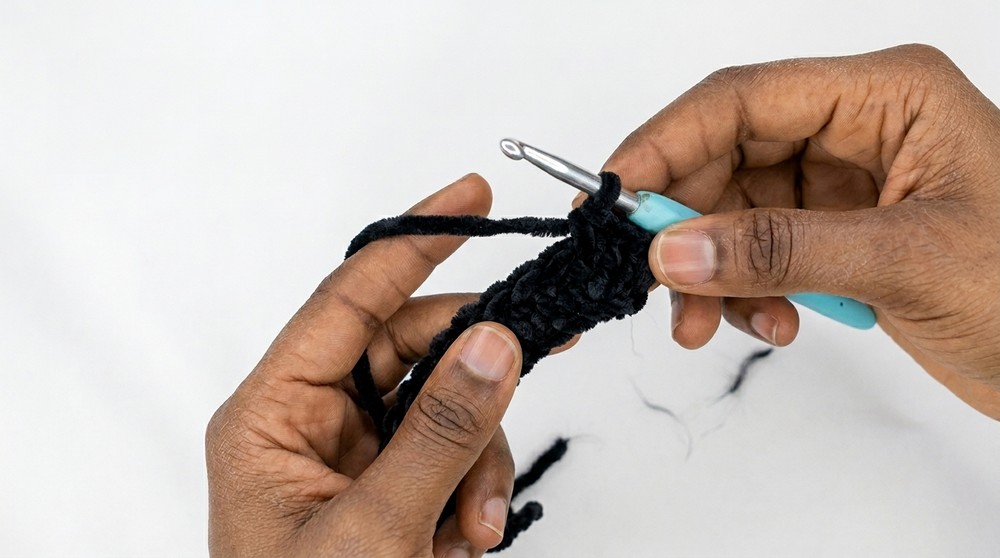
Step 4: Closing the First Row
- Once all 40 single crochets are complete and the band is completely covered, make a slip stitch into the first single crochet of the row to close the round.
Step 5: Second Row – Adding Volume
- Begin the second row by chaining three (this counts as the first double crochet of the next row).
- In every chain space from the first row, make three double crochets (dc):
a. Yarn over, insert the hook into the chain space, yarn over, and pull through.
b. Yarn over, pull through the first two loops on the hook.
c. Yarn over, pull through the last two loops on the hook.
d. Repeat this step two more times in the same chain space to create three double crochets. - Continue making three double crochets in each chain space all the way around.
Step 6: Completing the Second Row
- As you approach the end of the second row:
a. In the last chain space, make only two double crochets.
b. The initial chain 3 from the beginning of this row acts as the third double crochet for this last chain space. - Close the second row by making a slip stitch in the top of the starting chain 3.
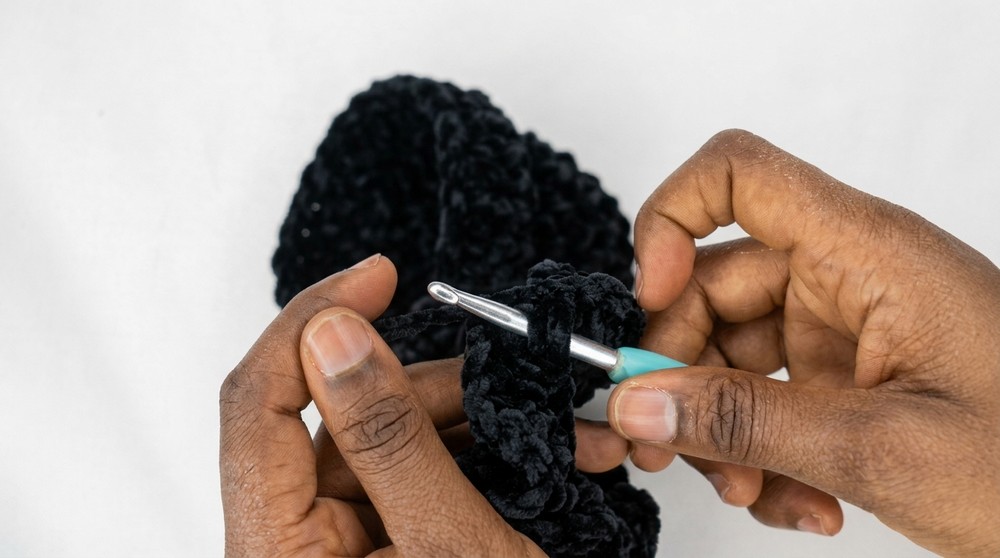
Step 7: Finishing the Scrunchie
- Cut the yarn, leaving a small tail, and pull it through the final slip stitch to form a knot.
- Bring the tail from the end of the yarn up close to the starting tail at the beginning of your work.
a. Begin tying the two tails together. First, make a loose knot to secure them.
b. Tie the knot 2–3 more times, ensuring the final knot is tight.
Step 8: Hiding the Yarn Tails
- Using your tapestry needle, carefully weave the excess yarn tails into the back of the stitches, ensuring they are well hidden to avoid unraveling. Take your time with this step.
- Once the yarn has been securely tucked, use scissors to cut off the excess yarn.
Finishing
- Your scrunchie is now complete! Admire your work and give it a final check to ensure the stitches are even and the yarn ends are tucked in properly.
- If you’d like, try stretching the scrunchie gently to ensure the elastic band is still flexible and functional.

Final Words and Tips
- Color Choice: Experiment with different colors of velvet yarn to match your outfits or create multiple scrunchies for different looks.
- Yarn Type: If you’re not using velvet yarn, any soft and slightly bulky yarn would work well. Just ensure it’s comfortable for hair accessories.
- Tightening: When tying the yarn tails, ensure they are snug but not over tightened as this may warp the shape of the scrunchie.
- Practice Makes Perfect: If you’re new to crochet, practice single and double crochet stitches on some scrap yarn before starting to ensure your stitches are consistent.
A handmade scrunchie is not only a fun and creative project, but it’s also a practical accessory that can elevate your everyday hairstyle.