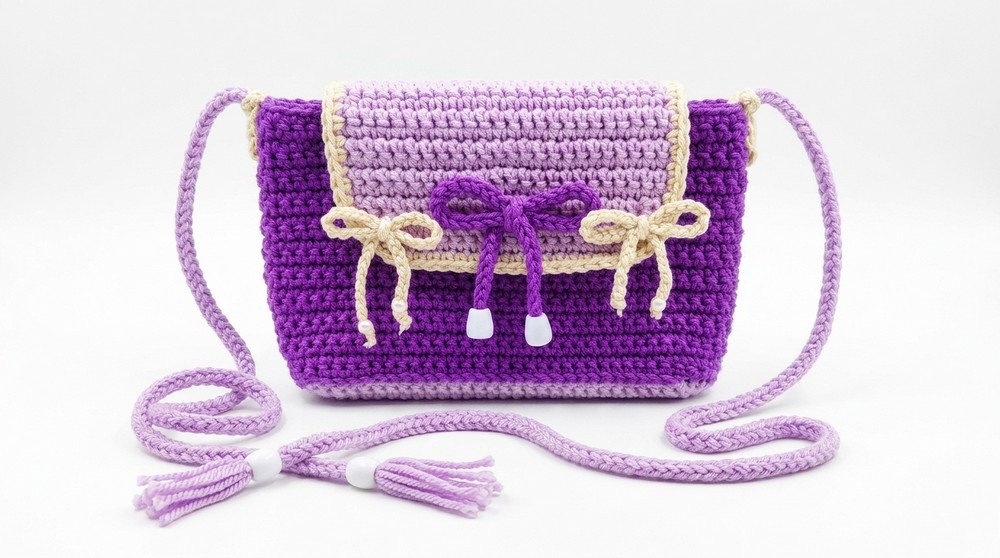
Hook a stylish and strong crochet bag for all your favorite things with this free pattern that helps you finish your own cool and handy accessory very quickly.
Gorgeous Free Crochet Bag Pattern You’ll Want to Use Every Day
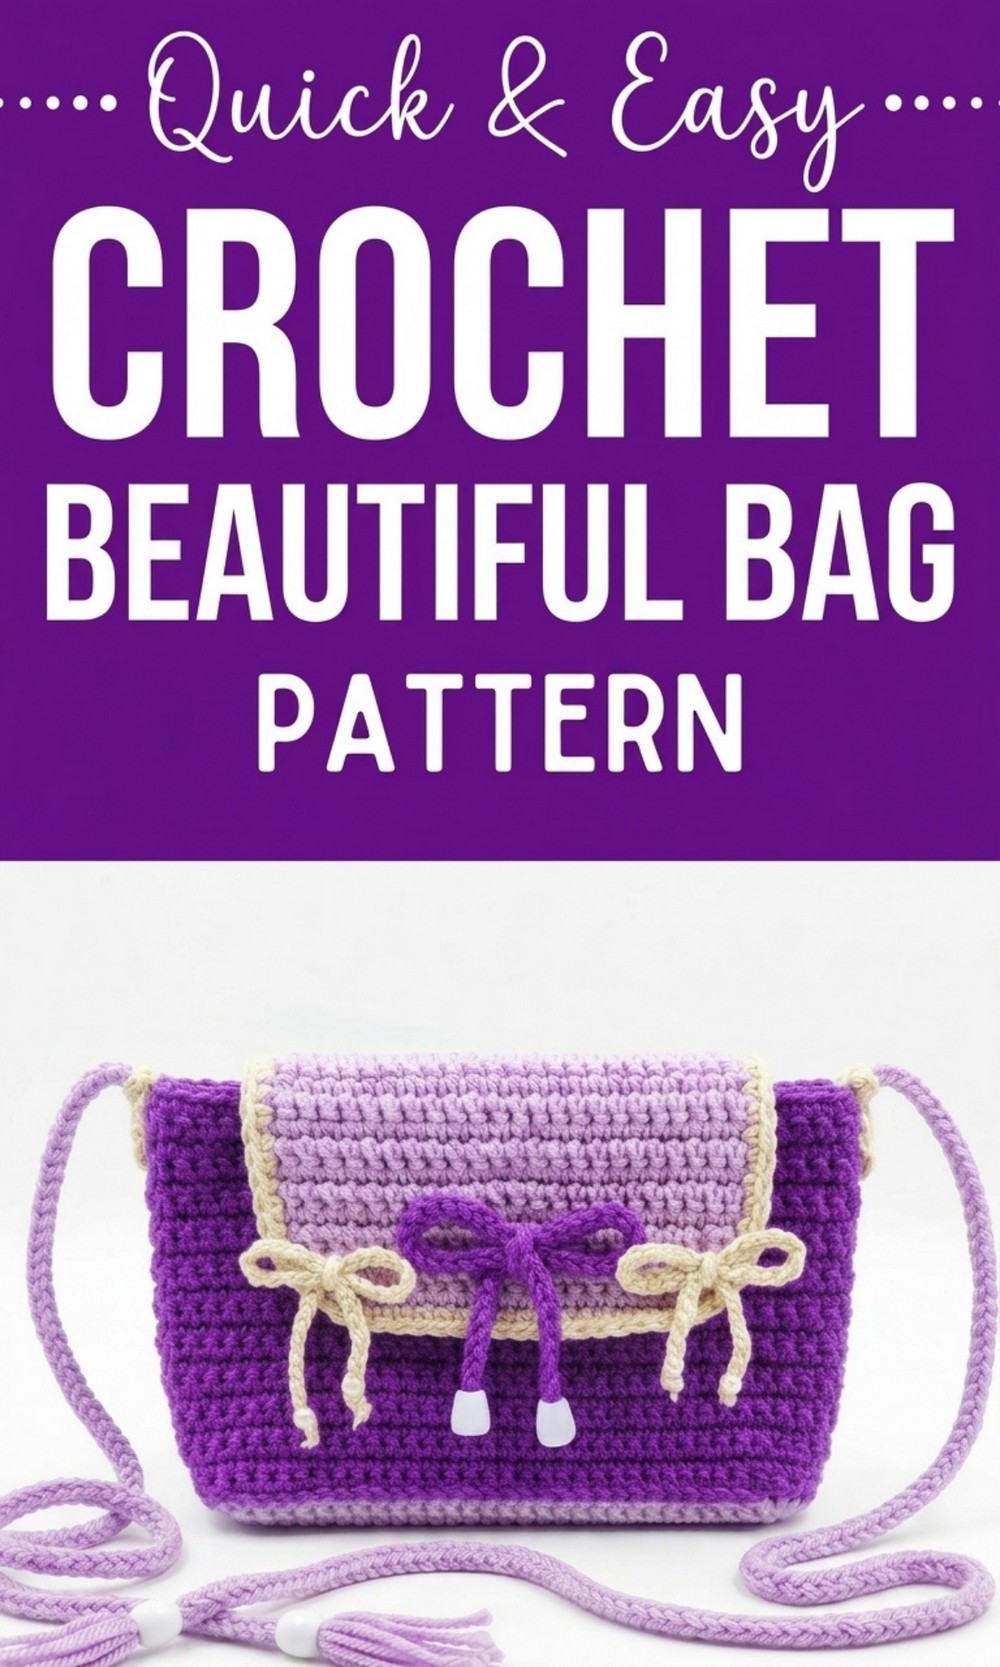
This free crochet bag pattern shows how to make a simple and pretty bag using easy steps and clear rows of single crochet. The bag has a neat box shape, a soft body and a nice flap lid that closes with a magnetic button so your things stay safe.
You can use it to carry your phone money keys or small books and it is light to hold. The bag looks beautiful with two or more yarn colors such as cream purple and light purple and you can add ribbons and rope for extra charm.
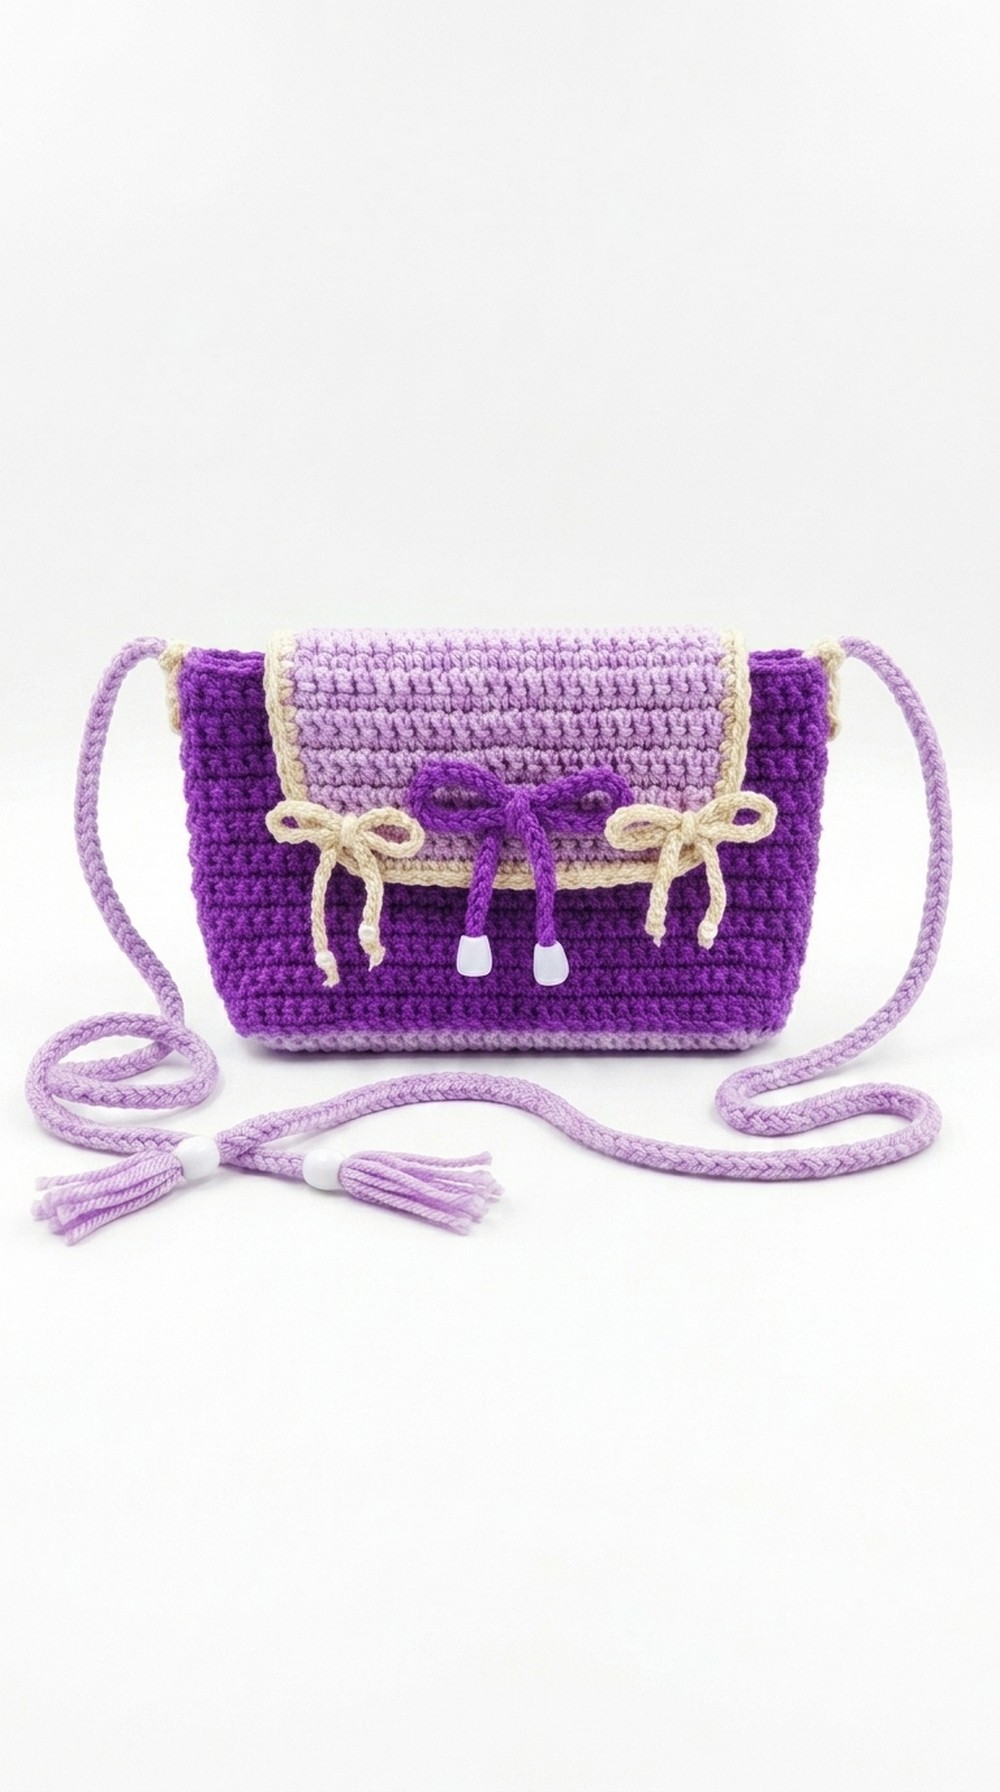 Side ears and an adjustable strap make it practical to use every day. This pattern is a good choice for beginners and students who want a useful and stylish handmade bag.
Graceful Free Crochet Bag Pattern
Materials Needed:
- Milk Cotton Yarn: Choose one base color (e.g., cream) and secondary colors (e.g., purple and light purple)
- Crochet Hook: 6/0 (Tulip Gold)
- Scissors
- Tapestry Needle
- Magnetic Button (for flap closure)
- Optional Ribbon Decorations: Romanian rope and chain
Step 1: Base Sheet Crochet
- Slip Knot & Chain Foundation:
- Create a slip knot.
- Make 31 chains (30 foundation chains + 1 turning chain).
- Row 1:
- Work a single crochet (SC) into each of the 30 foundation chains (skip the additional turning chain).
- Ensure you have 30 single crochets in Row 1.
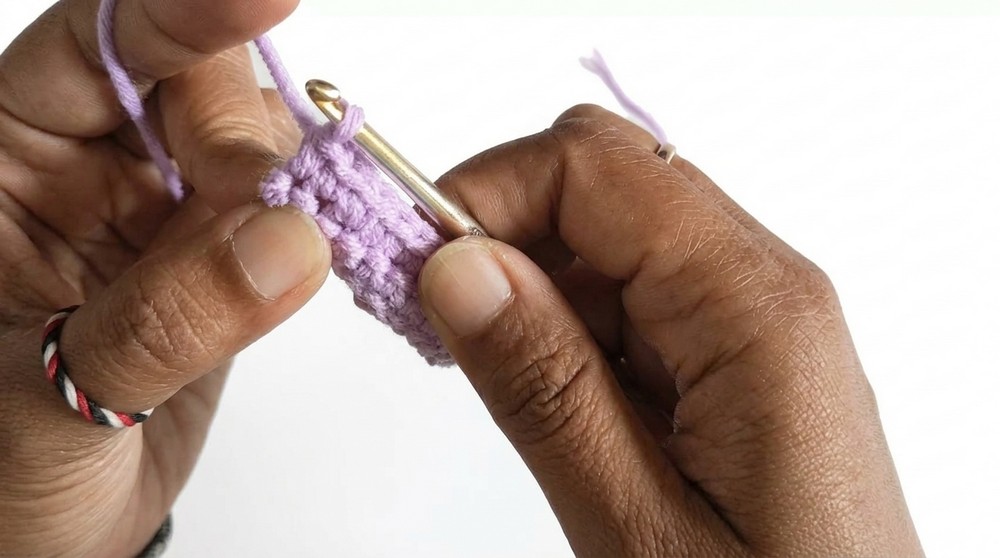
- Row 2:
- Chain 1, reverse the work.
- Insert the hook into each stitch across and work 30 single crochets.
- Rows 3–9:
- Repeat the same method as Row 2: chain 1, turn, and work 30 single crochets.
- After Row 9 is complete, chain 1 and fasten off the yarn using scissors.
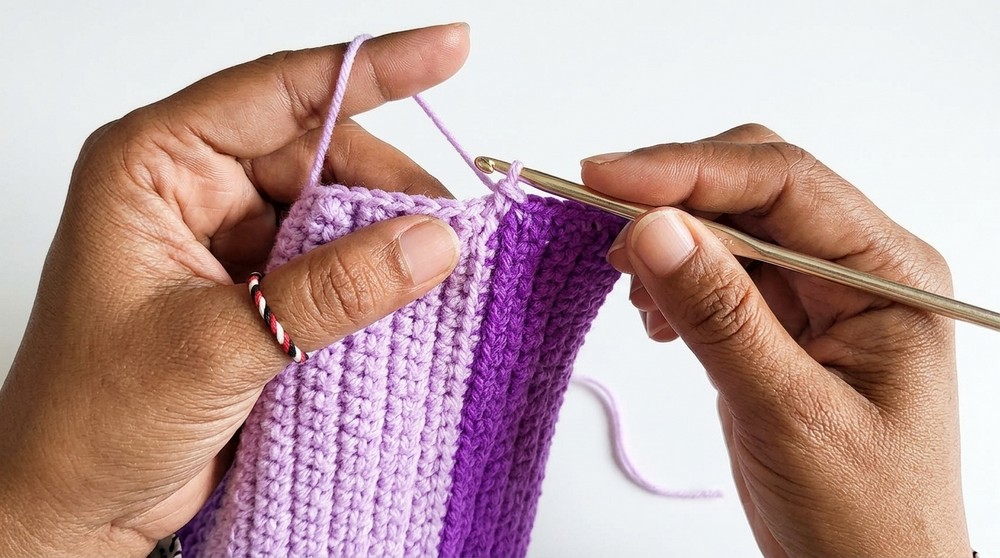
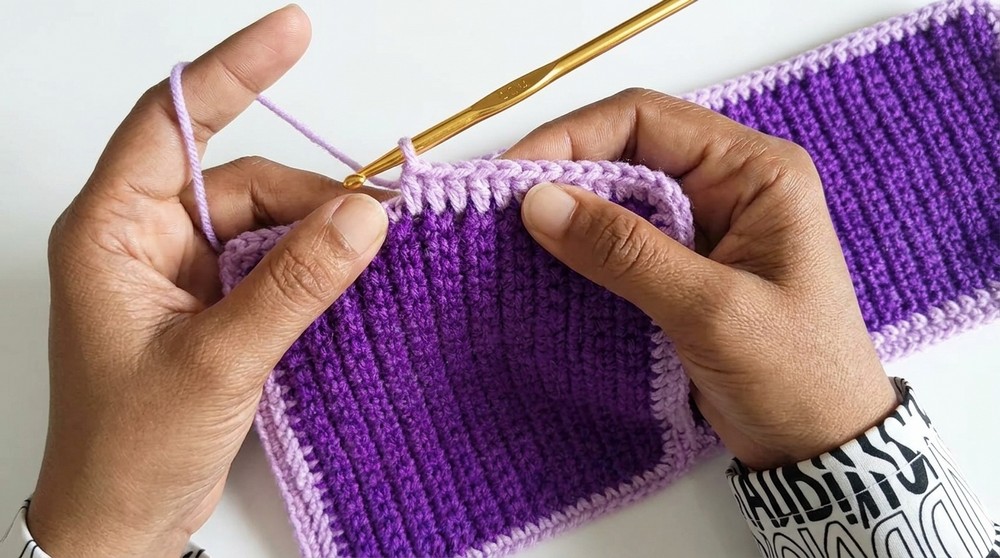
Step 2: Add Purple Trim
- Join Purple Yarn & Start Chain Foundation:
- Create a slip knot with purple yarn.
- Work 4 chains.
- Slip Stitch Row:
- Insert your hook into the last stitch from Row 9.
- Work 30 slip stitches across the edge.
Step 3: Build the Second Section
- Chain Foundation:
- Work 5 chains; this marks the first chain of the new section.
- Row 1 (Second Section):
- Turn and work 4 single crochets into the 5 chains.
- Work Rows Adding Light Purple Yarn:
- For Row 9 and onward, add light purple yarn.
- Continue working 30 single crochets in light purple for this section.
- Rows 2–23:
- Chain 1, reverse, and work 38 single crochets per row until Row 23.
- After finishing Row 23, chain 1 and fasten off the yarn.
Step 4: Flap/Lid Construction
- Position Markers:
- Fold the crocheted sheet in half. Position the markers by counting and marking a total of 23 stitches in the middle.
- Row 1 (Flap):
- Attach yarn at the first marker and insert the hook into the back loop of each stitch.
- Chain 1, then crochet 24 single crochets into the back loops only.
- Repeat Rows for the Flap:
- Rows 2–11: Chain 1, reverse, and work 24 single crochets per row.
- Flap Shaping (Decrease Rows):
- Row 12: Chain 1, reverse. Work single crochet decrease at the beginning and end of the row, and 20 single crochets in between.
- Row 13: Perform single crochet decrease at the start and end, along with 18 single crochets.
- Row 14: Repeat the method to create 16 stitches.
- Row 15: Work 14 single crochets, with decreases at the beginning and end, for a total of 16 stitches.
- After Row 15, chain 1 and fasten off the yarn.
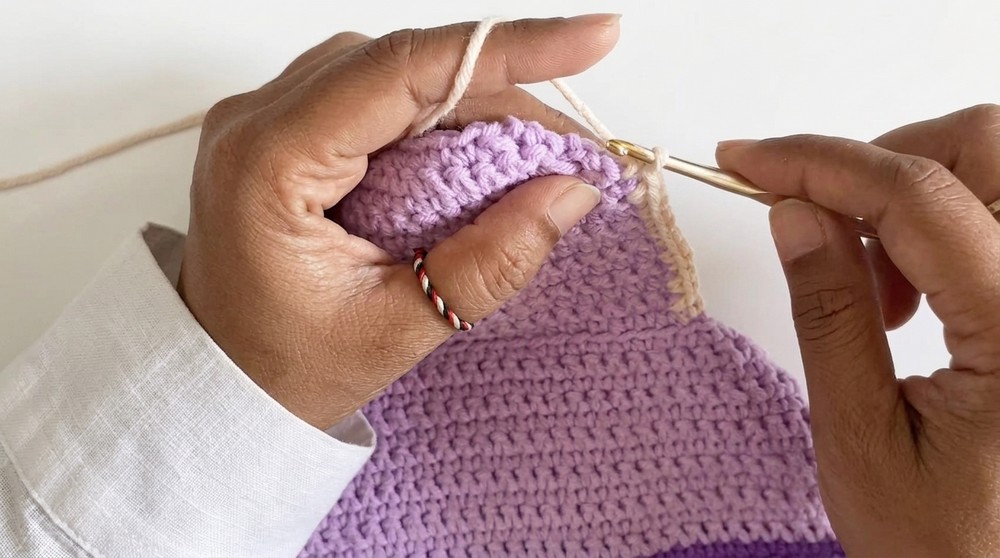
Step 5: Edging Around Flap
- Cream Yarn Edging:
- Use cream yarn for the decorative edge along the flap.
- Work into the curved edge by crocheting:
- 11 single crochets on the straight edge.
- Alternating single crochet + chain 1 (repeat 5 times) along the curve.
- 14 single crochets on the other straight edge.
- Secure with a slip stitch and fasten off.
Step 6: Assembly of Bag
- Join Side Panels:
- Fold the sheet into half.
- Attach the base yarn at one end and join both sides using 22 single crochets along the vertical seam.
- Join Bottom Seam:
- Fold the bottom edges together.
- Work 4 chains, followed by 9 single crochets along the bottom seam.
- Repeat for the Other Side:
- Join the opposite side and bottom using the same method.
Step 7: Final Details
- Attach the Flap Closure:
- Securely attach the magnetic button to the flap and the bag body to create a secure closure.
- Create Handles:
- Make 2 small ear loops on the sides.
- Crochet 3 single crochets back and forth for 15 rows.
- Sew them to the bag using a tapestry needle.
- Attach adjustable straps to the loops.
- Make 2 small ear loops on the sides.
- Decorative Elements:
- Add ribbons or Romanian rope as decoration to the exterior, if desired.
- Add ribbons or Romanian rope as decoration to the exterior, if desired.
Finishing Instructions
- Secure All Loose Ends:
- Use a tapestry needle to weave in all remaining loose threads.
- Trim any excess yarn.
- Turn the Bag Right Side Out:
- Ensure that all seams are neatly aligned.
Final Words and Tips:
- Durability Tip: Ensure that your slip stitches and single crochets are tight to give the bag strength and structure.
- Maintenance: Hand wash with mild detergent; avoid machine washing to maintain the bag’s shape and texture.
- Customization: Experiment with different yarn colors and decorative ribbons to make the bag unique and personal.
This pattern offers a straightforward way to make a functional and stylish bag perfect for everyday use or gifting.