Charm your heart with this Free Crochet Kitty in Red Dress Pattern and make a cute, stylish piece perfect for delightful decor.
Hello Kitty has enchanted generations with her timeless charm, and this free crochet Kitty in red dress pattern brings her to life in an irresistibly delightful way. With her playful apple-themed hoodie and signature red dress, this design seamlessly combines elegance and whimsy, making it a standout piece for gifting, decorating, or simply adding a magical touch to your crochet creations.
Free Crochet Kitty In Red Dress for Your Next Sweet Project
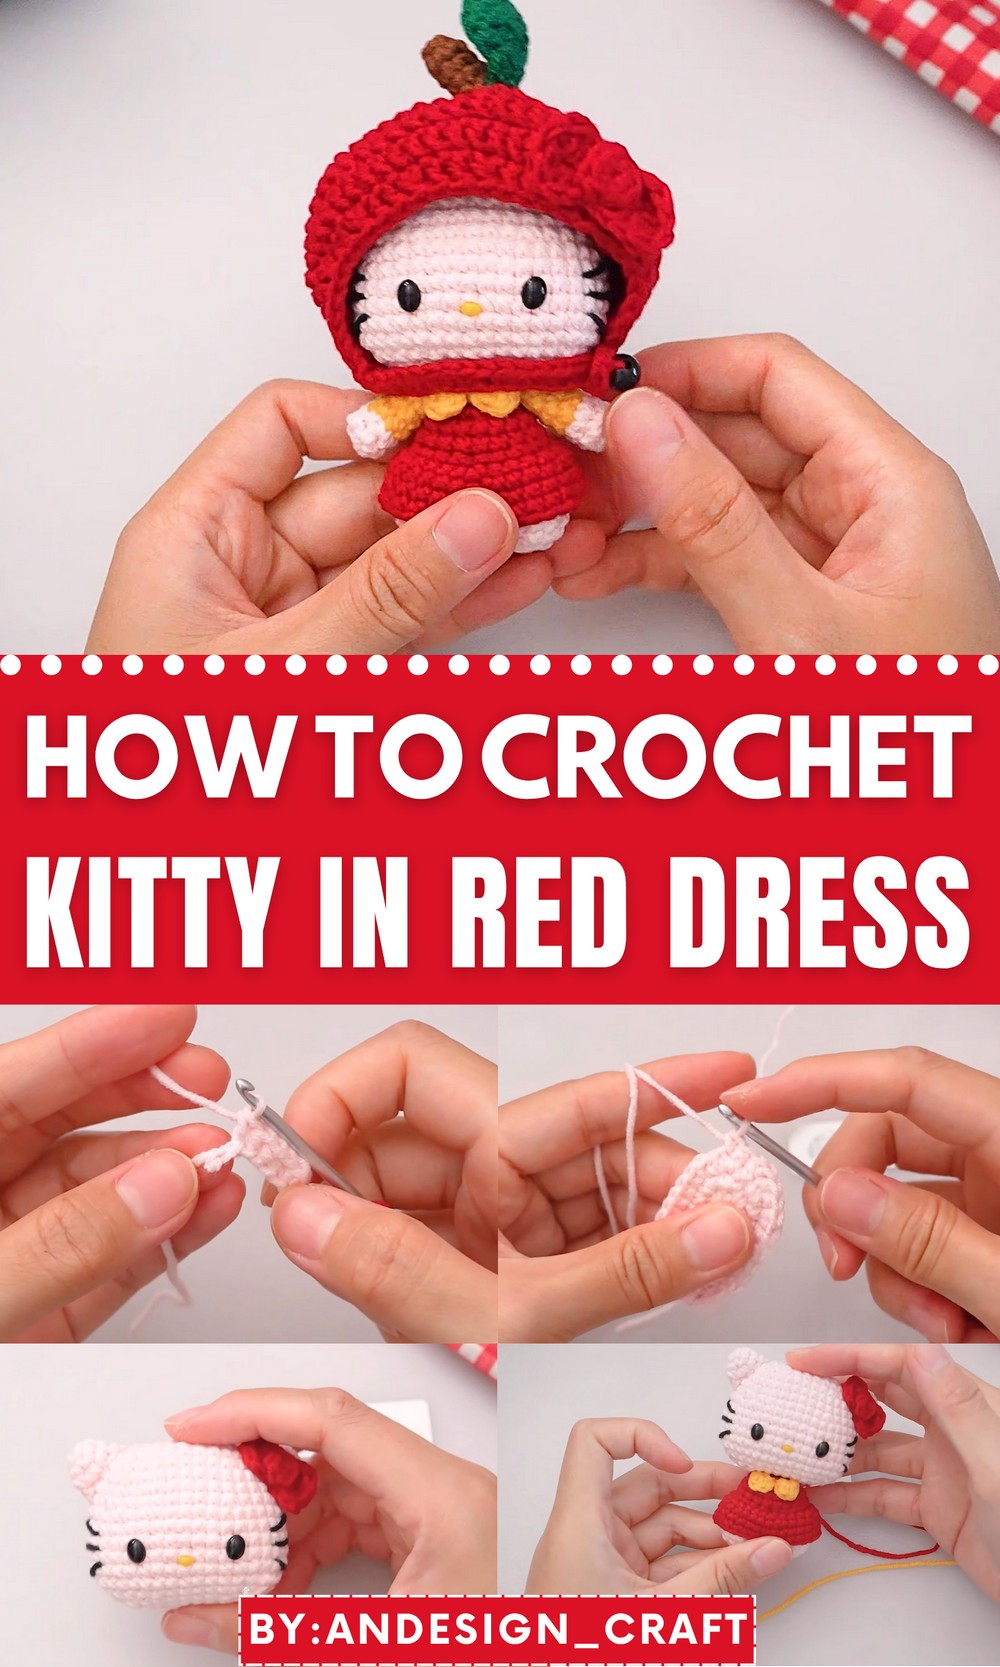
The pattern celebrates the details that make Hello Kitty iconic, from her rounded head with soft curves and embroidered whiskers to the petite ribbon adorning her ear, every stitch contributes to her lovable personality. The intricate apple hoodie, with its vibrant red tones, green leaf, and textured stem, adds a heartwarming touch that sets her apart from traditional designs.
A charming addition to any collection or gift basket, this project offers not just beauty but the joy of creating something truly unique. By maintaining consistent stitch tension and focusing on symmetry, visitors to your home or recipients of your gift are sure to fall in love with her all over again.
Crochet Hello Kitty Pattern
Finished Size:
- Approximately 12-15 cm (5-6 inches) tall when using the specified yarn and hook size.
Skill Level:
Intermediate – Includes basic increases, decreases, and assembly of various parts.
Materials:
- Yarn:
- 4-ply cotton yarn:
- Pink: For the head, body, and legs (optional: white for the classic version).
- Red: For the dress and ribbon.
- Yellow: For the collar and nose.
- Green: For apple stem and leaf.
- Brown: For the apple stem.
- Optional: Blue and contrasting colors for the classic Hello Kitty look.
- 4-ply cotton yarn:
- Hook:
- Recommended: 3.0 mm crochet hook.
- Eyes and Nose Beads:
- 7 mm oval-shaped black eyes.
- 4 mm oval-shaped yellow nose.
- Notions:
- Polyester fiberfill for stuffing.
- Stuffing tool: Optional, but helps reach small areas.
- Needle: Wire needle or tapestry needle for sewing parts together and embroidery.
- Scissors.
- Optional:
- Stitch marker to mark the round’s first stitch.
- Lighter (for securing eye beads, only for non-children plushies).
Gauge:
- 6 sc x 7 rows = 2.5 cm (1 inch) in continuous rounds.
- Gauge is important for sizing; adjustments in yarn weight or hook size will alter the final size.
Abbreviations (US Terminology):
- ch = chain
- sc = single crochet
- sl st = slip stitch
- inc = increase (2 sc in the same stitch)
- dec = invisible decrease (sc 2 stitches together in front loops)
- hdc = half double crochet
- dc = double crochet
- tr = treble crochet
- st(s) = stitch(es)
Special Notes:
- Work in Continuous Rounds: Work in a spiral unless otherwise stated. Use a stitch marker if needed.
- Color Changes: For smooth transitions, use the “yarn under” technique when alternating colors.
- Customization: You can make this project uniquely yours by experimenting with colors for the dress, ribbon, or apple hoodie.
Pattern Instructions:
1. Head:
- Foundation Chain:
- Ch 6.
- Round 1:
- Work into the back bump of the chain:
- Inc in the first stitch.
- 4 sc in the next 4 sts.
- Inc x3 in the last stitch.

- Rotate to the other side of the chain.
- 4 sc back down.
- Inc in the last st. (Total: 14 sts)
- Sl st to the first st.
- Work into the back bump of the chain:
- Round 2:
- Ch 1, in the first stitch: 2 inc.
- 4 sc in the next sts.
- Inc x3 in the next sts.
- 4 sc.
- Inc in the last st. (Total: 20 sts)
- Sl st to the first st.
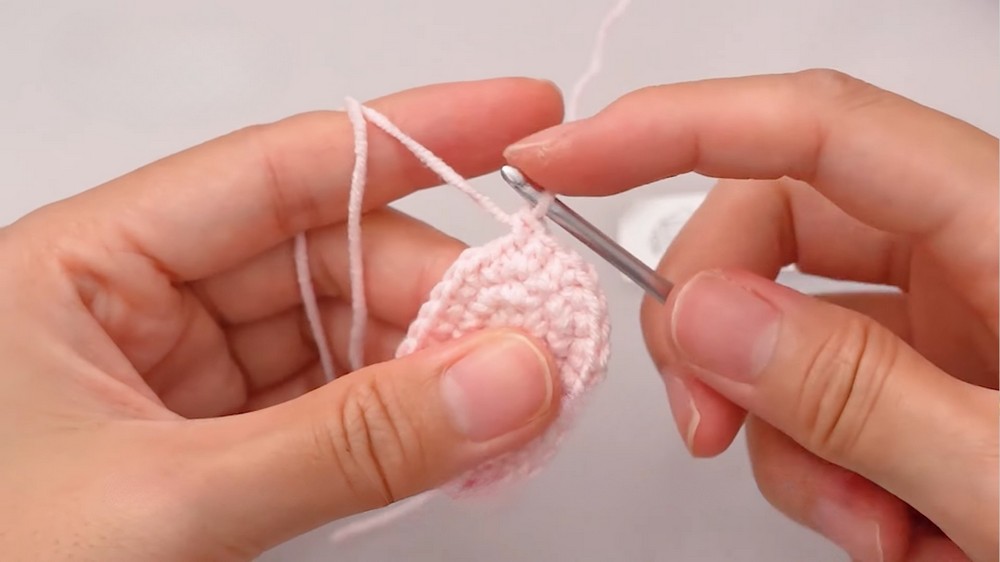
- Sl st to the first st.
- Round 3:
- [1 sc, 1 inc] x2, 4 sc, [1 sc, 1 inc] x3, 4 sc, [1 sc, 1 inc]. (26 sts)
Continue increases and shaping until Round 13.
Stuff the head firmly once increasing rounds are complete.
- Round 14 (Decreases):
- [3 sc, 1 dec] x6. (32 sts)
- Insert Features:
- Eyes Placement:
- Between Rounds 10-11, about 7 stitches apart.
- Nose Placement:
- Between Rounds 11-12 at the center.
- Eyes Placement:
- Rounds 15-16:
- Follow decrease sequences to shape and close the head.
- Weave in ends neatly to secure.

2. Body & Legs:
- Legs (Make 2):
- Magic Ring: 6 sc.
- Round 1: Inc in each st (12).
- Round 2-3: sc in each st.
- Alternate pink and red for color changes.
- Red yarn for Round 4, sc = skirt outline.
- Joining Legs:
- Sl st the two legs together and continue working the body in the round.
- Body Rounds:
- Round 5-10:
- Red sc in FLO for the dress detail. (Continue 24 sts)
- Attach tail in Round 7.
- Round 5-10:
- Dress Ruffles:
- Attach to FLO of Round 5, alternate stitches with [3 sc, 1 inc].
3. Arms:
- Magic Ring: 6 sc.
- Rounds 1-3:
- Yellow on Round 2 for sleeve detail.
- Attach arms to the body at appropriate positions.
4. Ribbon:
- Magic Ring: Work 7 sc.
- Bow Flaps. Shape with:
- Dc, tr, hdc into specific sts.
- Assemble: Place round center bead in the middle, attach above ear.

5. Apple Hoodie:
- Magic Ring Base:
- 12 dc.
- Rounds 2-7:
- Seamlessly increase for a fitted hood. Add leaf motif to center top.
Finishing:
- Assembly:
- Carefully center and sew the head on the body.
- Attach arms, ribbon, hood, and tail.
- Details:
- Embroider whiskers.
- Add optional facial expressions.

Conclusion & Tips:
Creating Hello Kitty with a Red Dress and Apple Hoodie offers a fun way to add character to your crochet projects. For advanced crocheters, explore mixing different textures (e.g., soft yarn for the apple).
- Tip: Use green tones for vibrant leaf details.
- Customization: Swap red for blue or striped dresses for seasonal creations.