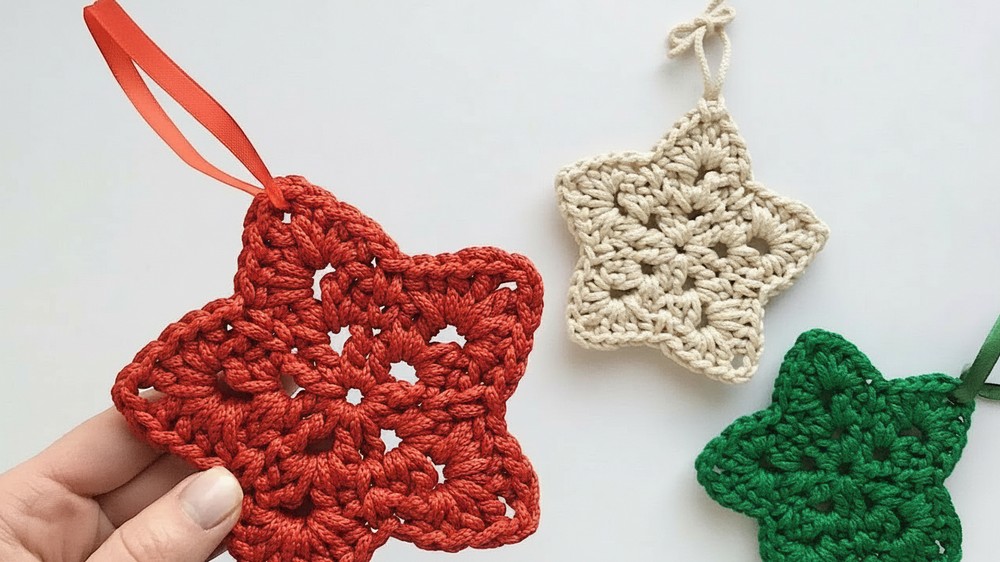
Twinkle with delight as you make a lovely crochet star pendant that adds magic to your gifts, decor, or accessories with this simple and fun pattern.
This little star shines bright and adds a lovely touch wherever you place it. Soft and charming, it’s perfect to hang on your Christmas tree, brighten up a child’s room, or even wear as a cute necklace. Its delicate loops and points make it look like a tiny sparkling treasure, catching the eye with every stitch. You can make it colorful or keep it simple; either way, it brings warmth and joy to any space.
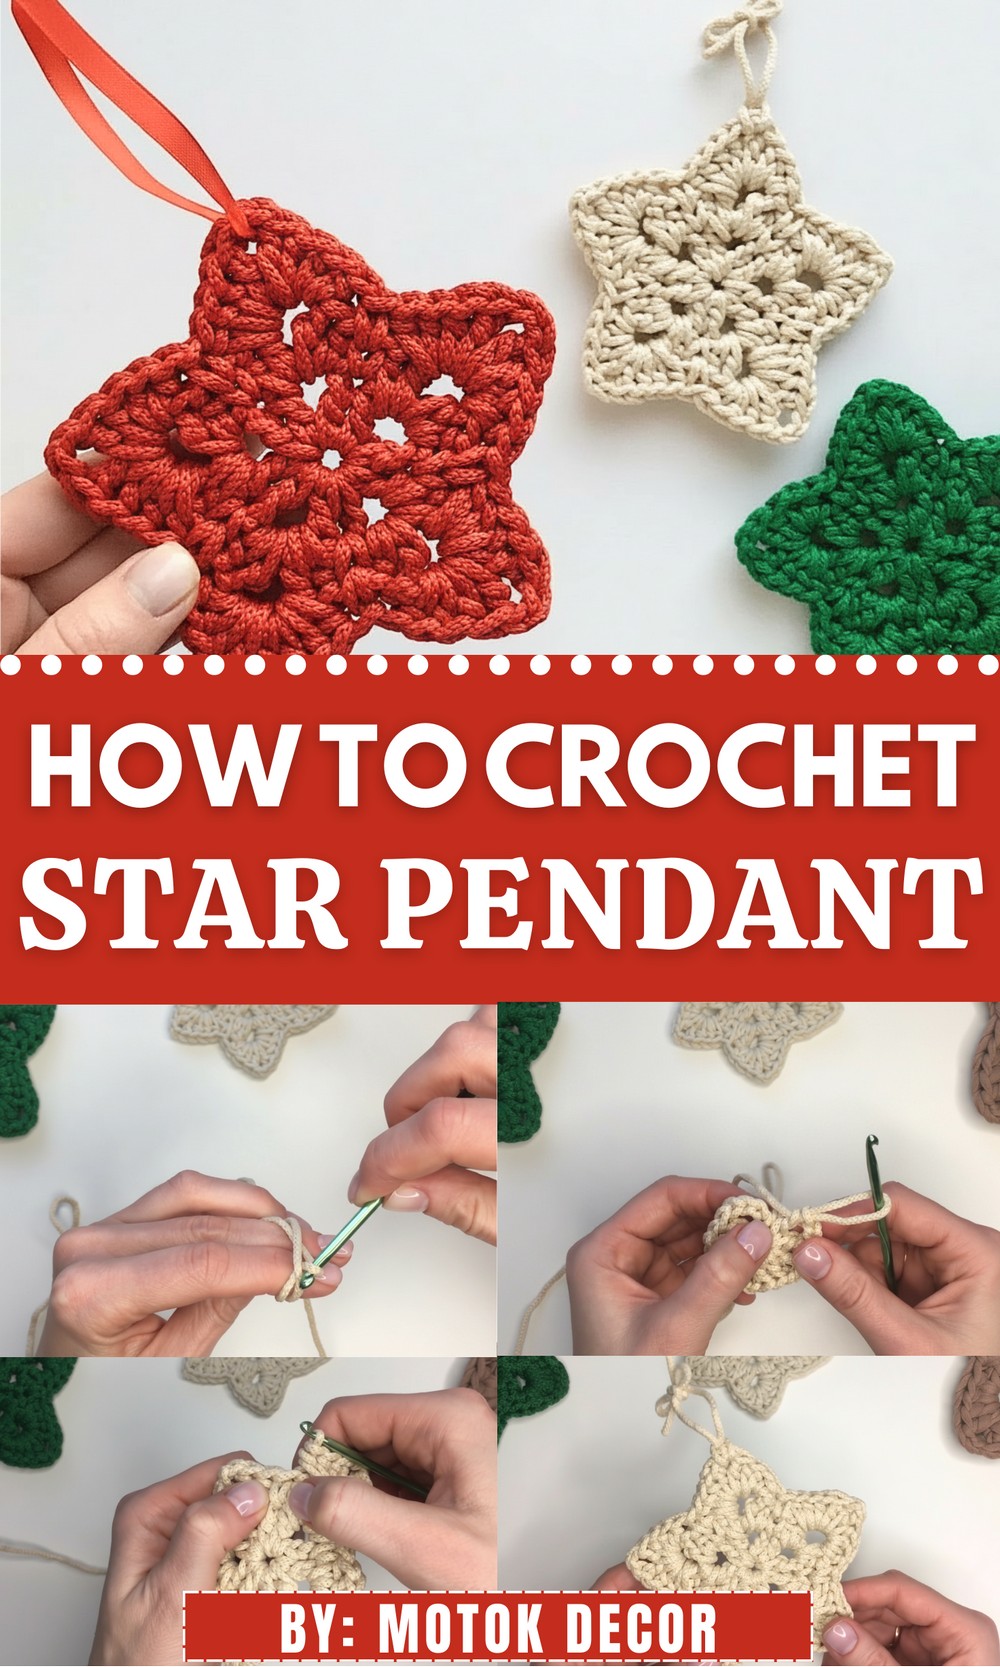
Crochet Star Pendant Pattern Perfect for Holiday Decorations
It’s small but special, a sweet gift to give or keep for yourself. Whether you hang it on a bag, use it as a decoration, or give it to someone you love, this star will always bring smiles. Easy to hold and fun to make, it’s a wonderful way to add a handmade sparkle to your day. Bright, soft, and full of charm, this star is sure to be a favorite little piece!
Crochet Asterisk Pattern: Step-by-Step Detailed Guide
Special Features:
- Can be made from cord (3mm recommended) or yarn in various thicknesses
- Size varies based on material: approximately 12 cm with cord, 15-16 cm with yarn
- Can be used as a pendant, decoration, or hot stand
- Festive look with symmetrical rays
- Hides yarn ends cleanly for a neat finish
Difficulty Level:
Beginner to Intermediate — involves magic ring, single crochet (sc), half double crochet (hdc), chains (ch), and working in the round
Step-by-Step Pattern
Materials Needed:
- 3mm cord or yarn of choice
- Crochet hook size 4 (or size appropriate to your yarn/cord)
- Scissors
- Tapestry needle (for weaving in ends)
- Optional: Ribbon or thread for hanging
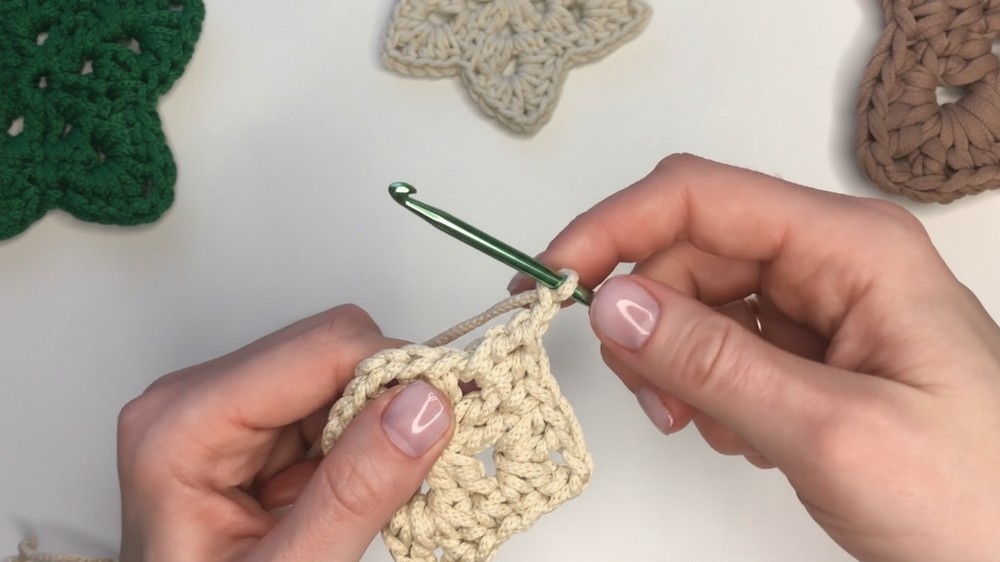
Round 1: Magic Ring and Foundation Rays
- Start with a magic ring:
Wrap the yarn around your fingers to form a loop. Insert the hook, pull up a loop, and chain 1 to secure the ring. - Crochet stitches inside the ring:
- Work 5 single crochet (sc) stitches into the magic ring. This forms the center of the star.
- Chain 2 (acts as corner/space).
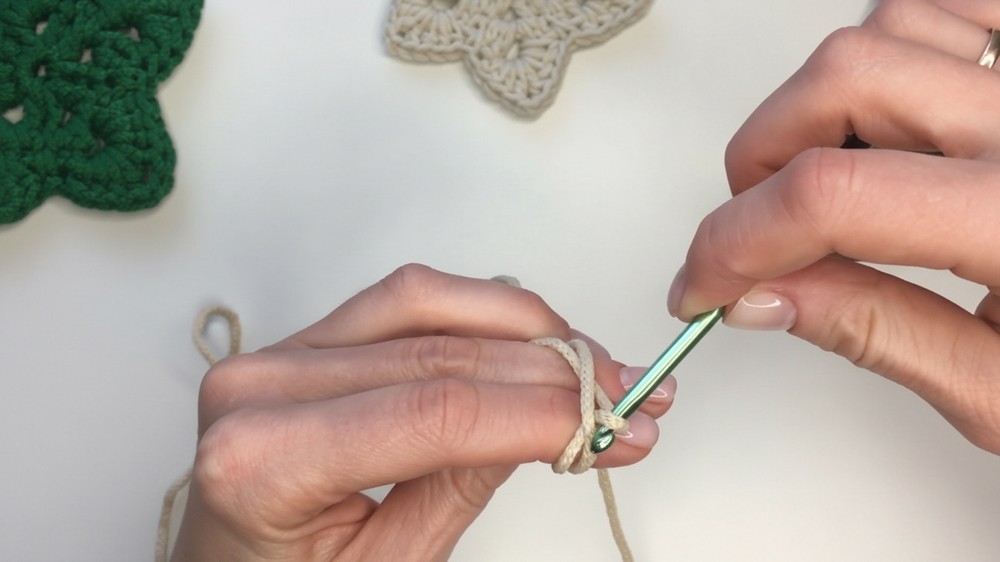
- Make one ray of the star:
- Work 2 sc into the ring after the chain 2. Pull the tail in and secure it as you crochet the first stitch.
- Repeat the process:
- Crochet 2 sc, chain 2, then 2 sc into the ring. Continue around to make 5 rays total.
- You should have 5 sets of “2 sc, chain 2, 2 sc” separated by chain 2 spaces.
- Join round:
- Pull the magic ring tight to close the center.
- Slip stitch to the 4th chain of the beginning chain 5 to join the round.
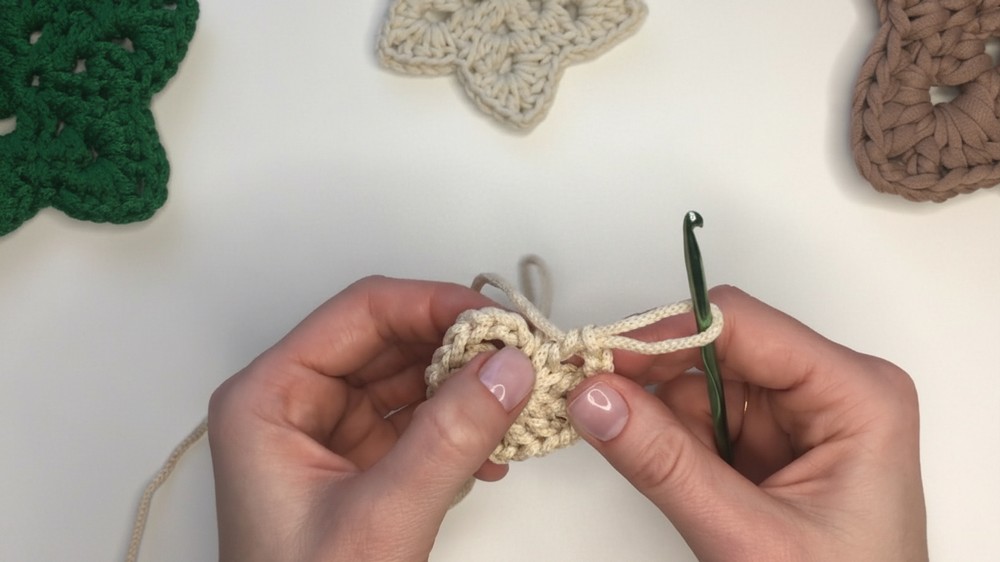
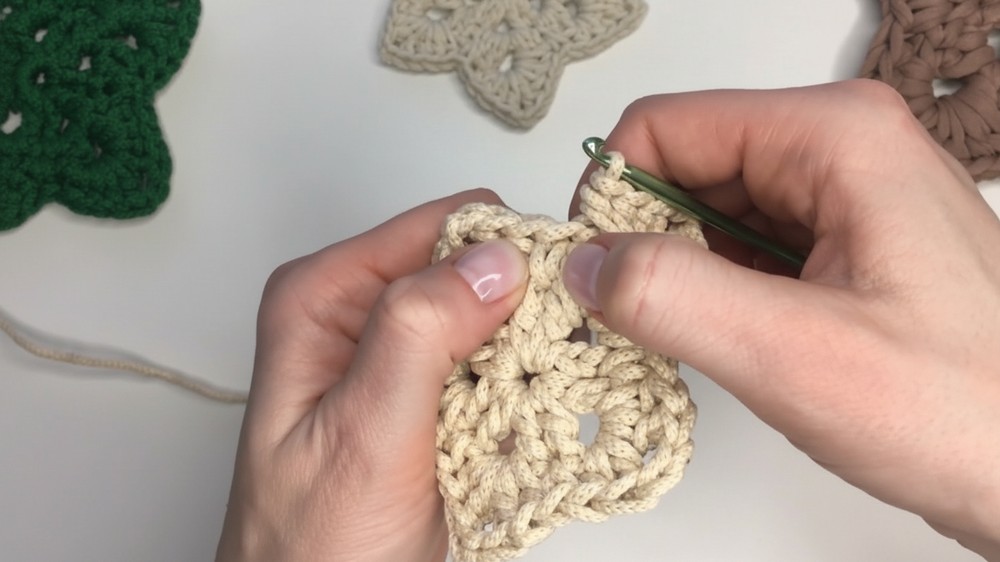
Round 2: Building the Rays with Half Double Crochet Stitches
- Start new round by slip stitching to the first chain 2 space (hole).
- Crochet into each chain 2 space:
- Work 1 half double crochet (hdc), then 1 single crochet (sc),
- Followed by 2 chain stitches to create space,
- Then mirror the stitches: 1 single crochet (sc) and 1 half double crochet (hdc).
- Between rays:
- Work 1 single crochet (sc) between the last and next sets to finish each ray nicely.
- Repeat for all 5 rays, maintaining symmetry, going into the holes to keep the star shape.
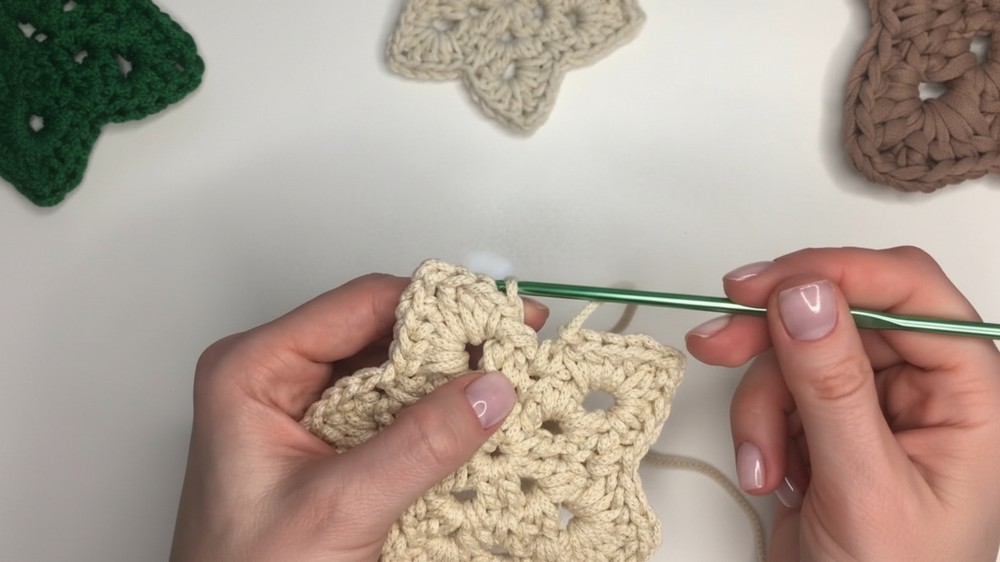
Round 3: Final Detailing of Rays
- Knit into each chain 2 space (hole) again:
- Crochet:
- Work 3 half double crochets (hdc),
- Then 1 single crochet (sc),
- Chain 2,
- Then 1 single crochet (sc) and 3 half double crochets (hdc) (mirrored on other side).
- Between rays:
- Work 1 single crochet (sc) between to connect the rays cleanly.
- Repeat this pattern for all rays.
Finishing Touches
- Close the last loop:
- Pull the working thread tightly and fasten off.
- Weave in all yarn tails neatly using a tapestry needle, hiding them under the legs of stitches.
- Optional: Lightly steam the star to maintain volume without flattening.
- Make it a pendant:
- Using leftover yarn or ribbon, tie a loop through one of the star’s points to hang as an ornament.
Uses:
- Pendant decoration
- Gift box accessory
- Hot pot stand
- Festive décor for holidays or special occasions
Tutor’s Suggestions:
- Use thicker cord for denser, sturdier stars and use as hot stands.
- For a delicate look, use fine yarn for smaller stars.
- Keep stitches even and consistent tension for a symmetrical star.
- Steam gently to avoid flattening the 3D shape.
Final Tip:
When working the rays, try to angle the stitches slightly right or left alternately for a beautiful symmetrical look that resembles an actual asterisk/star. Adjust tension accordingly to keep the shape balanced.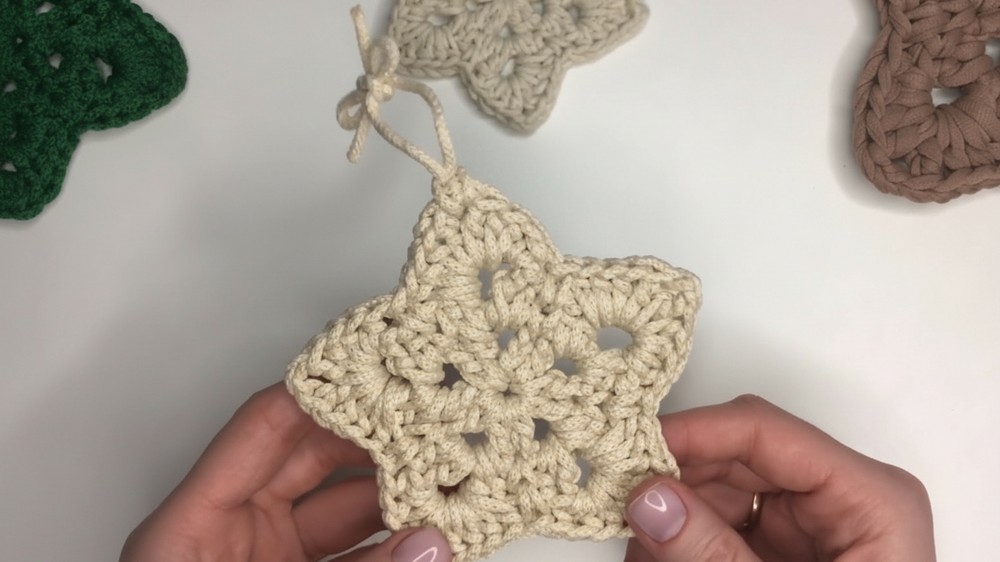
Conclusion:
This crochet asterisk pattern is a delightful and practical project that adds handmade charm to your crafts. Whether you use it as a decorative pendant or functional hot stand, it’s a quick and rewarding stitch experience. Keep practicing the stitches and tension consistency to master the pattern and create your personal collection of cheerful stars.