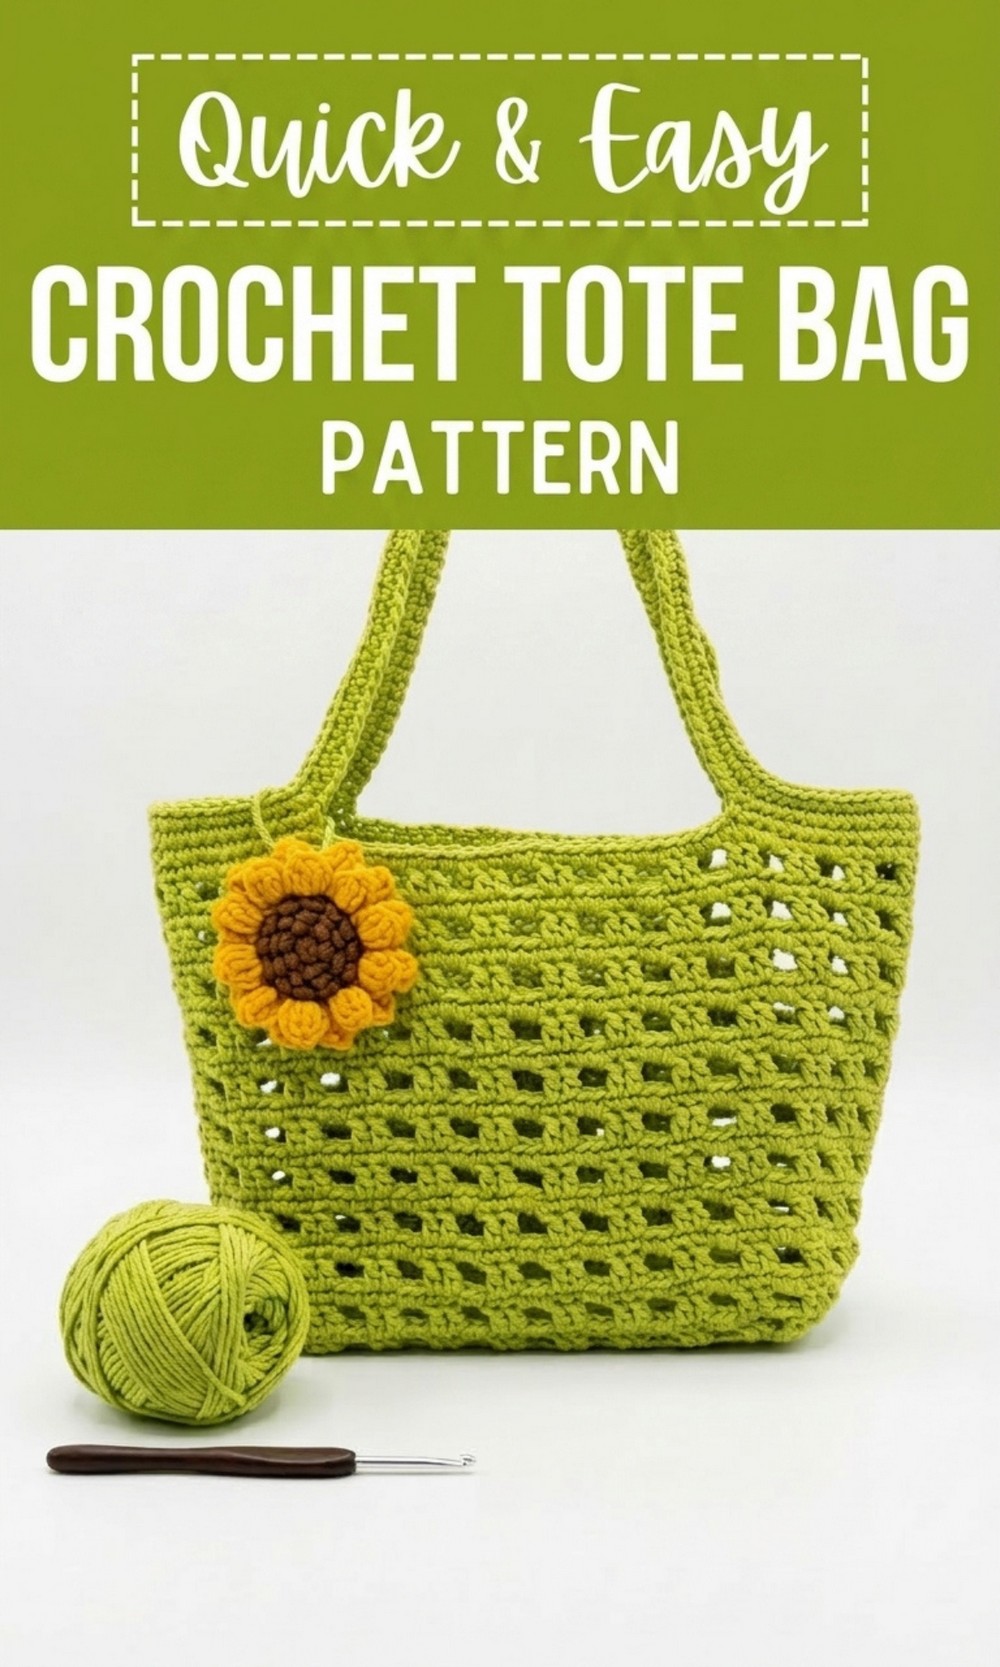
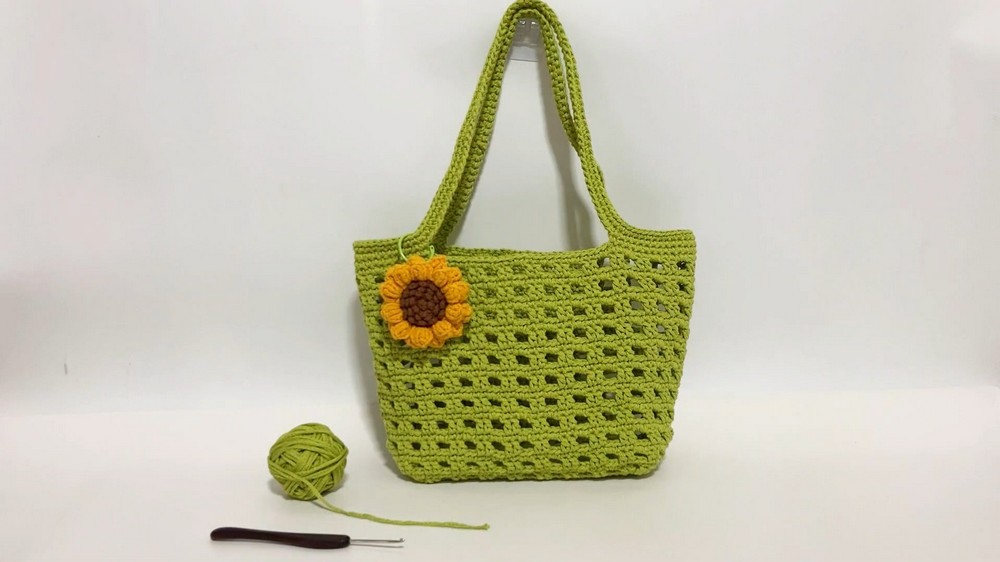
Carry your things with ease using this free crochet tote bag pattern that is perfect for making a strong and stylish bag for daily use and shopping.
Versatile Free Crochet Tote Bag Pattern You’ll Want in Every Color
Your ideal everyday tote is here, and it’s so fun and easy to make. This beautiful crochet tote bag is created using hollow fiber cotton and a 3.5mm hook, making it strong yet lightweight. It’s perfect for carrying books, groceries, or your favorite essentials wherever you go. The simple and stylish design, enhanced with textured stitches, gives it a modern look that anyone will admire.  The pattern begins with a sturdy rectangular base made of single crochet stitches for excellent durability. The sides feature a gorgeous latticework pattern crocheted with double crochets and chains, making the bag look unique and eye catching. This tote is not just useful but also looks like a fashionable accessory.
Crochet Tote Bag Pattern
Materials Required
- Yarn: Hollow fiber cotton, 2.5mm thickness (or similar sturdy cotton yarn).
- Crochet Hook: 3.5mm hook.
- Other Supplies:
- Scissors.
- Yarn needle (for weaving in the ends).
- Optional: Stitch markers (to mark rounds).
Special Techniques Used
- Slip Knot: To begin your crochet work.
- Chain (ch): Basic stitch to start and create spaces.
- Single Crochet (sc): Dense stitch used for the body and structure of the tote.
- Double Crochet (dc): Used for decorative latticework in the tote.
- Skip Stitch: Skipping stitches to create an open and airy texture for the design.
- Slip Stitch (sl st): To join rounds or finish edges.
Tote Bag Pattern
Base of the Bag
- Make a Slip Knot and chain 31 stitches to create the foundation for the base of the bag.
- Row 1: Starting in the 2nd chain from the hook, work 30 single crochet (sc) across the row. (30 stitches)
- Rows 2–13: Chain 1, turn your work, and single crochet in every stitch across (30 sc per row). Repeat this to make a sturdy rectangular base. After Row 13, fasten off, or leave your yarn attached for transitioning into the bag body.
Body of the Tote Bag (Working in the Round)
To create the bag’s body, you’ll start crocheting around the perimeter of the rectangular base.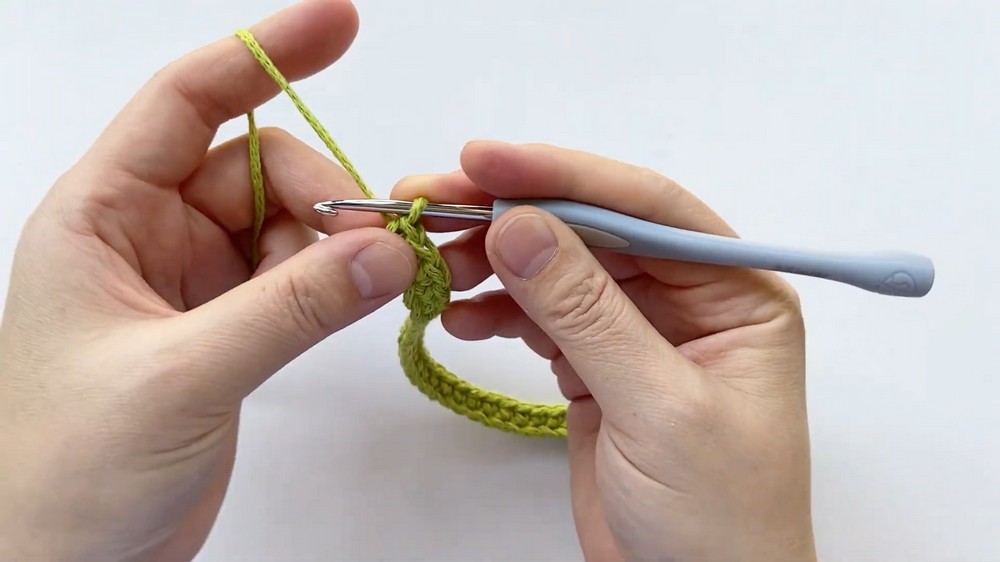
- Round 1:
- Attach your yarn to one of the shorter ends of the rectangle.
- Single crochet around the perimeter of the base, placing 1 sc in every stitch along the longer sides and distributing evenly along the shorter ends.
- Add 3 sc in each corner to round them off smoothly.
- Join with a slip stitch to the first stitch of the round.
- Total stitch count will depend on the base dimensions but should form an even rectangular shape.
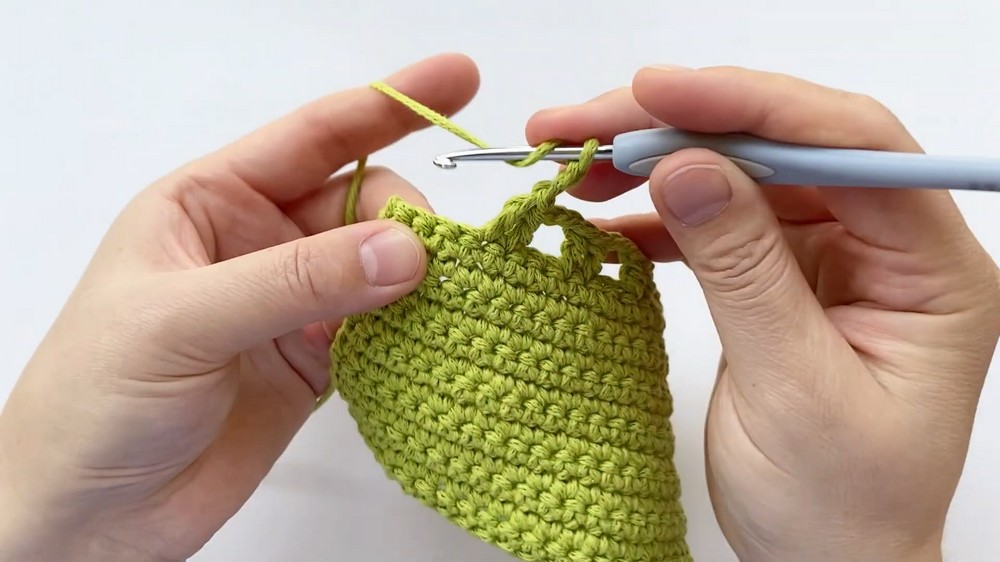
- Round 2–13:
- Chain 1, start working one single crochet (sc) into each stitch around.
- Continue working in rounds (adding no increases) to build up the height of the bag.
- At the end of each round, join with a slip stitch to the first stitch.
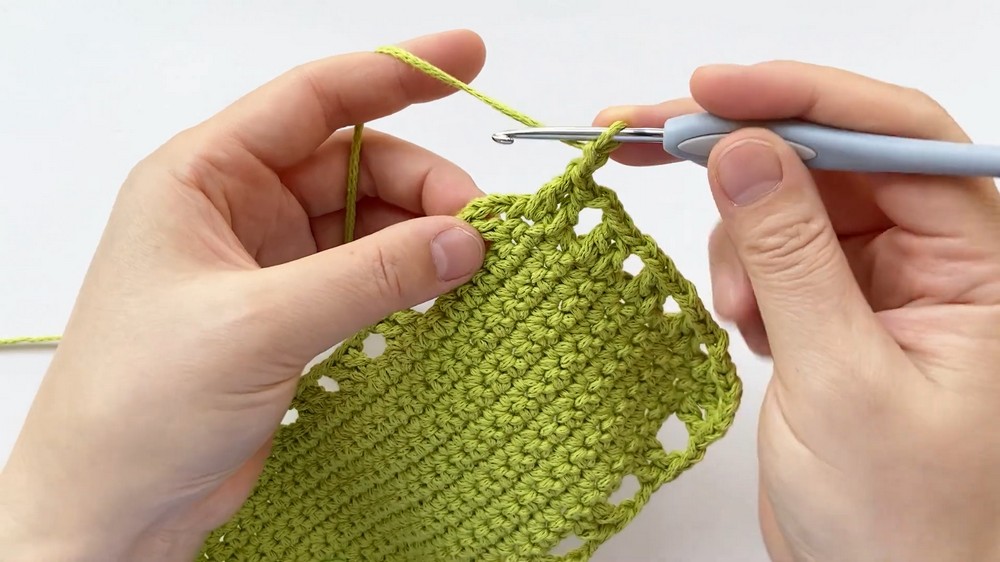
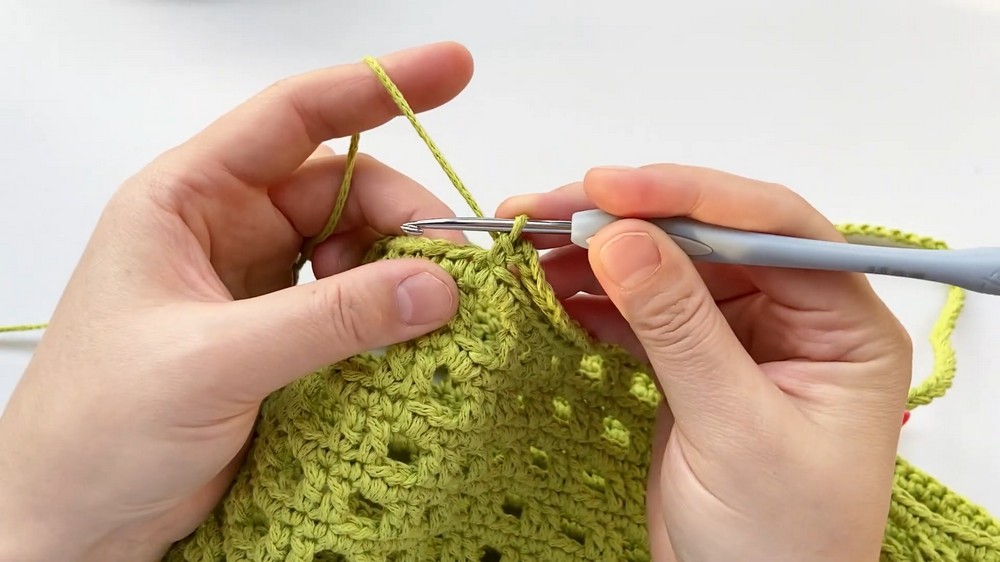
Latticework Design
- Round 14 (Starting the Pattern)
- Chain 3 (acts as your first double crochet), then turn your work.
- Skip the first stitch, work 1 dc in the second stitch.
- Chain 2, skip 2 stitches, then work 1 dc in the next stitch followed by another 1 dc in the next stitch.
- Repeat the pattern (ch 2, skip 2, 2 dc) around the round.
- Join with a slip stitch to the top of the starting chain 3.
- Round 15:
- Chain 2 and work 1 dc in the same stitch.
- Work 1 dc in the next stitch.
- Chain 2, skip the next stitch, then continue the sequence: ch 2, skip 1, 2 dc. Ensure that the double crochets are aligned with those from the previous row.
- Round 16 (Continuing Latticework):
- Chain 2 and work 1 dc in the same stitch.
- Work 1 dc in the following stitch.
- Chain 2, skip 2 stitches this time, and continue with the pattern: ch 2, skip 2, 2 dc. Repeat around.
- Continue the latticework pattern for about 5–6 rounds, or until the desired body height of the tote bag is achieved.
Top Edge of the Tote Bag
- After completing the latticework rounds, work a few rounds of single crochet to stabilize the bag’s top edge:
- Work 2 single crochet (sc) in each chain space and 1 single crochet (sc) into the top of each double crochet in the latticework pattern.
- Continue for 2–3 rounds or until the edge is sturdy.
- Work 2 single crochet (sc) in each chain space and 1 single crochet (sc) into the top of each double crochet in the latticework pattern.
Handles of the Tote Bag
- On the next round, chain the length of your desired strap (e.g., 40–50 chains) and skip stitches along the bag’s top edge to create the straps. For example:
- Single crochet across until you reach the starting point for a handle.
- Chain 40–50 (or your preferred strap length), skip 10–15 stitches, and reattach with a single crochet.
- Repeat on the opposite side for the second handle.
- For the next 2 rounds:
- Single crochet around the entire top edge, working into each chain of the straps to strengthen them.
- Ensure that the straps feel strong and sturdy.
Finishing Steps
- After completing the top edge, join with a slip stitch to the first stitch of the final round.
- Fasten off and cut the yarn, leaving a 4–6 inch tail.
- Use a yarn needle to weave in all loose ends for a clean finish.
Final Tips for Success
- Stabilize the Base: If you want extra structure, you can add a stiffening material (e.g., plastic canvas) inside the base.
- Strap Strength: To ensure durable straps for carrying, crochet additional rounds around the handles or reinforce by sewing.
- Block the Tote Bag: Gently block your tote bag after completion to shape it properly.
- Custom Sizing: You can adjust the initial rectangular base dimensions and height to create a smaller or larger bag.
Final Words
Congratulations on completing your crochet tote bag. This project combines functionality with a beautiful design, making it a perfect handmade accessory. You can experiment with colors, yarn types, and handle lengths to create bags suited to your style. This pattern is beginner friendly yet leaves room for creativity.