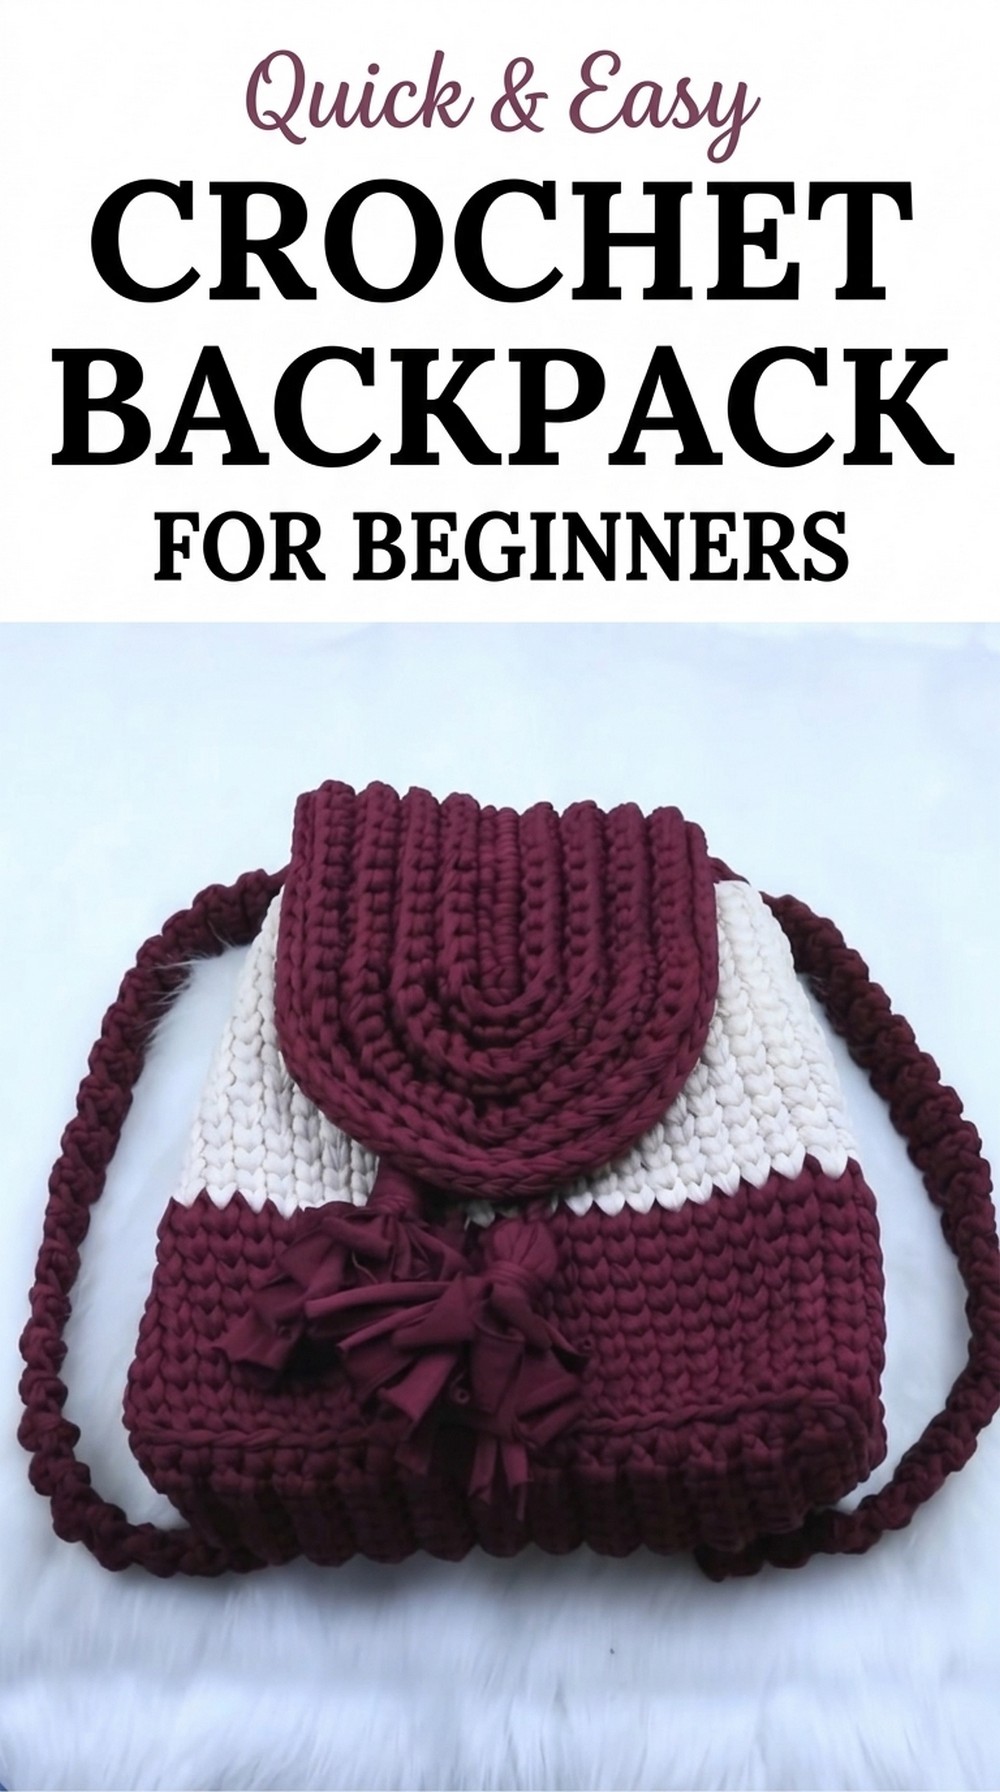
Carry your style effortlessly with a Free Crochet Backpack Pattern that lets you create a strong and stylish bag perfect for school, travel, or everyday use.
Convenient Free Crochet Backpack Pattern You’ll Love to Use
A bag is our daily need, and now you have the chance to make something truly special for your everyday essentials. The “Free Crochet Backpack Pattern” is the perfect project to combine style, creativity, and practicality. Crocheted with soft and flexible yarn like feather or lycra yarn, this handmade backpack is lightweight, durable, and a joy to carry.
Its compact size and smooth finish make it ideal for school, casual outings, or small trips. Featuring a secure magnet clasp, strong straps, and the option to add cute tassels, this backpack is both functional and beautiful. 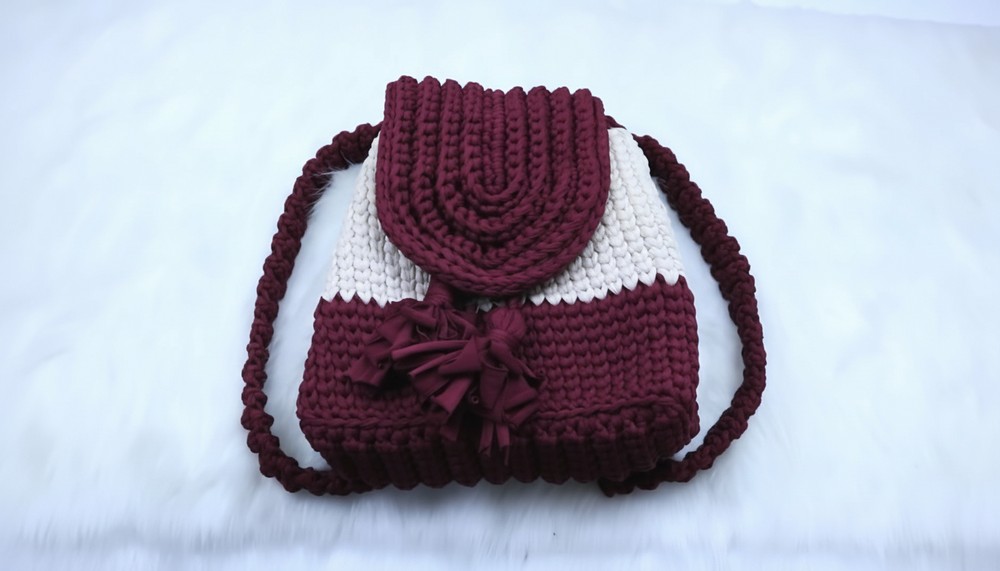
The best part? You can customize it with your favorite colors to reflect your unique style. Not only is it fun and easy to make, but it also adds a touch of personality to your daily look. Create this amazing crochet backpack today and carry your essentials in style.
Crochet Backpack Pattern
Materials Needed
- Feather yarn or lycra yarn (lightweight yarn preferred to avoid weight in the final backpack).
- 6.5 mm Crochet Hook.
- 2 Stitch Markers (optional).
- Magnet Clasp (for closure).
- Wool Needle (for sewing edges and attaching accessories).
- Scissors.
- Measuring Tape (to ensure accurate dimensions).
Techniques Used
- Slip Knot.
- Chain Stitch.
- Single Crochet (SC).
- Elastic Stitch.
- Slip Stitch.
- Increases (Multiple SC stitches in one stitch).
- Color Changes in Crochet.
- Basic Sewing with Yarn.
Pattern Instructions
Step 1: Rectangular Base
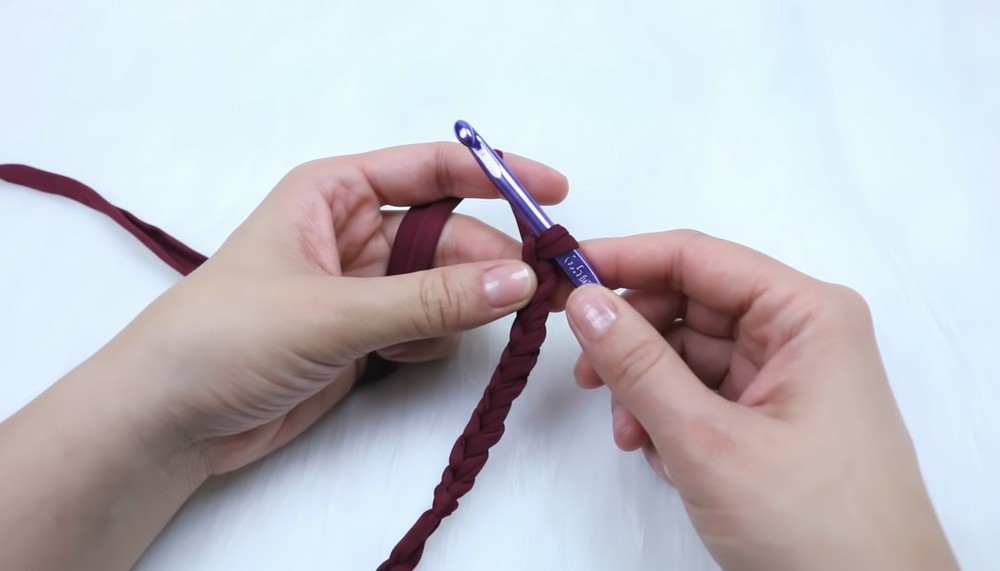
- Make a Slip Knot: Tighten the slip knot securely.
- Chain 10: This will determine the width of your backpack base. For wider bags, chain 15 or 18.
- Additional Chain: Once your foundational chains are complete, make one additional chain to get height. This chain does not count as a stitch.
- Row 1:
- Insert the crochet hook into the last chain.
- Work single crochet (SC) across all chains. At the end, you should have 10 SC (for 10 chains).
- The base may twist slightly due to the elastic nature of the yarn; this is normal.
- Row 2:
- Chain 1, turn.
- Work in elastic stitch, inserting the hook into the outer chain of each SC stitch.
- Knit the last stitch in a normal way (insert hook directly into the stitch). Repeat across the row.
- Repeat Rows: Repeat the pattern until the base reaches a length of 20–22 cm. Measure frequently to ensure the desired size. (The base will have roughly 22 rows.)
- Finalize the Base:
- Chain 1, turn, and work SC in a normal stitch across the row.
- Work SC around the perimeter of the rectangular base to clean up edges. When turning corners, add 2 SC into the same stitch to create smooth edges.
Step 2: Building the Backpack Body
- Identify the Center Back: Use markers to identify the back of the rectangular base.
- Attach Yarn: Insert the hook into the outer stitch of the chain and pull through the yarn.
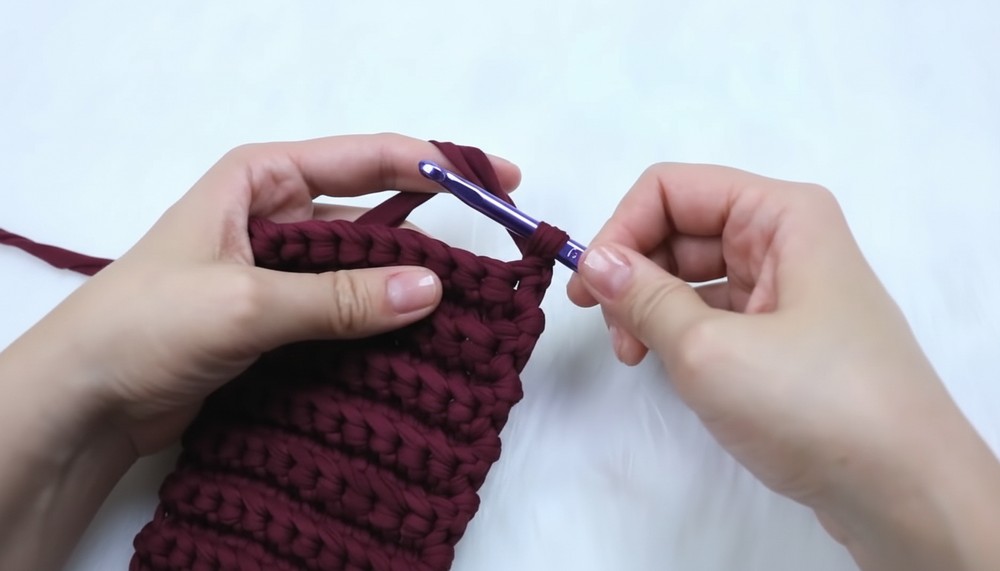
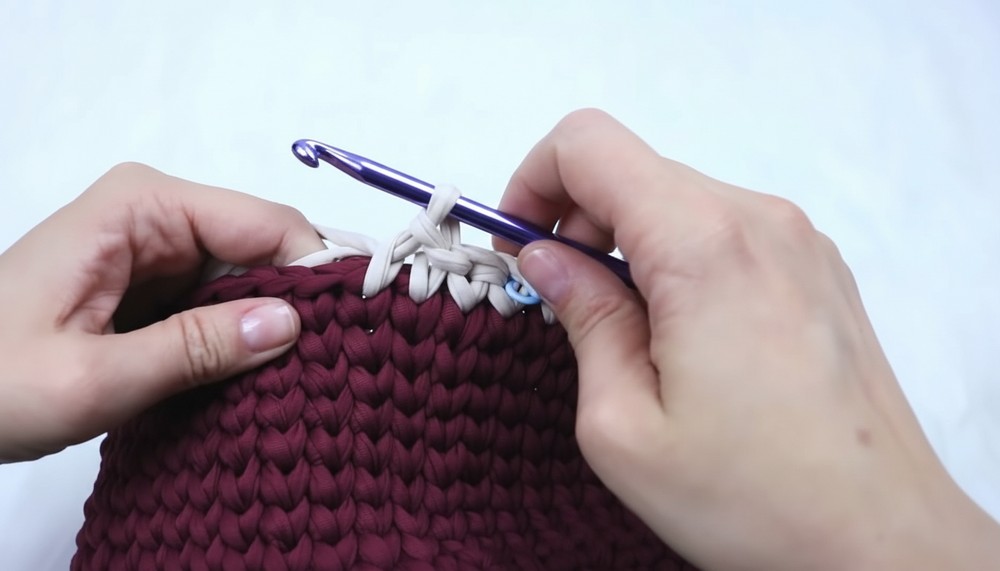
- Row 1: Work SC in the outer chain across the row, attaching the strand as you work. Once at the end, locate the starting chain and join with a slip stitch.
- Subsequent Rows:
- Work central SC by inserting the hook into the center of each stitch (not the usual location). This technique creates a tighter texture for durability.
- Continue working rows until the body reaches a total of 25 rows, with color changes introduced as desired.
- Example: 16 rows in the first color, 9 rows in the second color.
Step 3: Flap
- Foundation Chains:
- Make a slip knot and chain 17 (adjust based on backpack width). Position chains halfway down the second color for accurate placement.
- Row 1: SC across the chains, leaving 1 chain for an increase.
- In the last chain, add 3 SC (first increase).
- Use markers on the beginning and end of the increase stitches to keep count.
- Row 2:
- Chain 1, turn, and work SC along the outer chains as with the base.
- At the increase stitches, work 2 SC into each for a smooth oval edge. Place markers on the first and last stitch.
- Row 3: No increases. Work SC along each stitch.
- Subsequent Rows:
- Alternate rows with increases and rows without increases until the flap width matches the backpack.
- Example: 24 SC width, worked with 2 additional rows after reaching desired dimensions.
- Final size: Approximately 26 cm x 18 cm.
- Edging: Work a single round of SC along the sides and bottom of the flap to finish.
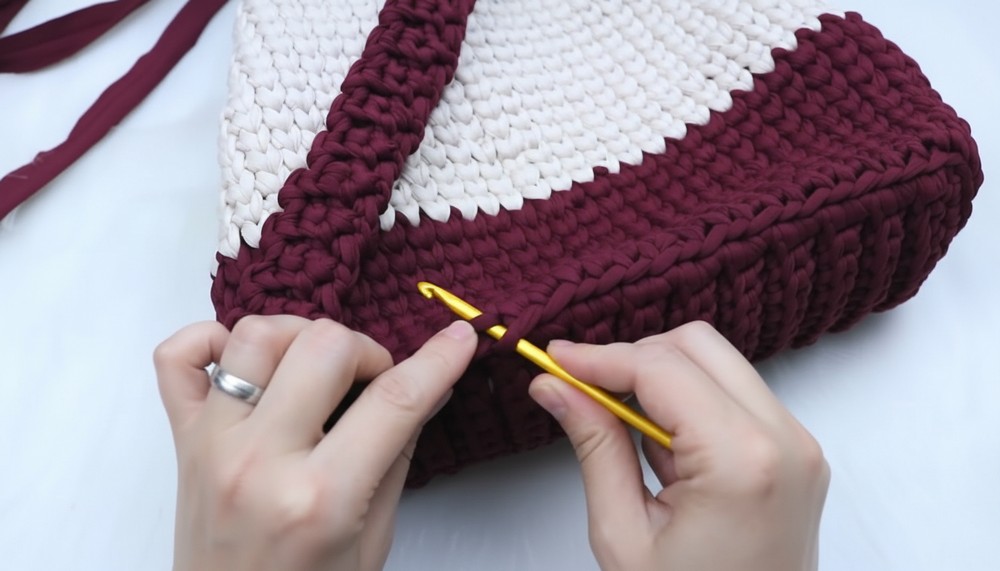
Step 4: Attach Flap
- Position the flap on the backpack with the oval edge facing down.
- Sew the flap to the backpack using yarn and a wool needle. Turn the flap inside out during sewing to align properly.
Step 5: Magnetic Closure
- Attach one side of the magnet clasp to the backpack body and the other to the flap.
- Measure carefully for accurate alignment. Secure both pieces using stitches.
Step 6: Straps
- Foundation Chain: Chain 3.
- Row Pattern:
- Work SC using the elastic stitch technique for approximately 54 cm (adjust length as needed).
- Always knit the last stitch in the normal way.
- Make Two Straps: Repeat the process for both straps.
- Attach Straps:
- Sew straps onto the backpack, ensuring even placement.
- Test adjustments to avoid uneven tension.
Step 7: Tassels (Optional)
- Cut 12 strands of yarn (25 cm each).
- Fold each strand in half and attach to the first chain on the flap edge.
- Organize tassels neatly and knot firmly.
Finishing Touches
- Ensure all strand tails are hidden securely.
- Test the backpack for durability before use.
Final Words
Congratulations,You’ve completed a lightweight, stylish backpack using feather or lycra yarn. The elastic nature of the yarn provides flexibility and durability, making it ideal for daily use. The backpack is customizable, allowing you to scale sizes and colors based on your preferences.
Tips to Maintain the Backpack
- Cleaning: Hand wash gently with cold water to maintain elasticity.
- Avoid Sharp Objects: The yarn may snag; keep sharp items away.
- Storage: Lay flat or hang to avoid stretching out the pack’s shape.
- Yarn Alternatives: Choose feather or similar yarn for lightness and ease, but avoid heavy yarns like cotton to maintain the pack’s portability.