A favorite red scarf takes shape through this free crochet Mikasa scarf pattern making a stylish accessory for cooler days.
Nothing brightens a wardrobe quite like a handmade touch of creativity and warmth. A cozy scarf with intricate details not only adds charm but also reflects your personal style. With soft textures and a timeless design, this project is perfect for anyone who loves fashion and functionality. You can wear it in different ways, like wrapped around your neck for warmth or draped over your shoulders for a more fashionable look. The pattern is designed to be straightforward and easy to follow, which means even those new to crocheting can achieve stunning results.
Fall in Love with This Free Crochet Mikasa Scarf Pattern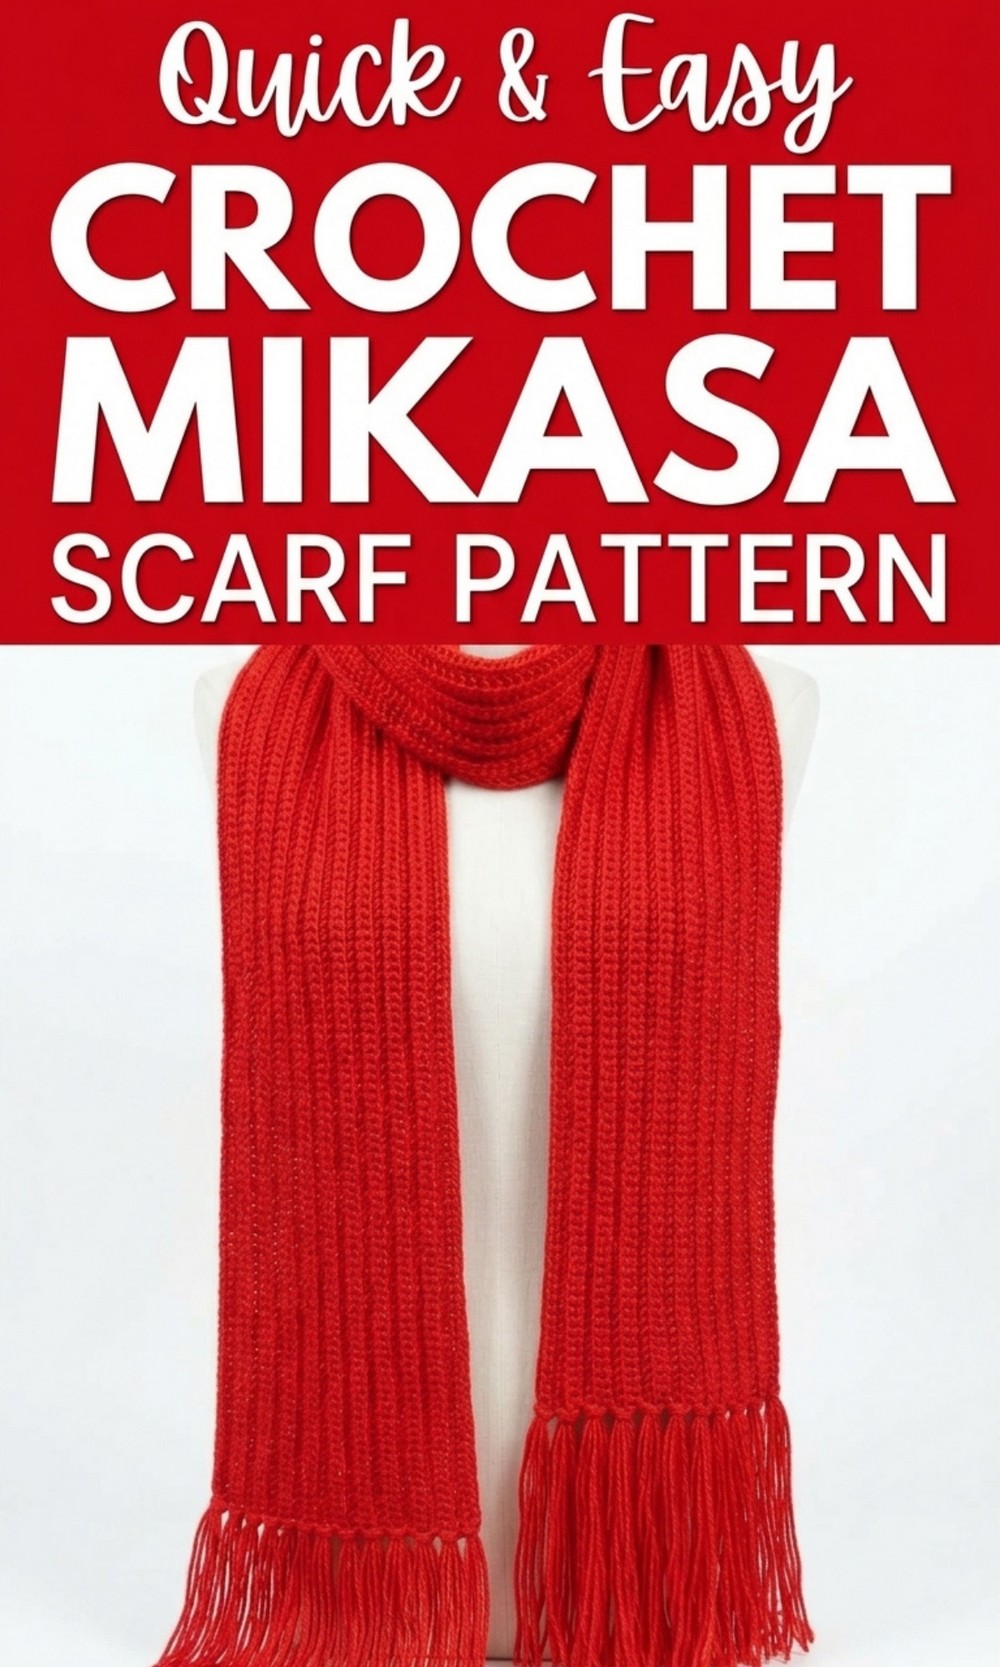

The pattern highlights the unique design and texture of the scarf. It uses a mix of simple stitches that create a beautiful and eye catching appearance. The stitches work together to make a cozy and soft stuff that feels great against the skin. Plus, the scarf can be customized with your favorite colors, allowing you to express your creativity.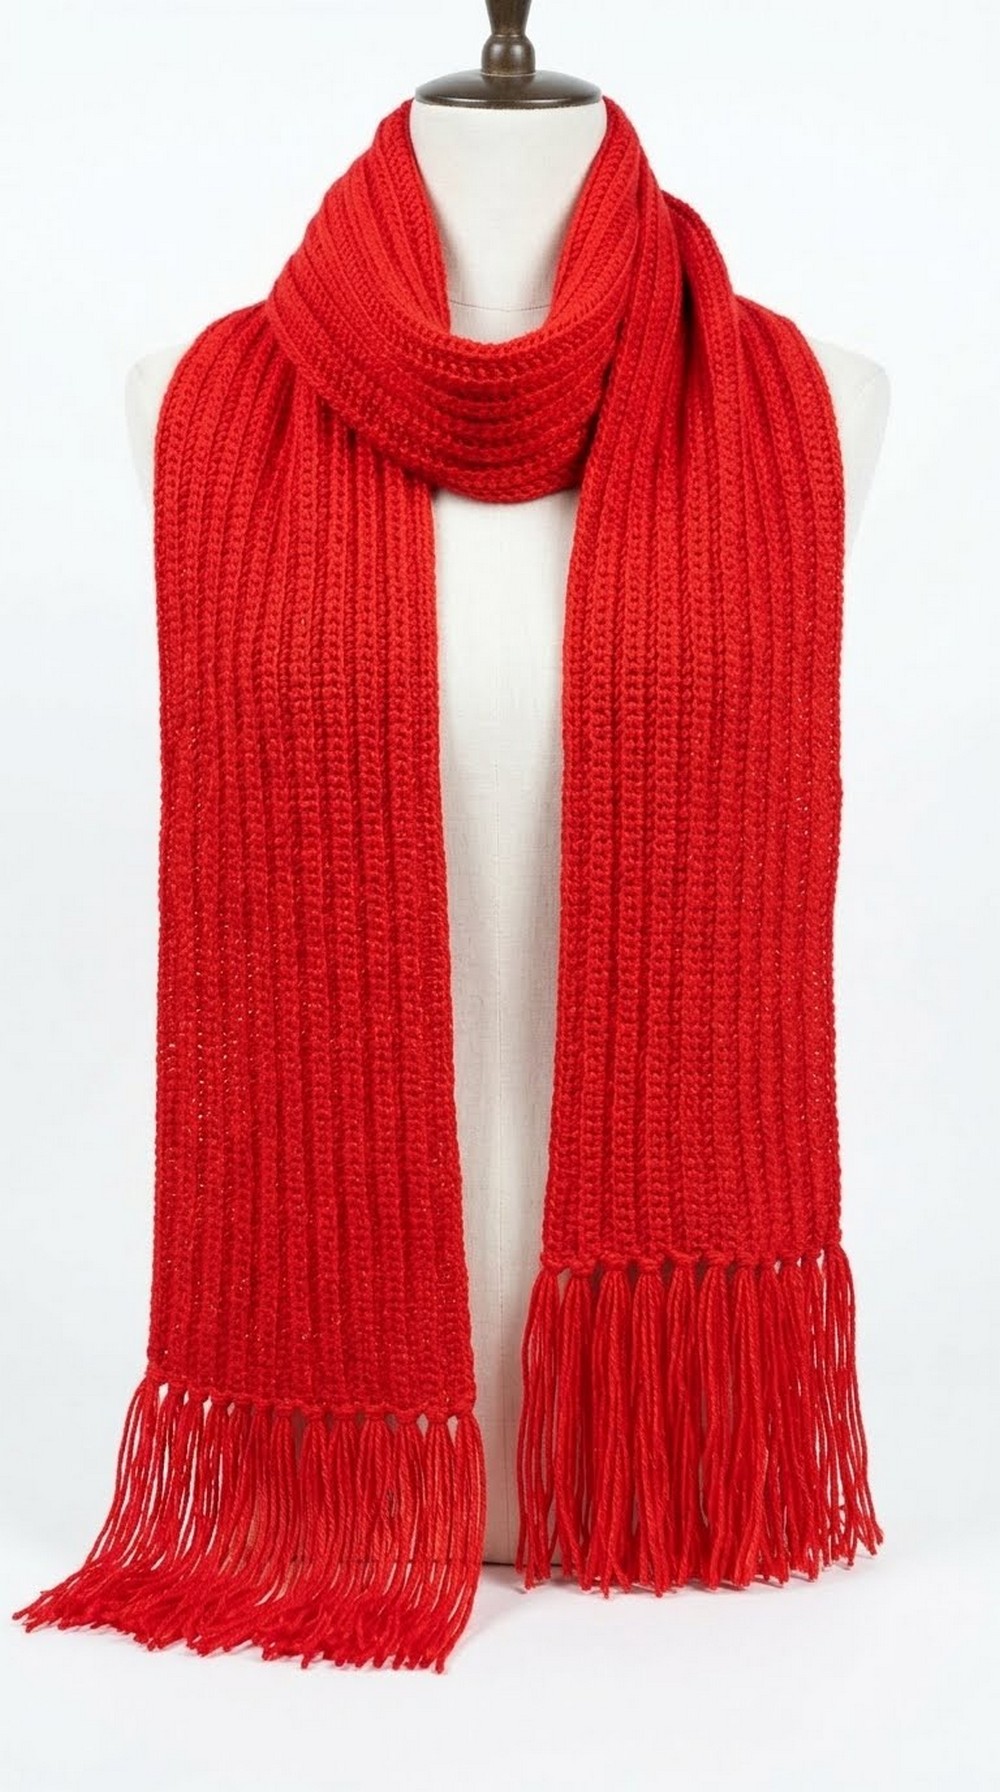 This project not only provides a great opportunity to learn and practice crochet but also results in a beautiful handmade gift for friends and family. The Free Crochet Mikasa Scarf Pattern inspires creativity and provides comfort, making it a wonderful choice for crochet lovers. It’s a delightful way to create something beautiful and functional with your own hands. So, gather your yarn and hook, and start crocheting a warm and stylish Mikasa Scarf today. This project is perfect for adding joy to your wardrobe and showcasing your newfound crochet skills.
Necessary Materials
To begin crocheting the muffler, gather the following materials:
- Yarn: 4 ply yarn (with 4 threads) for enhanced texture and warmth. The video features soft, plied yarn to make the muffler both functional and visually appealing.
- Crochet Hook: A 10 mm hook is recommended for this project to achieve the desired size and stitch definition.
- Scissors: For trimming yarn and shaping fringe ends.
- Measuring Tape: Helps maintain uniformity and precision (optional).
- Stitch Markers: Useful for tracking chain counts (optional but assists beginners).
Gauge
Gauge is critical to ensure the muffler is long and wide enough for the intended design. Create a test swatch using the following process:
- Stitch Gauge: 1 row of double crochet (DC) using 4 ply yarn and a 10 mm crochet hook equals approximately 1.25 inches in length.
- Adjust Hook/Material: If your stitches are too tight or loose, consider switching to a larger or smaller hook size accordingly.
Finished Size
Upon completion, the muffler measures around:
- Length: Approximately 420 chains (ideally 5 to 6 feet for full loop wrapping or decorative wear).
- Width: Around 30 rows of double crochet, tailored for a snug but comfortable fit.
Tips for Crocheting Success
- Avoid Tight Chains: Loose chains are easier to work with and smoothen out the project. Keep your tension consistent but relaxed.
- Stretch and Adjust: The muffler will naturally expand as it’s worn, so don’t worry about minor stiffness during stitching.
- Be Precise with Chain Counts: Always count your work carefully to avoid mistakes that affect your design.
- Experiment with Colors: Although the video uses a single soft colored yarn, you can alternate colors every few rows for added creativity.
Pattern Instructions
Step 1: Base Chain
- Begin with a slip knot on your 10 mm crochet hook. Keep the knot slightly loose.
- Chain 420 stitches to form the foundation of the muffler. Work slowly to maintain even tension.
- Add 3 extra chains at the end of the base chain. These chains will account for turning and be used for starting the first row’s stitches.
Step 2: First Row
- Insert your hook into the 4th chain from the hook (this is the chain marked earlier).
- Yarn over and create a double crochet (DC) stitch by pulling the yarn through two loops twice.
- Continue making double crochet stitches in every chain along the row.
- Work gently, as the first row can be challenging due to the tightness of the base chain.

Step 3: Turning Rows
- Once you’ve completed the first row, chain 3 stitches at the edge to turn your work.
- Rotate the muffler horizontally to begin working the second row on top of the completed foundation row.
Step 4: Building Design (Rows 2 and Beyond)
- Insert your hook into the top loop of each double crochet stitch from the previous row.
- Yarn over and create another double crochet stitch with the same technique.
- Repeat across the entire row.
- Ensure each row is neat and aligned; improper tension can lead to uneven pieces.
Step 5: Unique Design Feature
- For added texture, alternate the position of your hook between standard chain loops and loops angled under or above the row. This creates subtle ridges or gaps that enhance the muffler’s appearance.
- To do this: Skip one chain occasionally and add a double crochet in the adjacent chain for a slightly raised stitch effect.
Step 6: Final Rows
- Repeat the process until you complete 30 rows or until you achieve your desired muffler width.
- On the last row, secure the yarn tightly by pulling the final loop snug using an over knot.
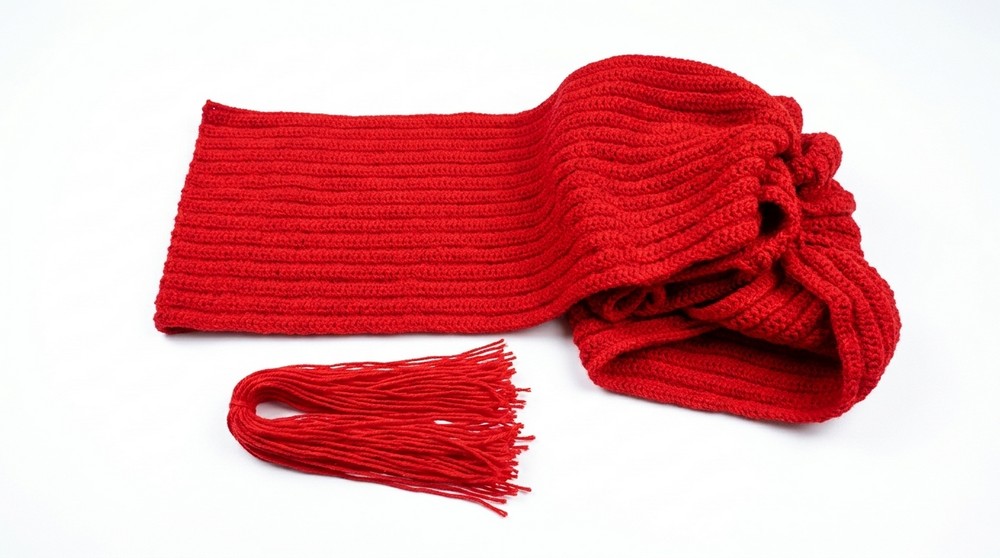
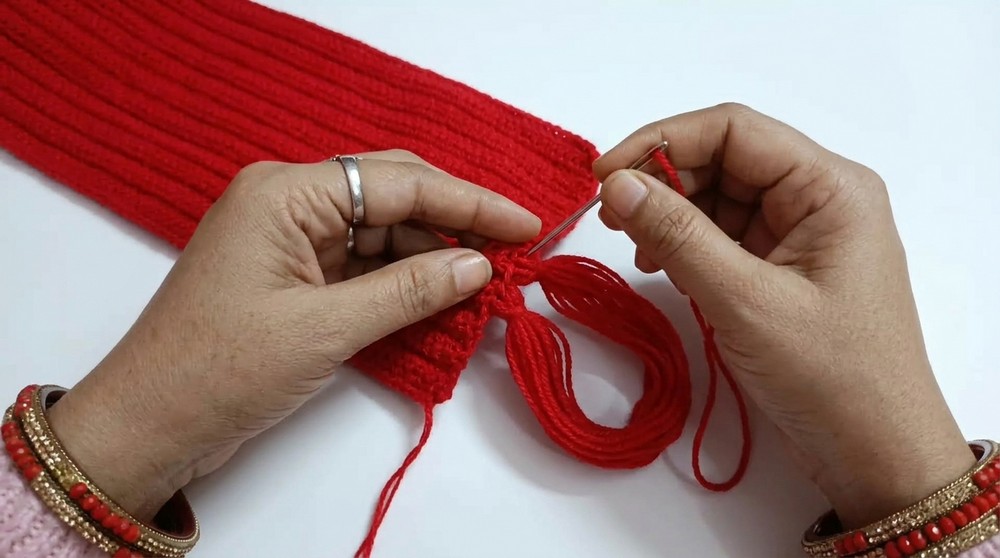
Fringe Addition
To add fringes at the end, follow these simple steps:
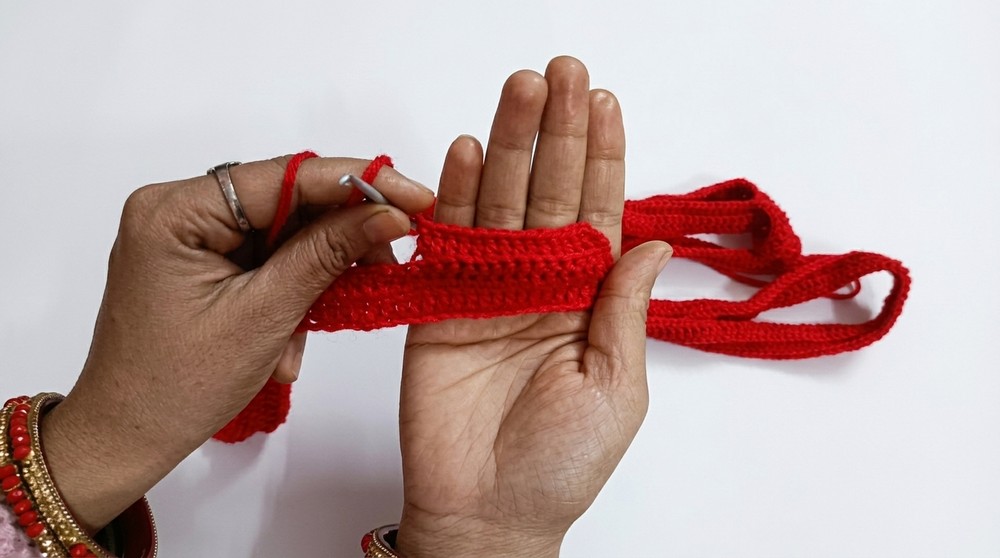
Step 1: Prepare Yarn Pieces
- Cut even sized yarn strands (about 7 inches long) for fringes. You’ll need 2 strands for each double crochet stitch on the muffler’s edge.
Step 2: Attach Fringes
- Fold one yarn piece into half, creating a loop.
- Insert the folded edge into one of the edge stitches using your crochet hook.
- Pull the loop through the stitch and thread the loose ends of the yarn through the loop. Pull tightly to secure the fringe.
- Repeat for every edge stitch by adding two strands per double crochet.
Customization Ideas
- Color Blocking: Use multiple yarn shades for a striped or multicolored design.
- Additional Texture: Incorporate special stitches like puff stitch or shell stitch in the middle rows to enhance the muffler design.
- Edge Decorations: Add scalloped or picot edges to the muffler using contrasting yarn for extra detailing.
- Personal Touch: Sew beads or buttons along with the fringes for a touch of sparkle and individuality.
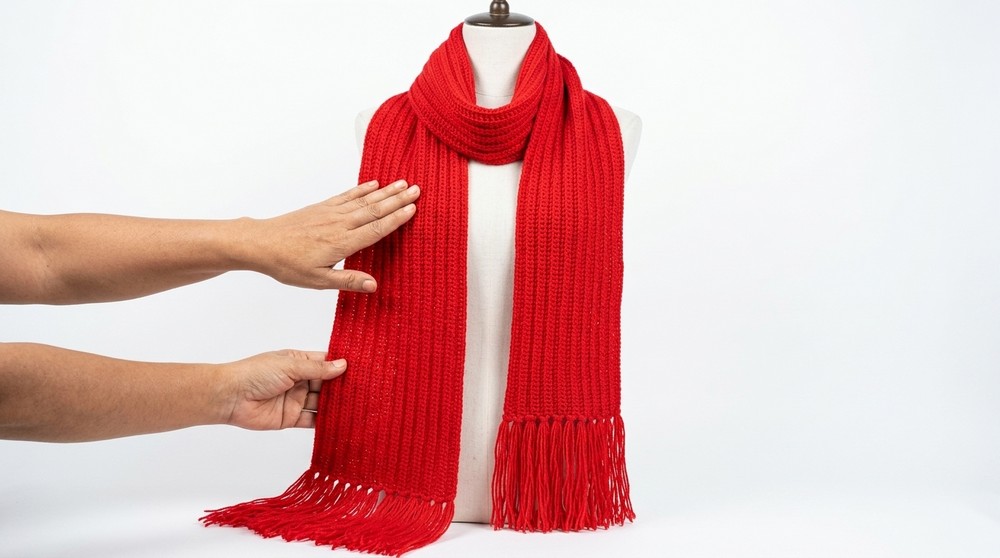
Conclusion
The muffler created from this pattern is not just a practical accessory but also a reflection of artistry. With its soft texture, durable construction, and warm design, it’s perfect for winter wear, gifting, or even selling as handmade creations. The included fringe adds a stylish finish, while the stretchable quality ensures easy handling and prolonged use.
Important Remarks
- Finished Look: When completed, the muffler features clean rows of double crochet with elegant fringes at both ends. The design appears neat from both the front side (smooth rows) and the back side (with visible loops).
- Ease of Learning: This pattern, with its simplicity, is ideal for beginners and seasoned crocheters alike.
- Final Touch: Ensure all knots are secure and all fringes evenly trimmed for a polished look before gifting or wearing the muffler.
With this detailed guide, crocheters can confidently bring their muffler creations to life and explore endless customization possibilities.