A stylish crochet crop top Pattern, perfect for casual wear, festivals, and beach vibes, combining comfort and elegance for effortlessly chic all day style.
Easy Free Crochet Crop Top Pattern You’ll Absolutely Love to Wear
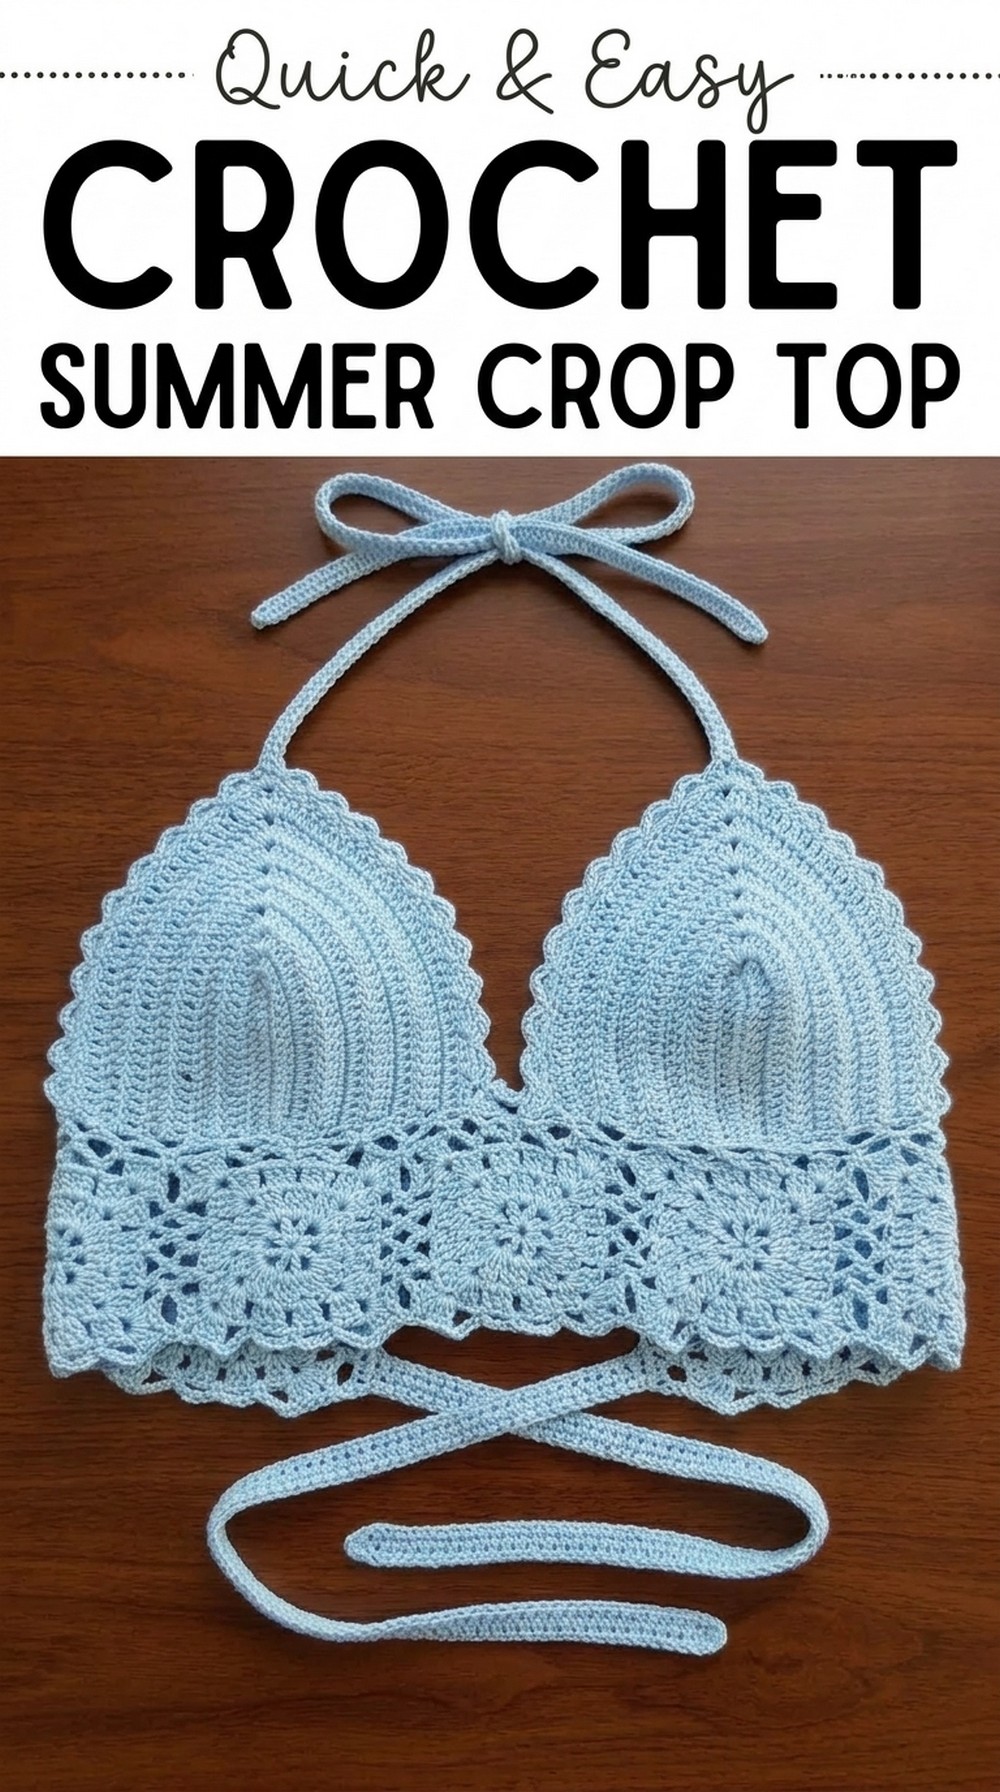
How about trying this Free Crochet Summer Crop Top Pattern right now so you can make a beautiful and soft new shirt that is perfect for a warm sunny day. It begins with simple stitches that form two pretty cups for the top and then adds colorful squares at the bottom called granny squares to make it look very trendy and fun.
This top features a unique design because it uses many different colors and a wavy edge that looks like small shells along the border. You can use this sweet crop top when you go to the beach or play in the park because it is very light and keeps you cool. 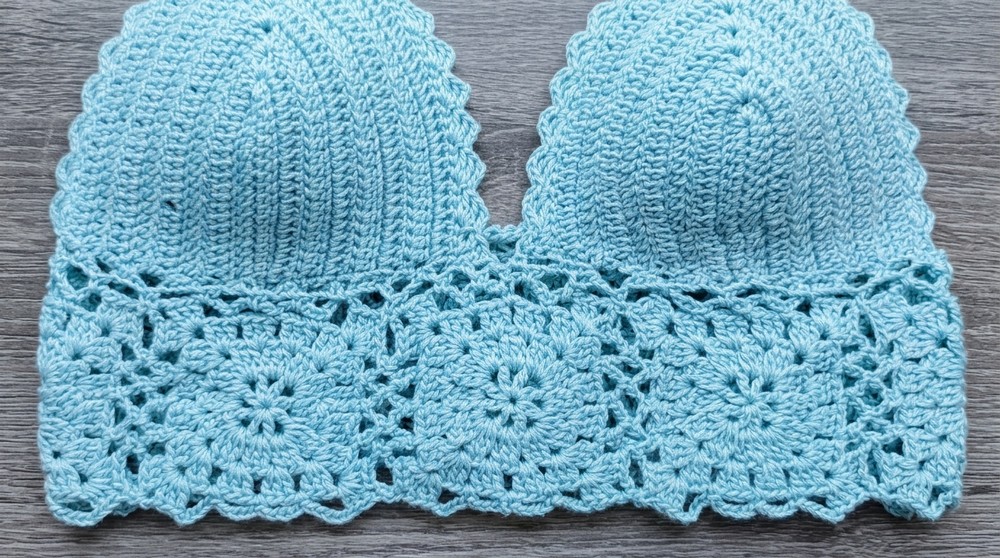
It is a very special project because you can match it with a skirt to have a whole handmade outfit for your family to admire. You will love how fast you can finish this lovely top to have a new treasure for your summer closet.
Vivid Crochet Crop Top Pattern
Materials Needed
- Yarn: Use the yarn of your preference. The creator recommends Symphony yarn by Eulália.
- Hook: Crochet hook size 2.5 mm.
- Additional Tools:
- Measuring tape
- Scissors
Techniques Included
- Basic Crochet Stitches: Chain (ch), single crochet (sc), and double crochet (dc).
- Granny Square Technique: Used for the bottom part of the top.
- Neck Ties: Creates the straps for tying the top around the neck.
- Corset Style Back Ties: Added at the back for a secure fit.
Instructions
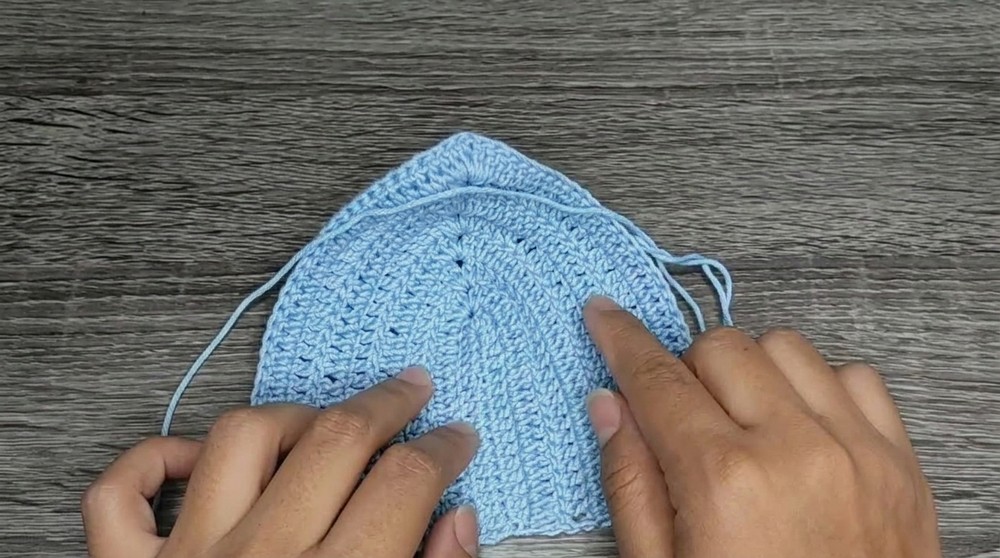
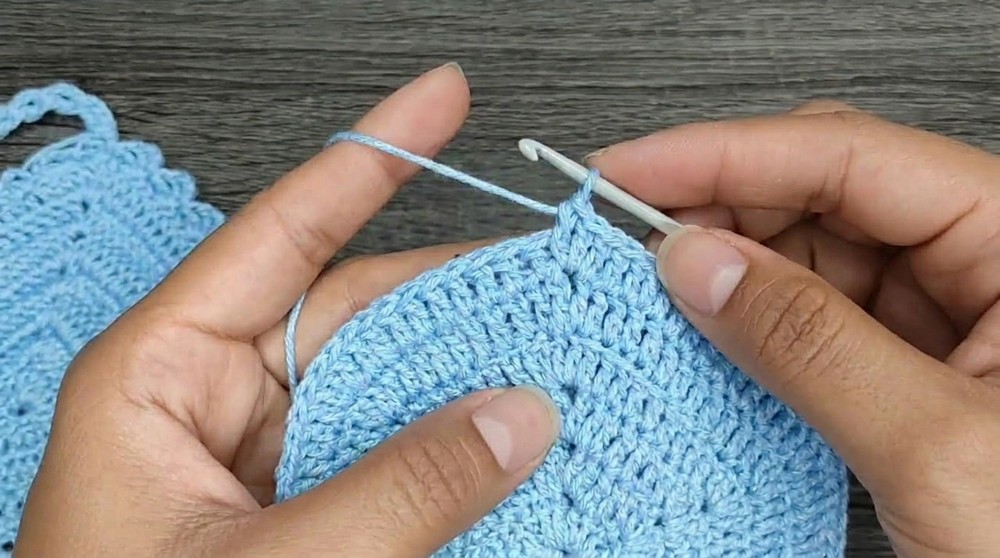
Step 1: Making the Cups
- Foundation Chain: Start by making a chain of 14 stitches. Measure to ensure the chain is 7 cm long. Adjust if needed according to your desired size.
- Adding Chains for Corner Shaping: Add 2 more chains to make a total of 16 chains.
- First Row: Work 1 dc in the third chain from the hook. Continue making 1 dc in each chain until you reach the final chain.
- Increasing at the Top Point: In the last chain, make 3 dc, 1 chain, and then 3 more dc to create a rounded edge that forms the peak of the cup.
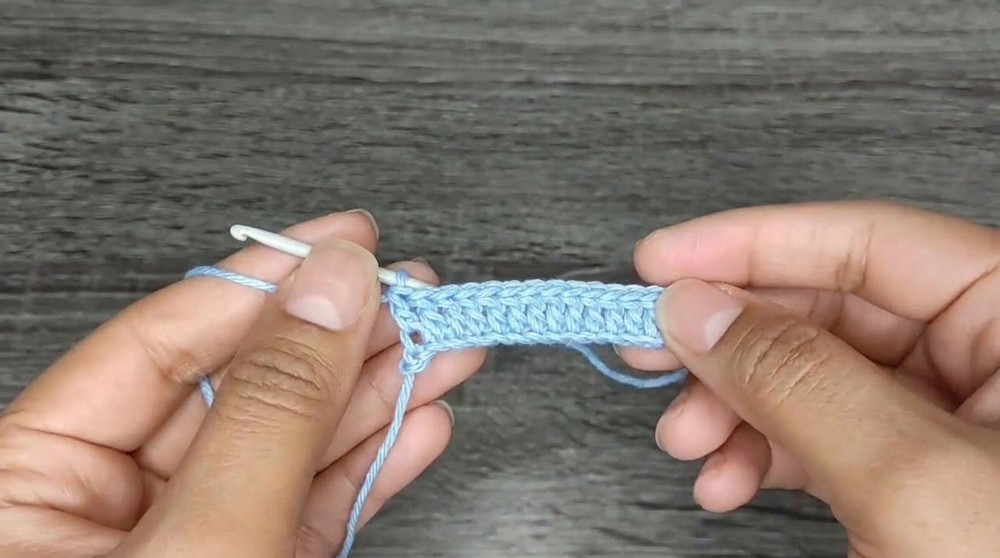
- Downward Side: Continue making 1 dc in each chain on the other side of the foundation chain.
- Subsequent Rows: For each row, increase at the top point (3 dc, 1 chain, 3 dc), and make 1 dc in each stitch on the sides. Make 8 rows for standard sizing, or adjust according to your desired cup size.
- Final Edge for Cup: On the last row (Row 9), work decorative shell stitches (3 dc in the same stitch, skip the next two stitches, sc, repeat).
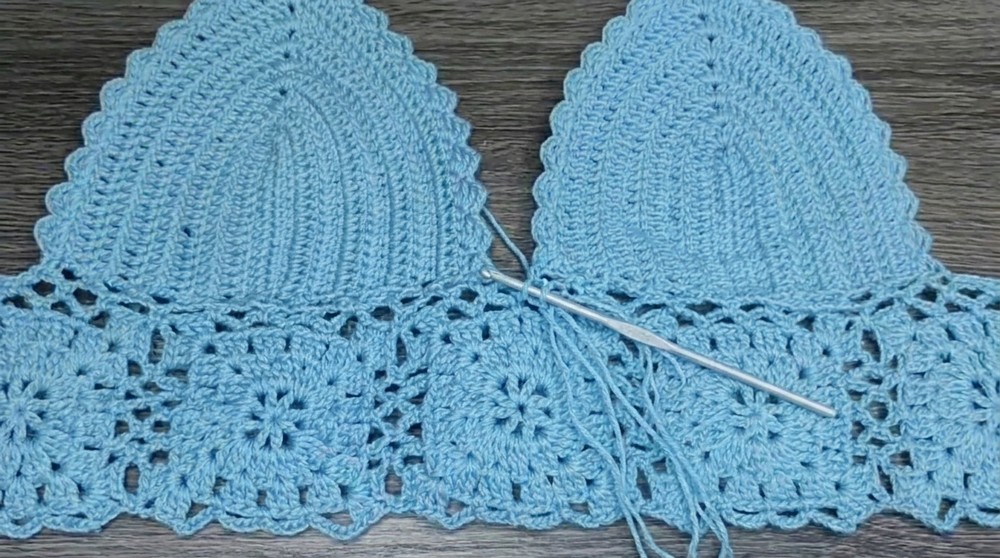
Step 2: Bottom Portion Using Granny Squares
- Granny Square Preparation: Use 5 granny squares to form the bottom section. Follow basic granny square patterns (clusters of 3 dc, separated by chains) and join them edge to edge to form a strip.
- Joining Cups to Bottom: Attach the edges of the cups to the granny square strip, ensuring the center granny square aligns with the center front of the top. Use 2 chains to bridge gaps while joining.
Step 3: Creating Side Panels
- Work 2 dc in each space along the side edge of the granny squares to form side straps.
- Create 14 rows to cover the desired width of the back straps. On the final row of each side, use single crochet stitches in each dc to make the strap edges sturdier.
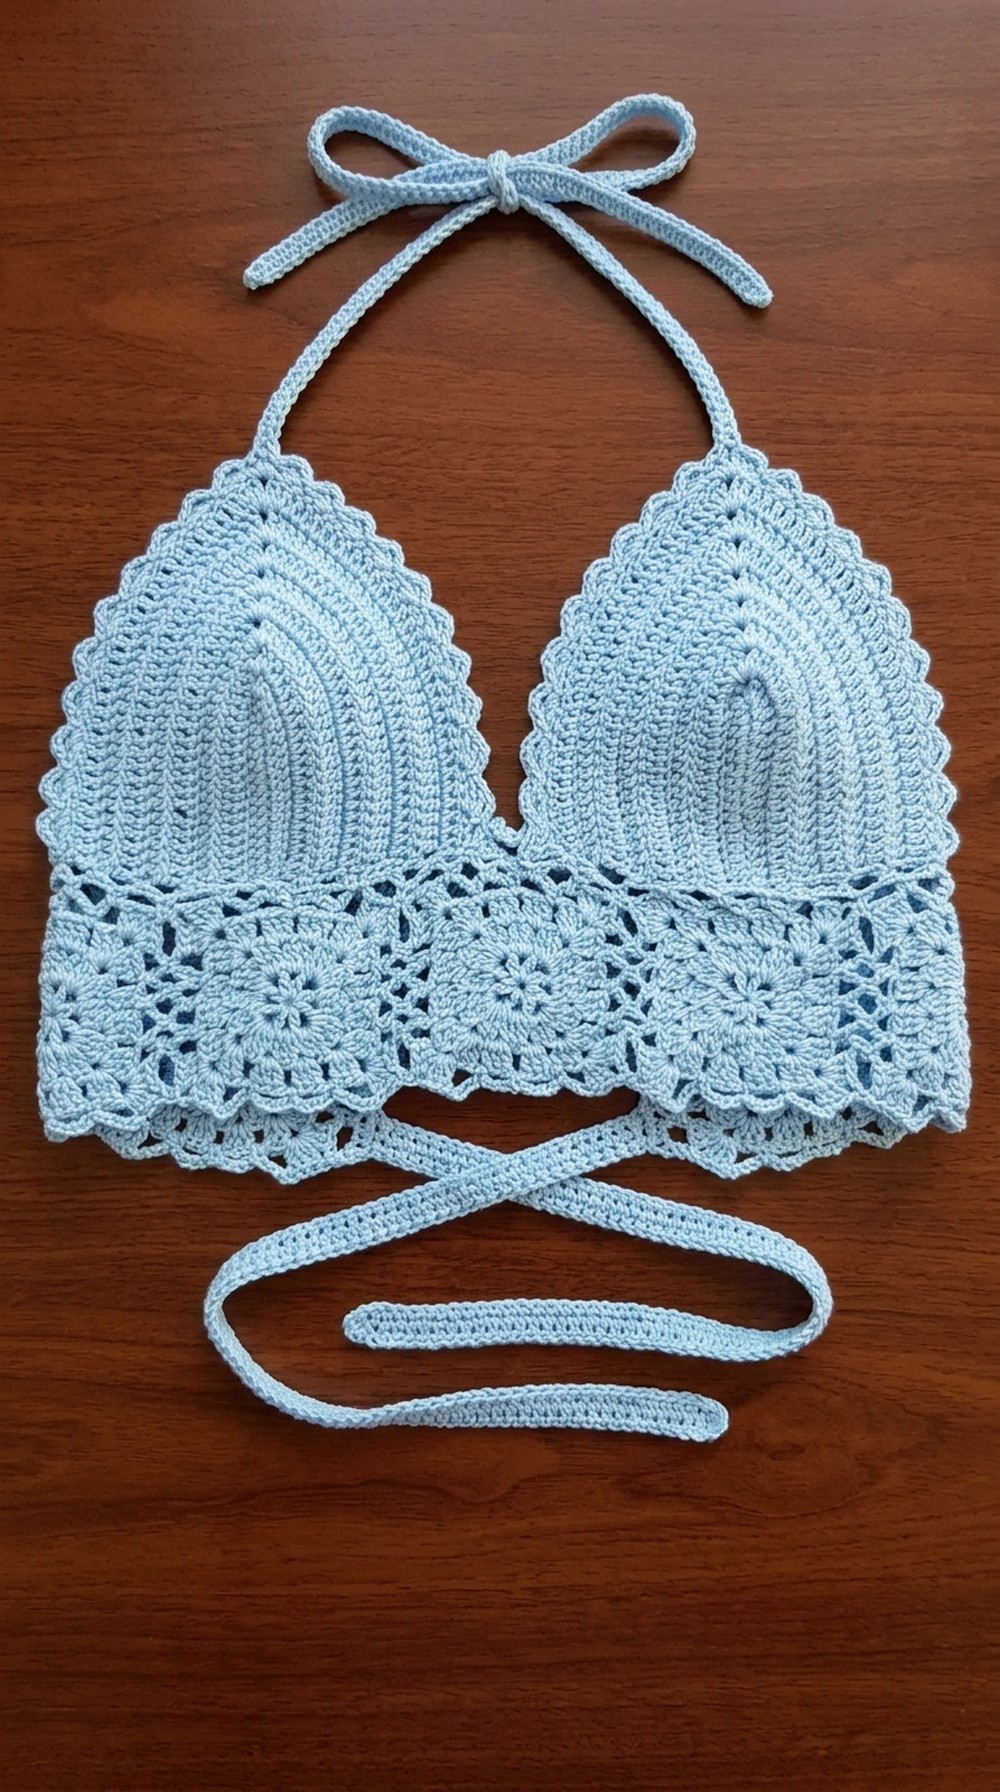
Step 4: Adding Neck Ties
- Create a foundation chain that runs the length of the desired strap. Use double strands of yarn for a sturdier finish.
- Attach one end to the top corner of each cup, creating strong neck ties that can easily be secured behind your neck.
Step 5: Corset-Style Back Ties
- Make a long chain using double strands of yarn to ensure durability.
- Thread this chain through the gaps in the side panels, like a corset, crisscrossing to secure the top around your back.
Finishing the Top
- Secure All Loose Ends: Use a yarn needle to weave in all the loose ends properly.
- Block the Top: Damp block or steam block (according to the yarn’s requirements) to shape the top and smooth out any uneven stitches.
Final Words and Tips
- Be sure to measure your body before starting to ensure the right custom fit. Adjust the number of chains for the cups and the granny square quantity as necessary.
- If you prefer a more secure back, add additional granny squares or extend the side panels with more rows.
- For durability, always double check your stitches and secure knots tightly.
- To clean the top, handwash with a mild detergent and lay it flat to dry.
By following this guide, you’ll create a stunning and customizable crochet flower halter top, perfect for summer events or casual outings.