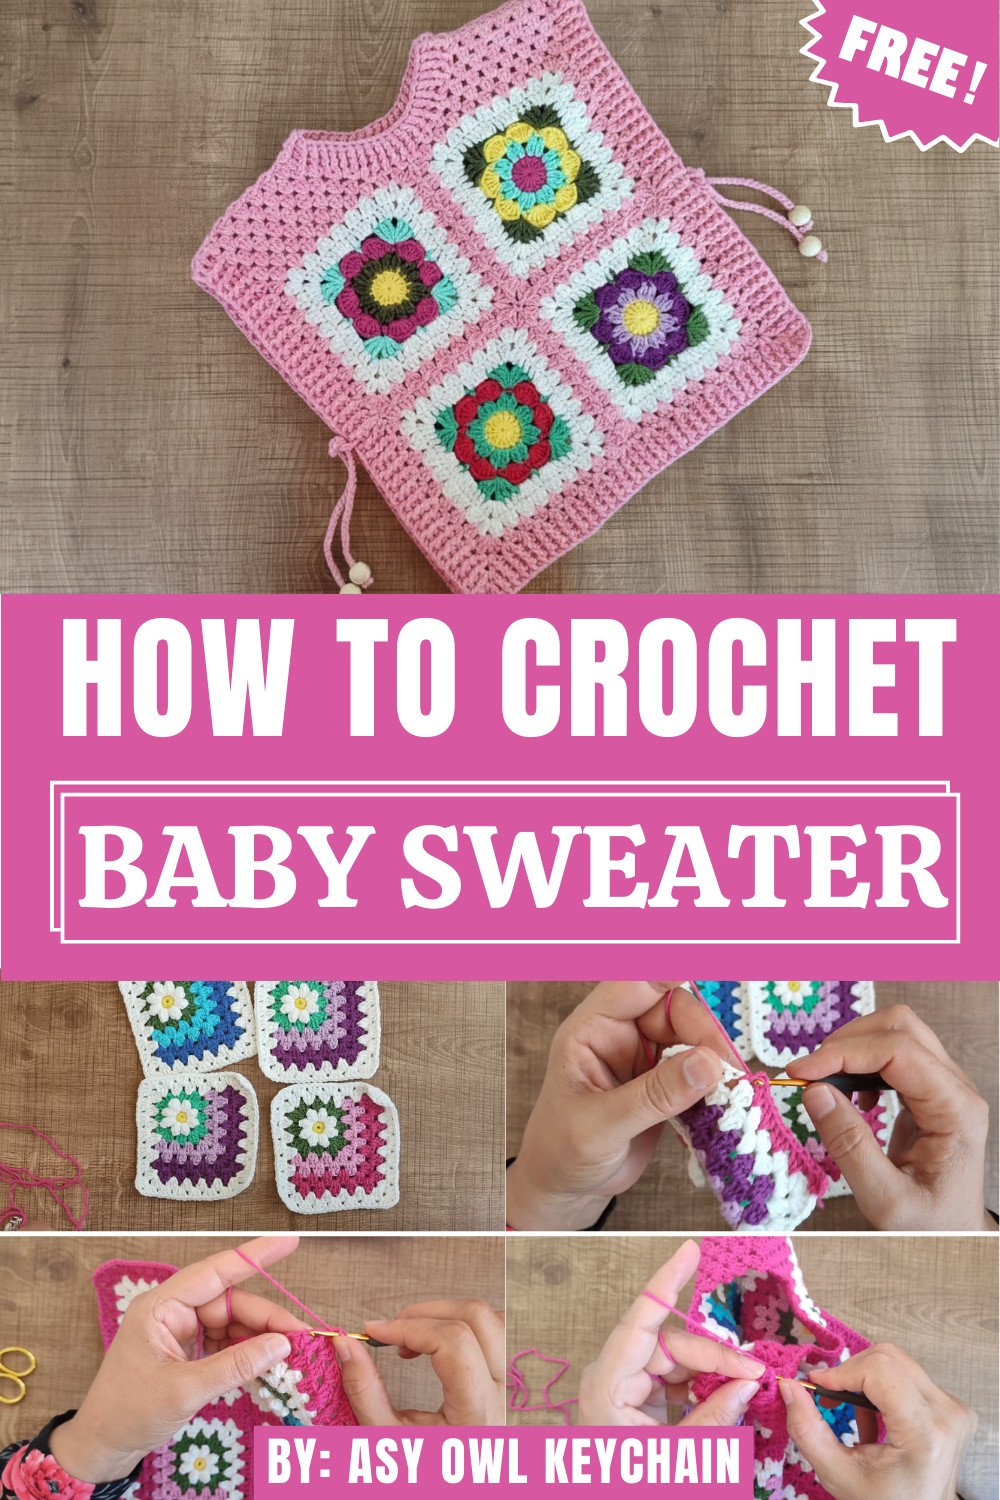
Dress your baby in comfort and charm with this Free Crochet Baby Sweater Pattern that’s soft, cozy, and ideal for any season.
A soft and cozy sweater for a little one adds warmth, comfort, and sweet charm to their wardrobe, making it a lovely addition for everyday wear or special outings. The free Crochet baby sweater pattern offers a simple way to fashion a snug garment that’s gentle against delicate skin and visually appealing in soft yarn and pastel tones. Whether for a newborn or toddler, this design brings practicality and adorable style together in a timeless piece.
Adorable Crochet Baby Sweater Pattern You’ll Love
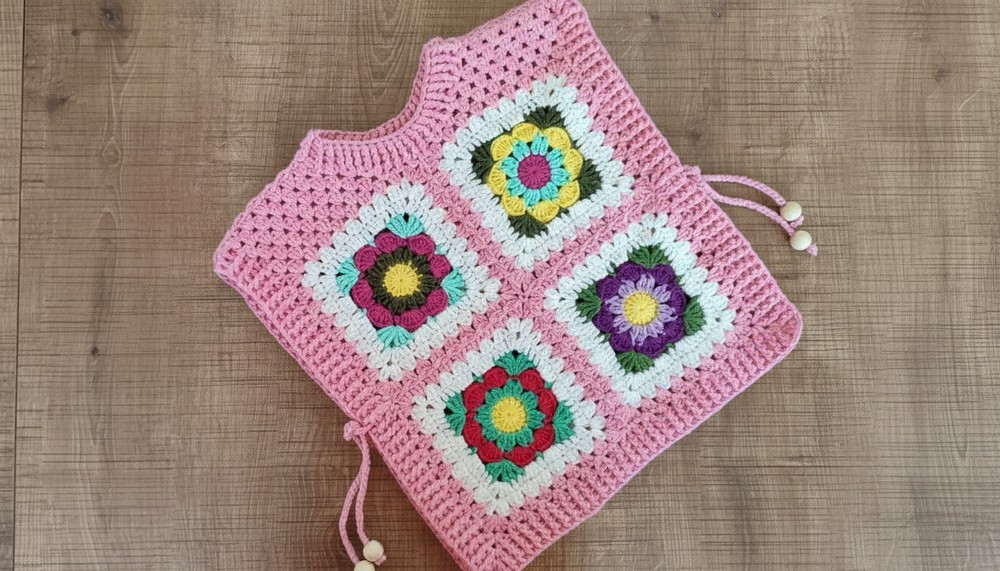
When completed, the sweater offers multiple benefits: gentle warmth, a cozy fit without restricting movement, and charming style suitable for daily wear or photo moments. The textured stitches and neat finishing give it a handmade quality that feels thoughtful and special.
Crochet Lace-Up Motif Sweater Pattern for Children (Ages 2–3)
Skill Level
- Intermediate: Familiarity with making motifs, assembling them, joining techniques, and crocheting ribbing or edging.
Finished Size
- Child size: Suitable for ages 2–3 years.
- Length: Approximately 33 cm.
- Width: Approximately 30 cm.
- Size adjustments: Motifs can be made larger or additional motifs can be added to increase the size for children up to 10 years old.
Materials
- Yarn:
- Weight: Light DK (Category 3) or Sport Weight (Category 2) yarn.
- Example colors: Light pink, dark pink, and coordinating colors for contrast.
- Approximate yardage: 300–400 yards.
- Hook Size:
- Recommended size: US E-4 (3.5 mm) hook.
- Optional: Smaller hook for tight stitches or joining.
- Stitch Markers: For marking corners and rows during assembly.
- Tapestry Needle: For sewing motifs and weaving ends.
- Optional Embellishments:
- Beads (e.g., for the lace ties).
- Extra yarn for decorative details or small changes.
Key Abbreviations (US Terminology)
- ch: chain
- sl st: slip stitch
- sc: single crochet
- dc: double crochet
- yo: yarn over
- beg: beginning
- rep: repeat
Special Notes
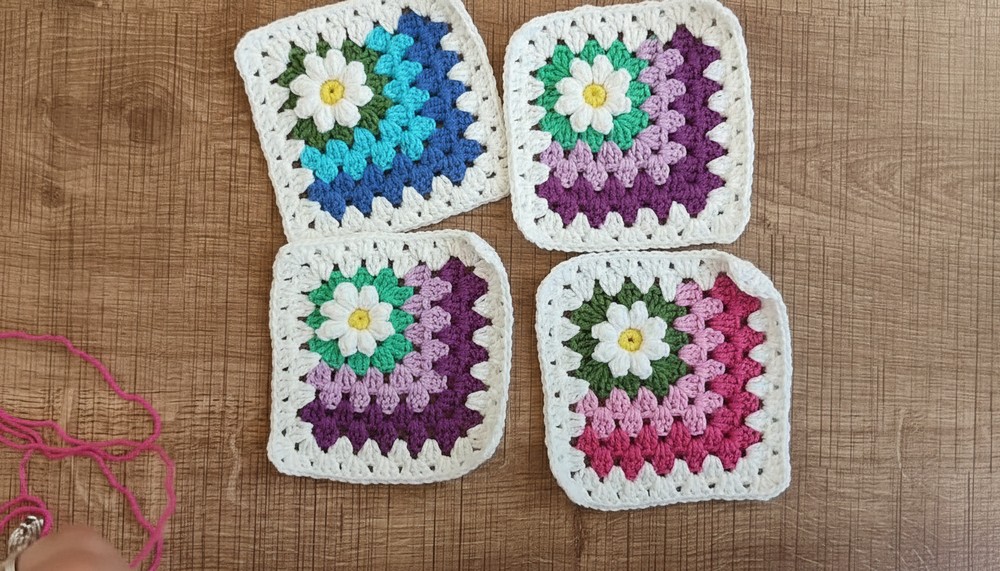
- Motifs: The sweater is constructed using square motifs. You can use any motif pattern you like (e.g., granny squares, sunburst, or flower motifs). Instructions for making specific motifs can be found on YouTube or within related tutorials.
- Customization: To increase or decrease the size of the sweater, adjust the number of motifs used or their sizes.
- Joining Techniques: The motifs are joined without breaking the yarn, using seamless methods. Alternatively, you can sew motifs together with a tapestry needle.
- Flexibility in Design: This sweater has no front or back differences—both sides are reversible for ease of use.
Pattern Instructions
Step 1: Create the Motifs
Motif Basic Design
- Choose your preferred motif pattern (e.g., granny square or African flower).
- Motif Dimensions:
- Each square motif is 12 cm (4.75 inches).
- Create 8 motifs in total for the sweater body:
- 4 motifs for the front panel.
- 4 motifs for the back panel.
Step 2: Join the Motifs into Panels
- Arrange the Motifs
- For each panel (front and back), arrange 4 motifs in a 2×2 square grid.
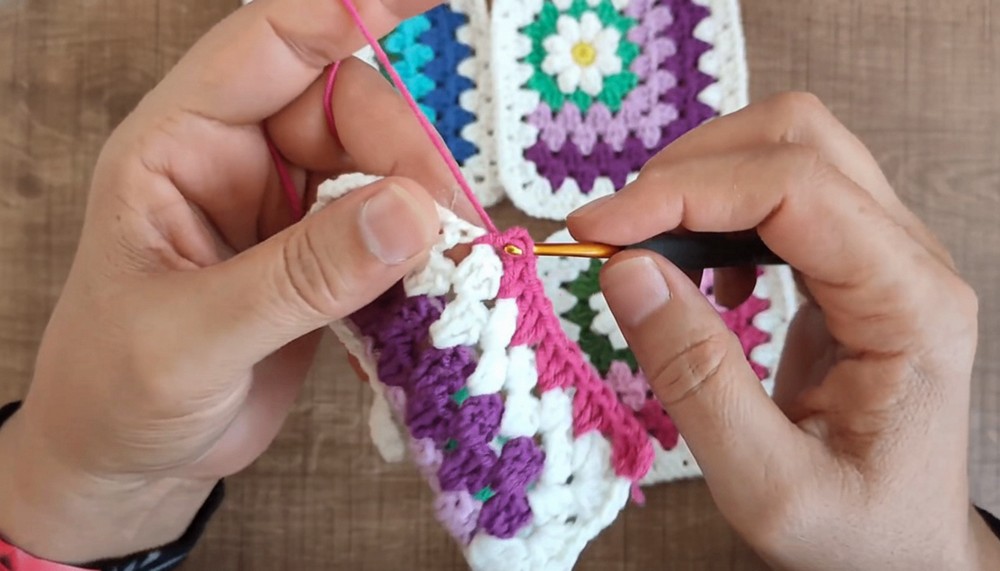
- Joining Method – Without Breaking the Thread
- Use a seamless join method:
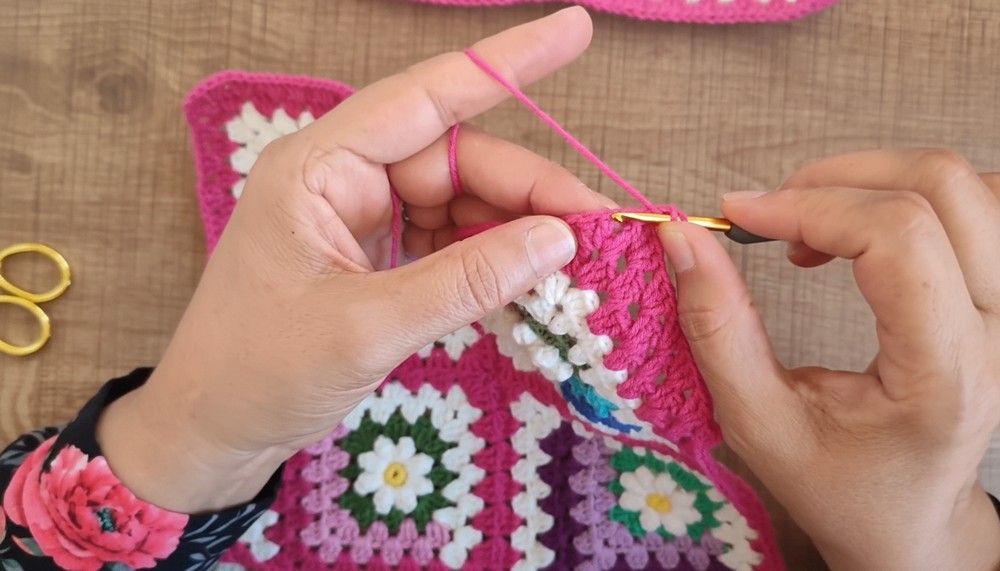
- Step 1: Place two motifs side by side (right sides facing up). Working into the outer loops of both motifs, use sl sts or sc to join.
- Step 2: Continue joining the next motif in the same way without cutting the thread.
- Step 3: Once the 4 motifs are joined into a square, fasten off and weave in ends.
- Repeat the process for the second panel.
- Use a seamless join method:
- Optional: Add chains between motifs for decorative spacing. However, the pattern recommends joining motifs tightly for a cleaner look.
Step 3: Assemble Panels
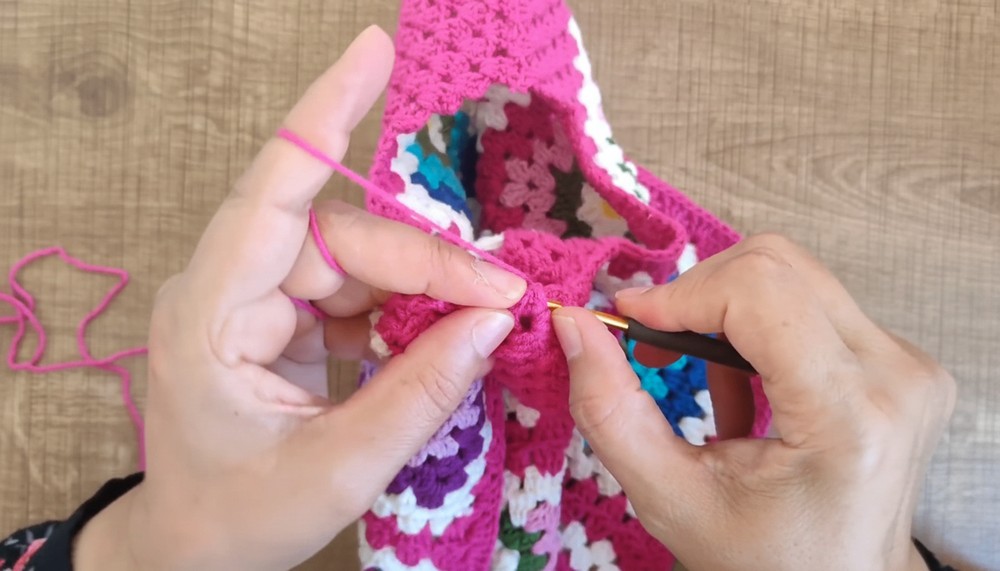
Join Side Seams
- Position the two panels (front and back) together with right sides facing outward.
- Starting from the bottom edge, join the side motifs together vertically, leaving 12–15 cm open at the top for armholes.
Join Shoulder Seams
- On the top edge, join the outer edge of the top motifs together for approximately 6–8 cm on each side, leaving the center open for the neckline.
Step 4: Add Ribbing to Collar, Hem, and Sleeves
- Collar Ribbing
- Attach yarn at the neckline.
- Work 1 round of sc evenly around the neckline.
- Add 3 more rounds of ribbed stitches:
- Alternate between front post double crochet (FPdc) and back post double crochet (BPdc) for each stitch.
- This creates a classic ribbed effect.
- Fasten off and weave in loose ends.
- Bottom Hem Ribbing
- Attach yarn to the bottom edge of the sweater.
- Work 2–3 rows of sc or use the same FPdc/BPdc ribbing technique.
- Side Lace Tie Loops
- Create a small loop at each side seam (just below the armhole).
- Use chains or sc to create a sturdy loop to thread lace ties through.
Step 5: Side Lace Ties
- Lace Design
- With double-stranded yarn, work a long chain of 30–40 stitches for each side.
- Attach ends securely to prevent unraveling.
- Add Beads or Knots
- For a decorative touch, add beads to the ends or tie knots for added weight.
- Thread the Lace
- Weave the lace ties through the loops on each side.
- Weave the lace ties through the loops on each side.
Step 6: Finishing Touches
- Weave in all loose ends with a tapestry needle.
- Block the sweater gently, especially if motifs have uneven edges, to give the piece a polished and even appearance.
Customization Ideas
- Use contrasting colors for the motifs or ribbing for a two-tone look.
- Add additional decorative chains or trim at the motif edges for a boho-chic vibe.
- Use beads, buttons, or embroidery to embellish the motifs further.
- If you prefer, replace the lace ties with buttons, zippers, or elastic to close the sides.
Conclusion
Your reversible lace-up motif sweater is now ready for wear! This cozy and stylish sweater is perfect for gifting or for your little one’s wardrobe. Easy to customize in size and embellishments, it is a versatile and delightful project for experienced crocheters looking for something fun and practical to create.
Pattern Corrections, Tips, and Suggestions
Potential Corrections
- Take care when joining motifs to maintain uniform spacing and alignment. Uneven joins can cause the sweater to twist or stretch.
- Adjust the motif size or stitch counts if your tension does not match the suggested dimensions.
Tips
- Steam Blocking: Block your motifs after completing them to ensure a uniform size and shape.
- Joining with Markers: Use stitch markers liberally while joining motifs and joining panels to keep edges aligned.
- Lace Tensions: Avoid tightening the lace ties too much, as they may pull and distort the sweater’s shape.