
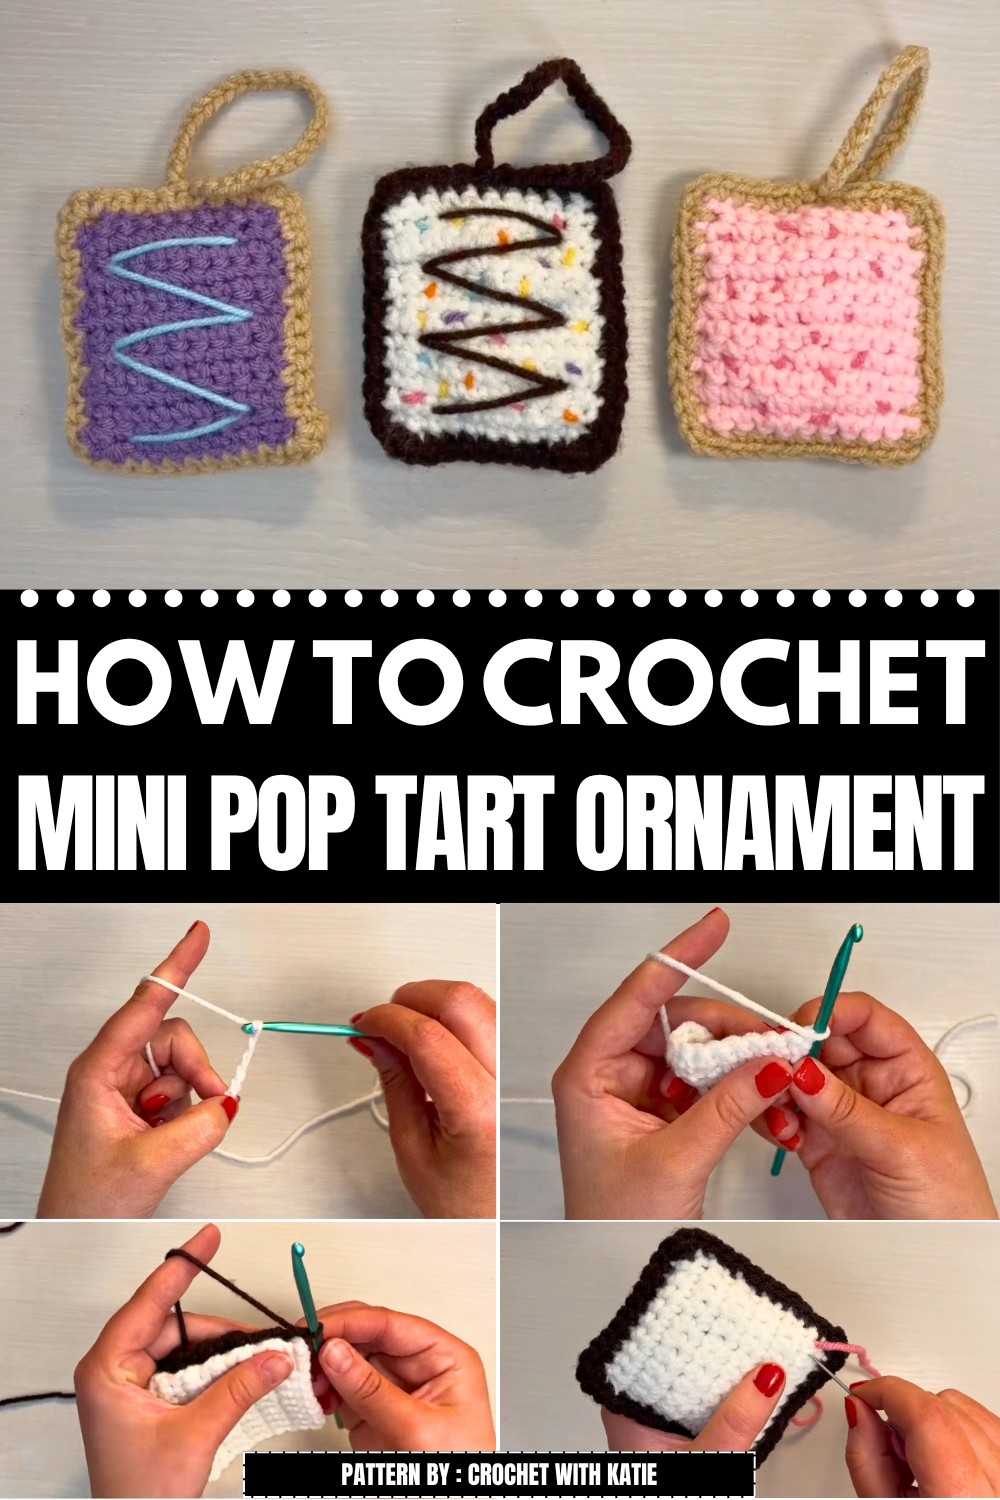
Every time this little ornament is added to the decorations, it brings a happy feeling to the room. It looks lovely by itself, but it becomes even more eye-catching when displayed with other crochet treats and holiday ornaments. You can make several in different icing colors to match your Christmas theme or decorate a special corner with a fun handmade collection. Each one has its own personality, making every ornament feel unique and full of joy.
This adorable ornament also makes a thoughtful gift for birthdays, Christmas, teachers, friends, or anyone who enjoys cute handmade decorations. It is a keepsake that can be enjoyed year after year and always brings back warm memories. If you love simple crochet projects that are colorful, playful, and easy to display, the Free crochet Pop Tart Ornament Pattern is a wonderful choice that will brighten your home and your holiday season.
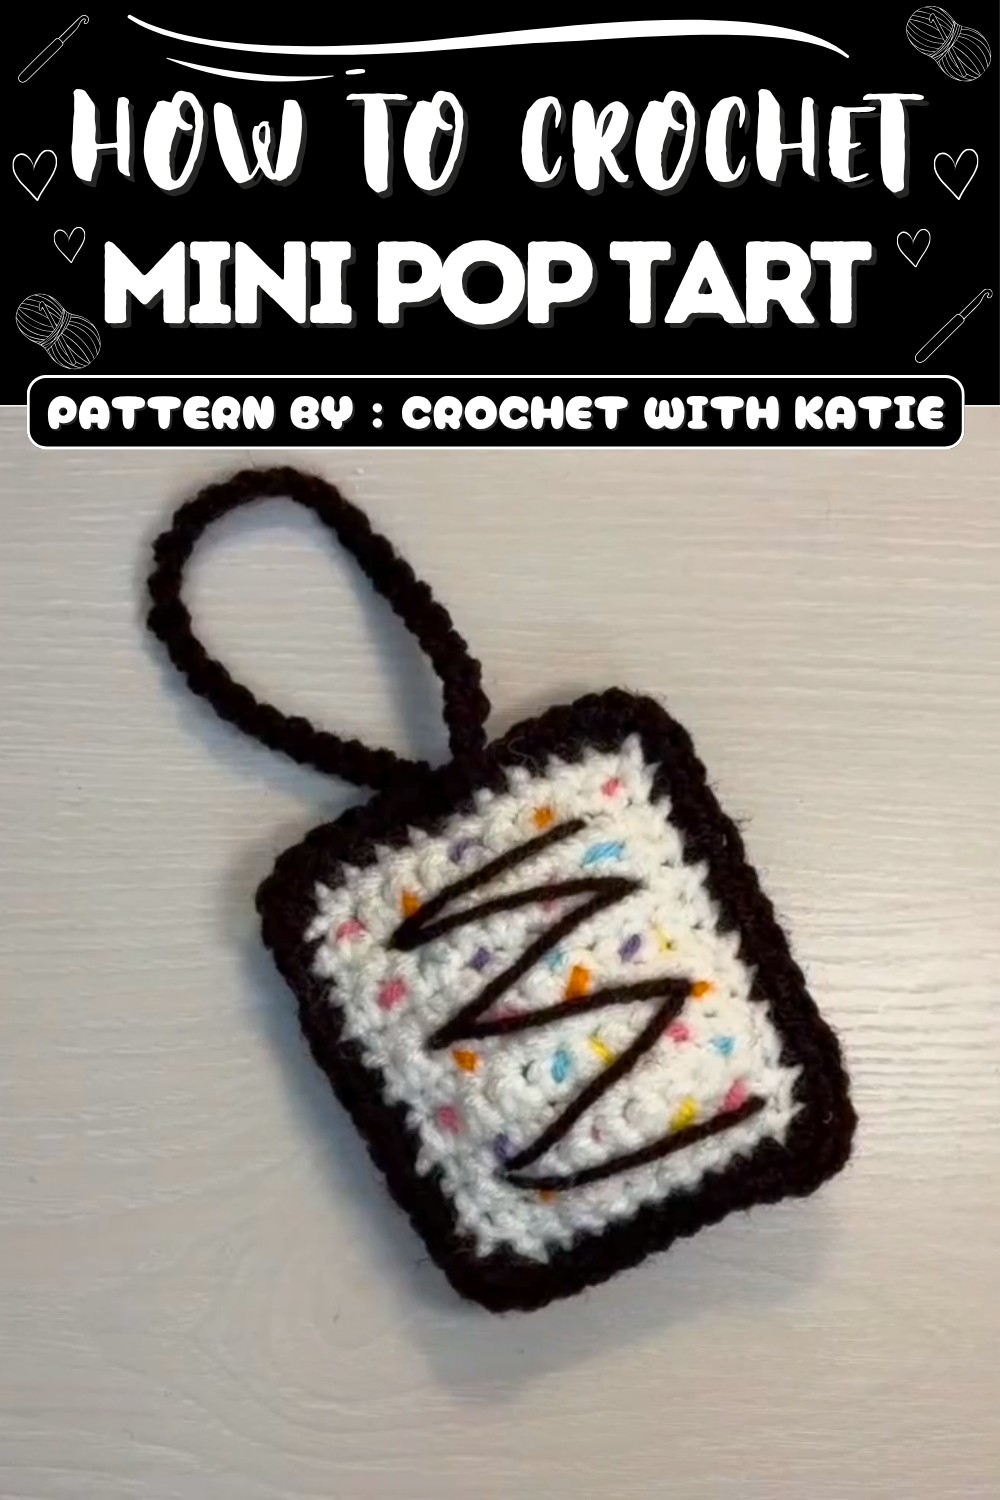
Mini Pop-Tart Ornament Crochet Pattern
Create a cute and sweet mini Pop-Tart ornament with this beginner-friendly crochet pattern. Using two simple rectangular pieces joined together and padded for a plush look, this ornament looks adorable on Christmas trees, backpacks, or as a gift tag. The pattern involves basic stitches and includes clear instructions for decorating with sprinkles and a fudge stripe.
Quick Overview of the Pattern
- Worked flat in rows using single crochet (sc) stitches
- Two pieces: white “icing” and dark brown “cookie crust”
- Joined around edges with single crochet join
- Stuffed with fiberfill for a squishy feel
- Decorated with embroidered sprinkles and a fudge stripe
- Finished with a loop for hanging
Notes
- Use a 4.5 mm crochet hook throughout.
- Consistent tension is key to keeping edges straight.
- Work slowly when joining pieces, especially at corners (3 single crochets (sc) in same stitch).
- Customize sprinkles with your favorite yarn colors.
- Weave in all yarn ends securely for durability.
Skill Level
Beginner to Intermediate
This project uses basic crochet stitches: chain (ch), single crochet (sc), and slip stitch (slst). It’s perfect for new crocheters wanting to practice consistency and finishing techniques.
Materials
- Medium weight (4) yarn:
- Dark brown (cookie crust)
- White (icing)
- Various colors for sprinkles
- Crochet hook: 4.5 mm
- Fiberfill stuffing
- Tapestry needle
- Scissors
Measurements / Sizing
- Width: ~7.5 cm (3 inches)
- Height: ~5.5 cm (2.2 inches) (without loop)
Size might vary slightly with your tension.
Gauge
- Not crucial for this pattern
- Approximate gauge: 16 single crochet (sc) = 10 cm width using 4.5 mm hook
Stitch Abbreviations
| Abbreviation | Meaning | Description |
|---|---|---|
| ch | Chain | Yarn over, pull through loop |
| sc | Single Crochet | Insert hook, yarn over, pull through both loops |
| slst | Slip Stitch | Insert hook, yarn over, pull through loops |
Special Techniques
- Single Crochet Join: Joining two pieces by crocheting through both layers’ edges.
- Corner Increase: Work 3 single crochet (sc) stitches into the same stitch at corners to keep the ornament flat.
The Crochet Pattern: Step-by-Step Instructions
Step 1: Crochet the Icing Side (White Yarn)
- Create a slip knot, leave a long tail for weaving in later.
- Chain 11 (ch 11).
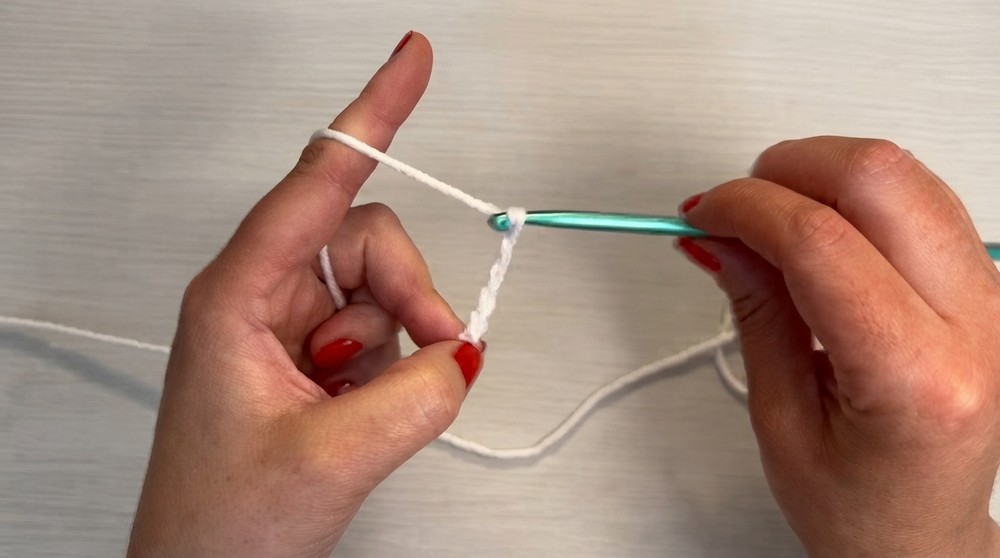
Row 1:
- Work 1 single crochet (sc) into the second chain from the hook.
- Continue working 1 sc in each remaining chain stitch across (total 10 sc).
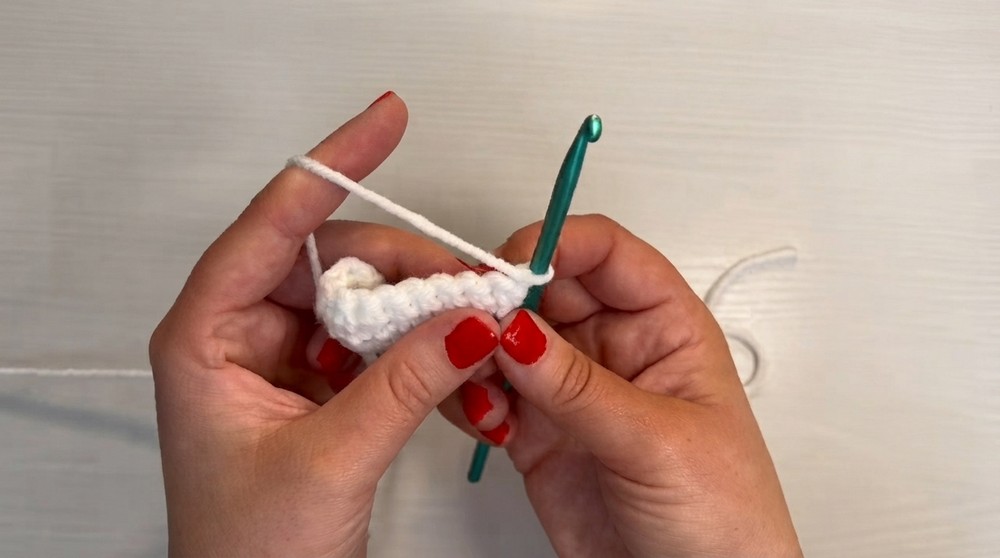
Rows 2 to 13:
- Chain 1 (ch 1), turn your work.
- Work 1 single crochet (sc) in each stitch across (10 sc per row).
- Repeat until you have a total of 13 rows (including row 1).
- Cut the white yarn and leave a tail for weaving.
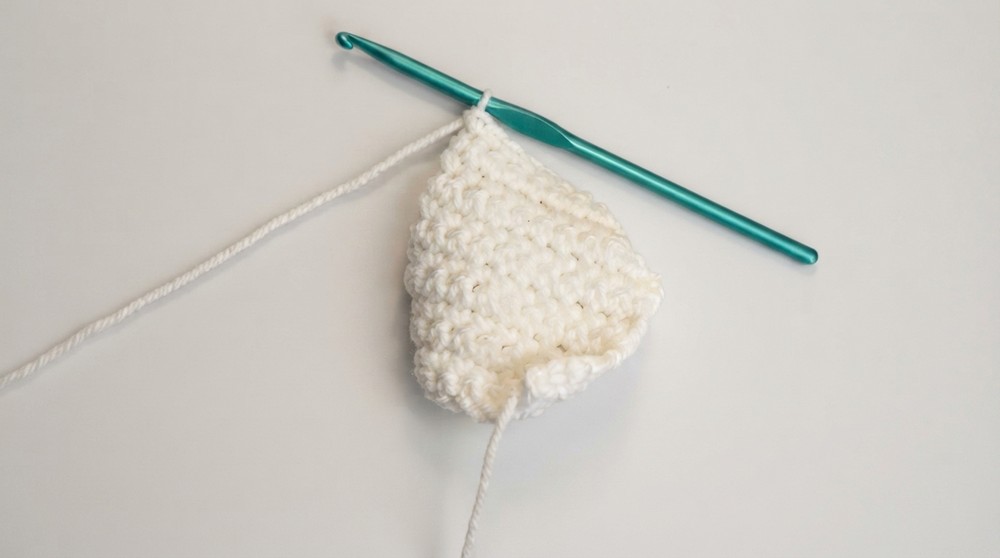
Step 2: Crochet the Cookie Crust Side (Dark Brown Yarn)
- Repeat Step 1 exactly, but using the dark brown yarn.
- Do not cut the yarn after finishing row 13 — this yarn will be used for joining.
Step 3: Join the Two Pieces
- Place the white icing piece on top of the dark brown cookie piece, edges aligned, white side facing up.
Joining:
- Insert your hook into both layers’ edges at one corner.
- Work single crochet (sc) stitches through both pieces simultaneously around the entire edge.
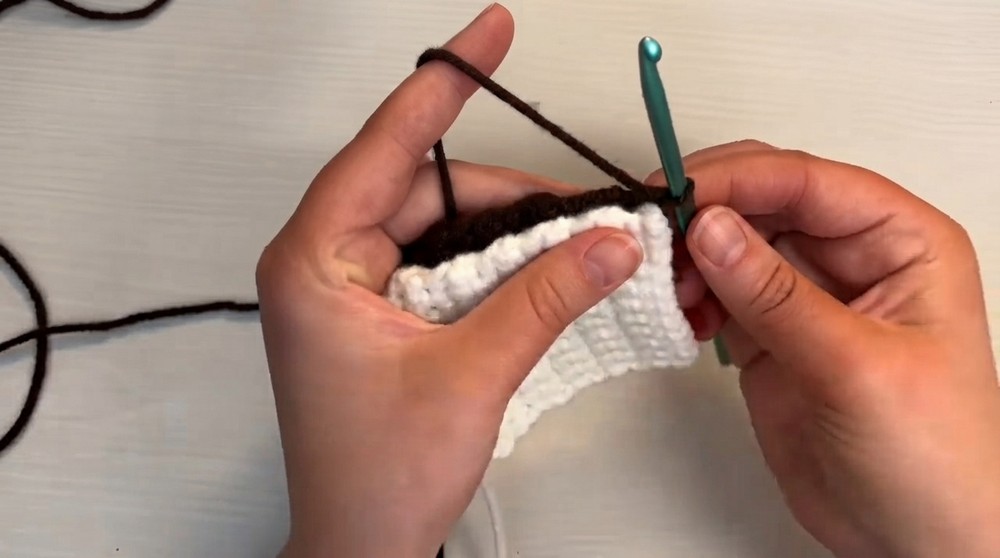
Corners:
- When you reach a corner, work 3 single crochet (sc) into the same stitch to keep corners flat and prevent puckering.
Stuffing:
- When halfway through the joining (about halfway along a long edge), stop and fill the ornament with fiberfill stuffing to desired thickness.
Closing:
- Use a slip stitch (slst) to finish the last stitch neatly.
- Cut yarn and weave in ends securely.
Step 4: Add Sprinkles and Icing Stripe
Sprinkles:
- Thread a tapestry needle with short lengths of various colored yarns (pink, blue, green, yellow).
- Sew small straight lines randomly across the white front piece to mimic candy sprinkles.
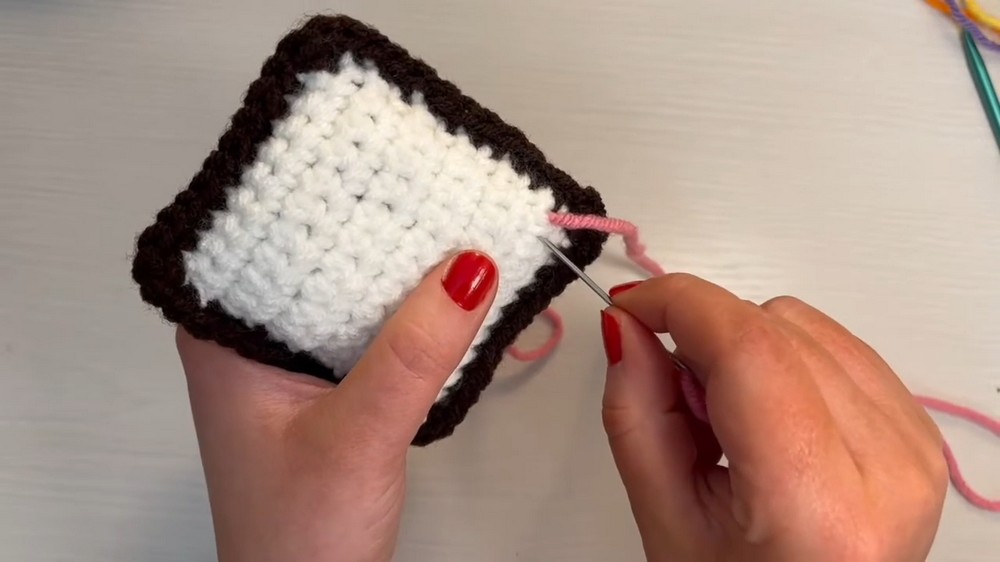
Icing Stripe (“Fudge” effect):
- Using a longer piece of dark brown yarn, stitch a slanted diagonal line across the icing surface for a fudge stripe.
- Use simple sewing stitches (backstitch or running stitch) to create a clean line.
Step 5: Create the Ornament Hanging Loop
- Attach the dark brown yarn firmly at the top edge (centered).
- Chain 30 (ch 30) to create a hanging loop.
- Slip stitch (slst) into the next stitch to form a closed loop.
- Tie the yarn ends securely.
- Weave ends into the ornament body to hide them.
Assembly & Finished Size
- This mini Pop-Tart ornament measures approximately 7.5 cm wide by 5.5 cm tall (excluding the loop).
- Stuffing ensures a plush, firm shape.
- The hanging loop allows easy display on branches, hooks, or bags.
Conclusion
This mini Pop-Tart ornament is a delightful and simple crochet project for beginners and seasoned crocheters alike. With just basic stitches and crafting techniques, you’ll create a sweet, stuffed confection that’s perfect for holiday decorating or gifting. The sprinkled yarn embroidery adds a customized, playful touch, while the fudge stripe enhances its charm.
