
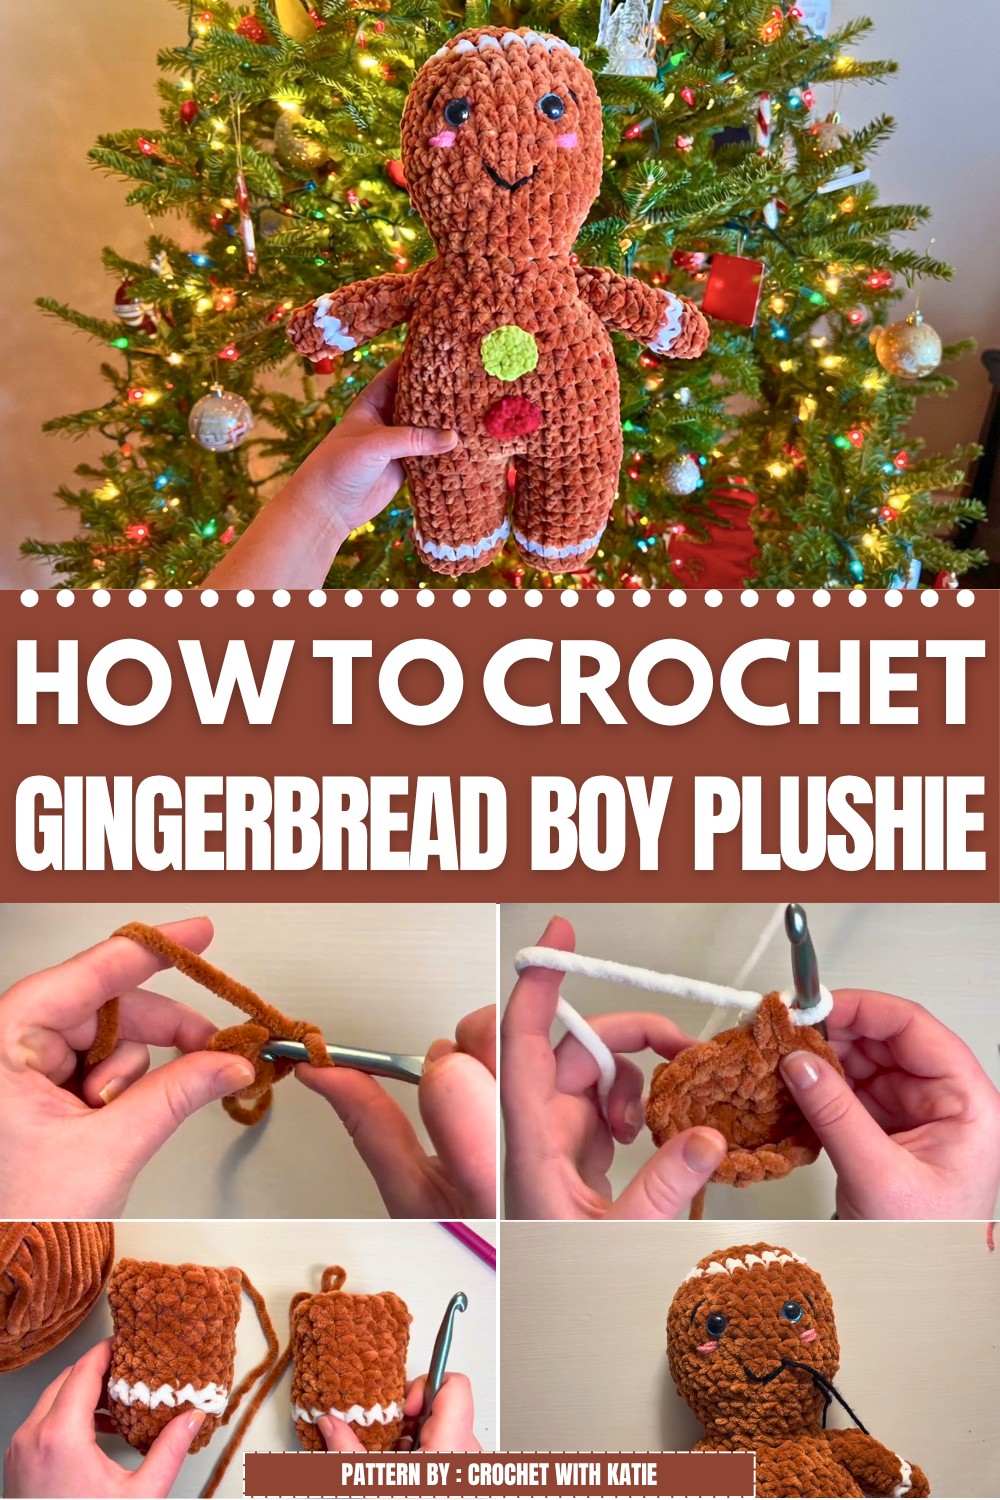
The Free Crochet Gingerbread Boy Plushie Pattern is designed to be easy and fun for anyone who wants to try. With clear steps provided by Katie, even beginners can enjoy making this adorable toy. The pattern is free to access, making it simple to start your project without any hassle.
Once completed, this gingerbread boy plushie shines as a reminder of joyful moments and festive warmth. It’s a great addition to holiday traditions, kids’ favorites, or handmade gift collections. Making this plushie brings a special kind of happiness that lasts far beyond the holidays.

Gingerbread Boy Plushie Crochet Pattern
This pattern provides detailed instructions for crocheting a charming gingerbread boy plushie using super bulky yarn. The plushie is crafted in parts—the legs, body, head, arms, and finishing touches—combined with crocheted buttons and embroidered facial features for personality. The use of color changes and stitch tricks results in a smooth, professional finish. The step-by-step rounds ensure an even beginner can follow along to create this adorable holiday-themed amigurumi.
Pattern Highlights
- Uses Super Bulky 6 yarn for a squishy, plush texture
- Includes seamless color changes to define limbs and clothing details
- Features safety eyes and embroidered facial features for expression
- Worked in continuous rounds using half double crochet and single crochet stitches
- Buttons crocheted separately and sewn on to complete the look
Notes
- Use tight tension for a neat finish and to avoid gaps that might reveal stuffing.
- Color changes are worked into the last stitch of the previous color to minimize jogs.
- Safety eyes are set before stuffing the head.
- Embroidery on the facial features should be done with medium 4 yarn for clear visibility.
- Stuff parts firmly but not overly to maintain shape and softness.
- Use stitch markers to maintain round beginnings and ease counting.
- Weave in all ends securely during finishing for durability.
Skill Level
Beginner to Intermediate
This pattern includes basic crochet stitches, color changes, simple increases and decreases, as well as sewing and embroidery. It is ideal for crocheters comfortable working in the round and ready to add finishing details.
Materials
- Caramel colored Super Bulky 6 plush yarn (Loops & Threads Chenille Home Slim in “Terracotta”)
- White Super Bulky 6 yarn (Loops & Threads Chenille Home Slim in “White”)
- Medium 4 black yarn (for eyebrows & smile)
- Medium 4 pink yarn (for cheeks)
- Medium 4 light green yarn (button #1)
- Medium 4 maroon yarn (button #2)
- 16 mm glitter safety eyes
- Fiberfill/polyfill stuffing
- Crochet hook 8 mm
- Crochet hook 4.5 mm (for crocheting buttons)
- Tapestry needle
- Stitch marker
- Scissors
Measurements / Sizing
- Approximate finished height: 20–25 cm (8–10 inches)
- Proportions suitable for display or gifting as a plush toy
- Completed buttons measure roughly 2–3 cm (0.8–1.2 inches) diameter
Gauge and Stitch Pattern
- Gauge is flexible given amigurumi construction but maintaining consistent tension in single crochet (sc) and half double crochet (hdc) stitches ensures smoother shaping.
- The legs, body, and arms are crocheted in continuous rounds with increases and decreases to shape form.
- Color changes are used strategically to simulate clothing details.
Stitch Abbreviations
| Abbreviation | Term | Description |
|---|---|---|
| sc | Single Crochet | Insert hook, yarn over, pull through both loops |
| hdc | Half Double Crochet | Yarn over, insert hook, yarn over, pull through all loops on hook |
| inc | Increase | Work two stitches into one stitch |
| dec | Decrease | Crochet two stitches together |
| sl st | Slip Stitch | Insert hook, yarn over, pull through both loops |
| magic ring | Adjustable ring | Creates a closed tight circle as the start of rounds |
Special Stitches
- Slip Stitch Back Loop Trick: Used in Round 5 of the legs to reduce color jog and create a clean color change line.
- Invisible Decrease: Used in head shaping to give smoother decreases without holes.
- Magic Ring: Allows starting rounds with a tightly closed center.
The Crochet Pattern: Step-by-Step Instructions
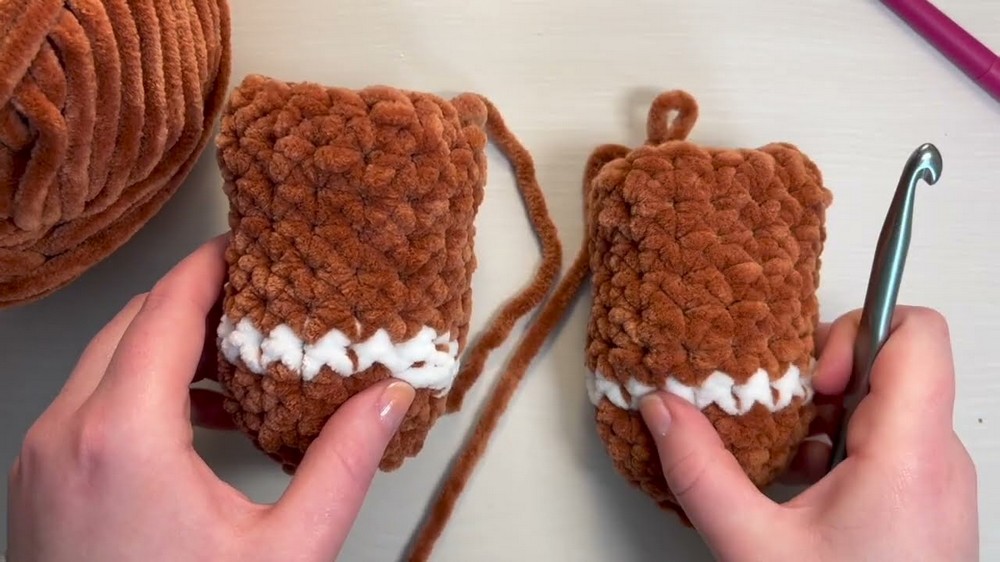
1. Legs (Make Two)
Round 1:
- Create a magic ring, work 6 single crochets (sc) into the ring. (6 sts)

Round 2:
- Increase in every stitch (work 2 sc in each stitch) to get 12 stitches.
Round 3:
- Work 1 sc, 1 inc (2 sc in next stitch), repeat 4 times. (16 sts)
Round 4:
- Work 16 sc in the round.
- Change yarn color to white in the last stitch of this round to start the “sock” color.
Round 5:
- Work 16 sc using the slip stitch back loop trick to reduce color jog on color transition.
- Change back to caramel colored yarn in the last stitch to continue leg color.
Rounds 6-11:
- Work 16 sc in each round with caramel yarn.
- Stuff legs firmly as you finish these rounds.
2. Body
Join legs:
- Place the legs with a marker on the right leg to keep track of position.
- Sc 4 stitches past the marker on the right leg to align with the left leg.
- Join by single crocheting into the left leg, creating a seamless attachment.
Round 7:
- Work 32 sc around joining the legs and beginning the body.
Round 8:
- Work 2 sc, 1 decrease, repeat 8 times.
- Stitch count reduces to 24 stitches.
Rounds 9-10:
- Work 24 sc in each round.
Round 11:
- Work 1 sc, 1 decrease, repeat 8 times.
- Stitch count reduces to 16 stitches.
Round 12:
- Work 16 sc to finish off the body section.
3. Head
Round 1:
- Work 3 sc, 1 increase, repeat 4 times. (20 sts)
Round 2:
- Work 4 sc, 1 increase, repeat 4 times. (24 sts)
Round 3:
- Work 5 sc, 1 increase, repeat 4 times. (28 sts)
Round 4:
- Work 6 sc, 1 increase, repeat 4 times. (32 sts)
Rounds 5-7:
- Work 32 sc for 3 rounds.
Round 8:
- Work 6 sc, 1 decrease, repeat 4 times. (28 sts)

Round 9:
- Switch to white yarn.
- Work 5 sc, 1 decrease, repeat 4 times. (24 sts)
Round 10:
- Switch to caramel yarn.
- Work 4 sc, 1 invisible decrease, repeat 4 times. (20 sts)
Round 11:
- Work 3 sc, 1 decrease, repeat 4 times. (16 sts)
Round 12:
- Work 2 sc, 1 decrease, repeat 4 times. (12 sts)
Round 13:
- Continue decreasing stitches to close the head opening.
- Insert safety eyes before substantial stuffing.

- Firmly stuff the head and finish closing.
4. Arms (Make Two)
Round 1:
- Create a magic ring, work 6 sc into the ring.
Round 2:
- Work 1 sc, 1 increase, repeat 3 times. (8 sts)
Round 3:
- Work 8 sc, switch to white yarn for the cuff.
Round 4:
- Work 8 sc, switch to caramel yarn again.
Rounds 5-9:
- Work 8 sc in caramel yarn.
Round 10:
- Close the arm by crocheting 4 sc across the opening.
5. Finishing Touches
Attach arms:
- Sew the arms securely to the sides of the body.
Facial features and details:
- Using black yarn, embroider eyebrows and a smile.
- Using pink yarn, embroider cheeks for a sweet blush.
Buttons:
- Make two small buttons separately using medium 4 yarn and 4.5 mm hook.
- Crochet a magic ring, work 6 sc into the ring.
- Follow with an increase round for button shape and dimension.
- Sew buttons onto the front of the body using light green (button #1) and maroon yarn (button #2) for distinction.
Assembly & Finished Size
- Final plushie stands approximately 20 to 25 cm tall.
- All parts are securely stuffed and joined for durability.
- The finished figure is soft, squeaky, and visually striking with its contrasting color details.
Conclusion
This gingerbread boy plushie is a fun and approachable project that allows crocheters to practice foundational amigurumi techniques including magic circles, seamless color changes, shaping by increases and decreases, and embroidery. Utilizing Super Bulky yarn ensures a quick build and a plush, cuddly finished toy.
The detailed stitch counts and rounds guide you clearly through creating well-shaped, proportionate parts and assist in their assembly to form a polished final product. The plush features, including embroidered expressions and sewn-on buttons, add personality and charm that delight both maker and recipient.
