
Make the Crochet Pencil Bow to brighten your pencils with a fun and easy pattern that brings a colorful touch to your everyday writing tools.
This written pattern is based on the original YouTube tutorial by Márcia Souza Crochê, and full credit goes to her for creating this lovely design. The Crochet Pencil Bow is a small and pretty accessory made with yarn that you can attach to pencils, pens, or even hairbands. It adds a fun and colorful touch to your everyday items, making your writing tools stand out and look extra special.
Quick & Easy Crochet Pencil Bow Free Pattern With Sweet Details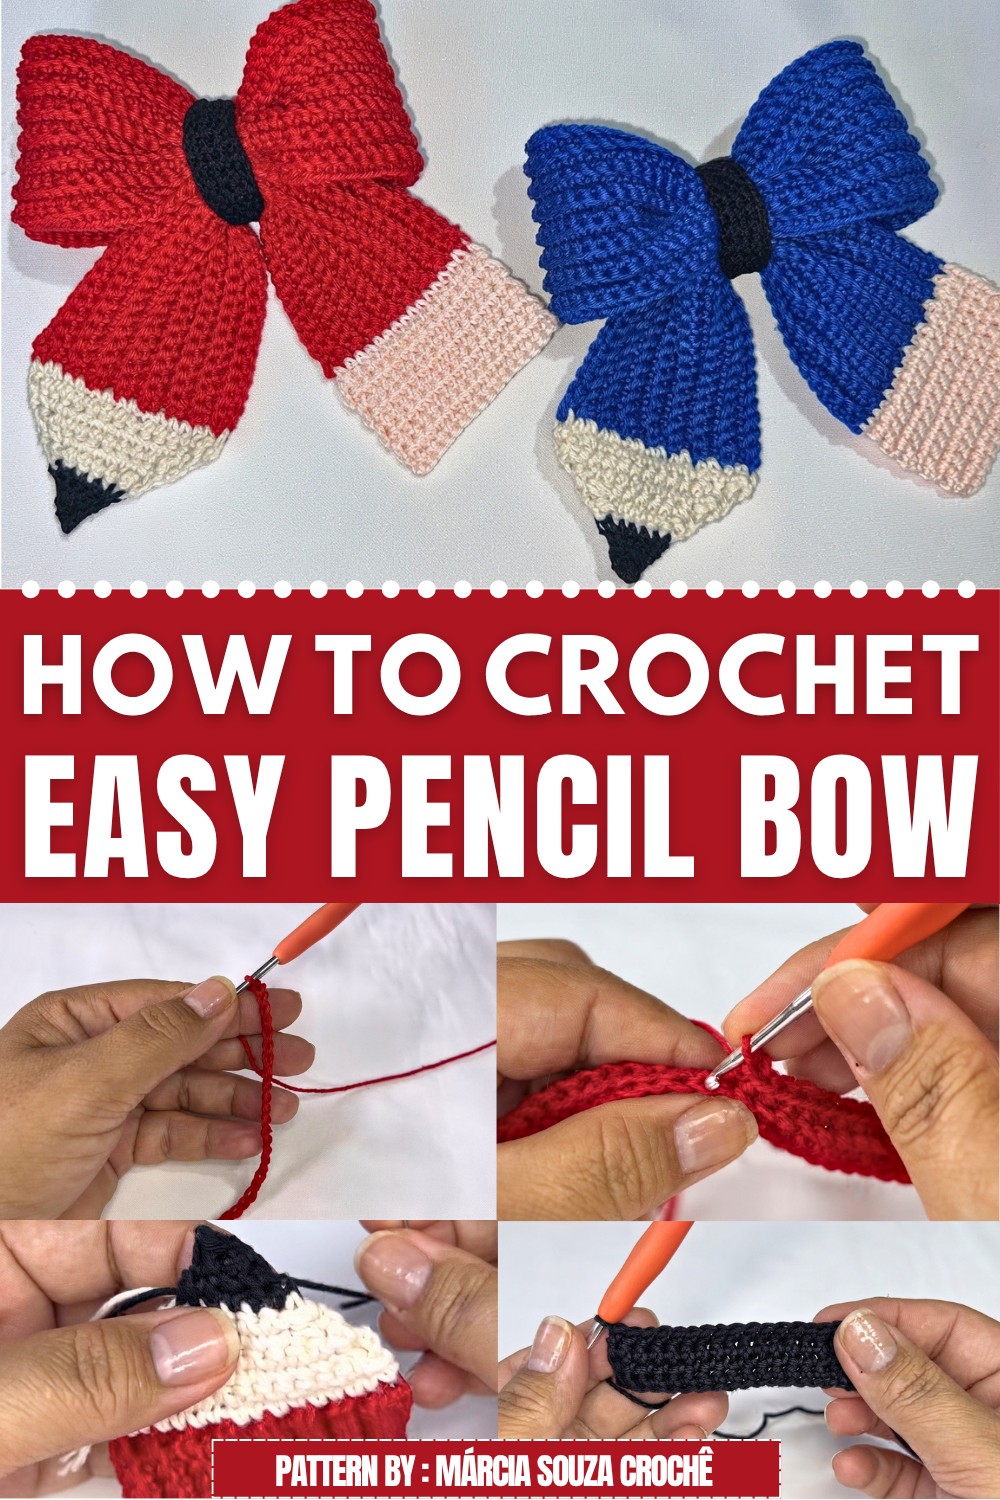

The main feature of this project is the simple bow shape, which looks neat and charming. It’s a great way to personalize pencils, making them more enjoyable to use or giving them as cute gifts to friends and family. The bow’s size makes it easy to fit on most standard pencils, and you can choose any color you like to match your style or mood.
What makes this pencil bow unique is its simplicity and versatility. You can customize it by changing colors, adding small beads, or attaching it with different clips or bands. The pattern involves basic crochet stitches such as chain stitches, single crochet, and slip stitches. You start by making a small rectangle, then fold and wrap yarn around the center to create the bow shape. Finally, you sew or glue it onto your pencil.
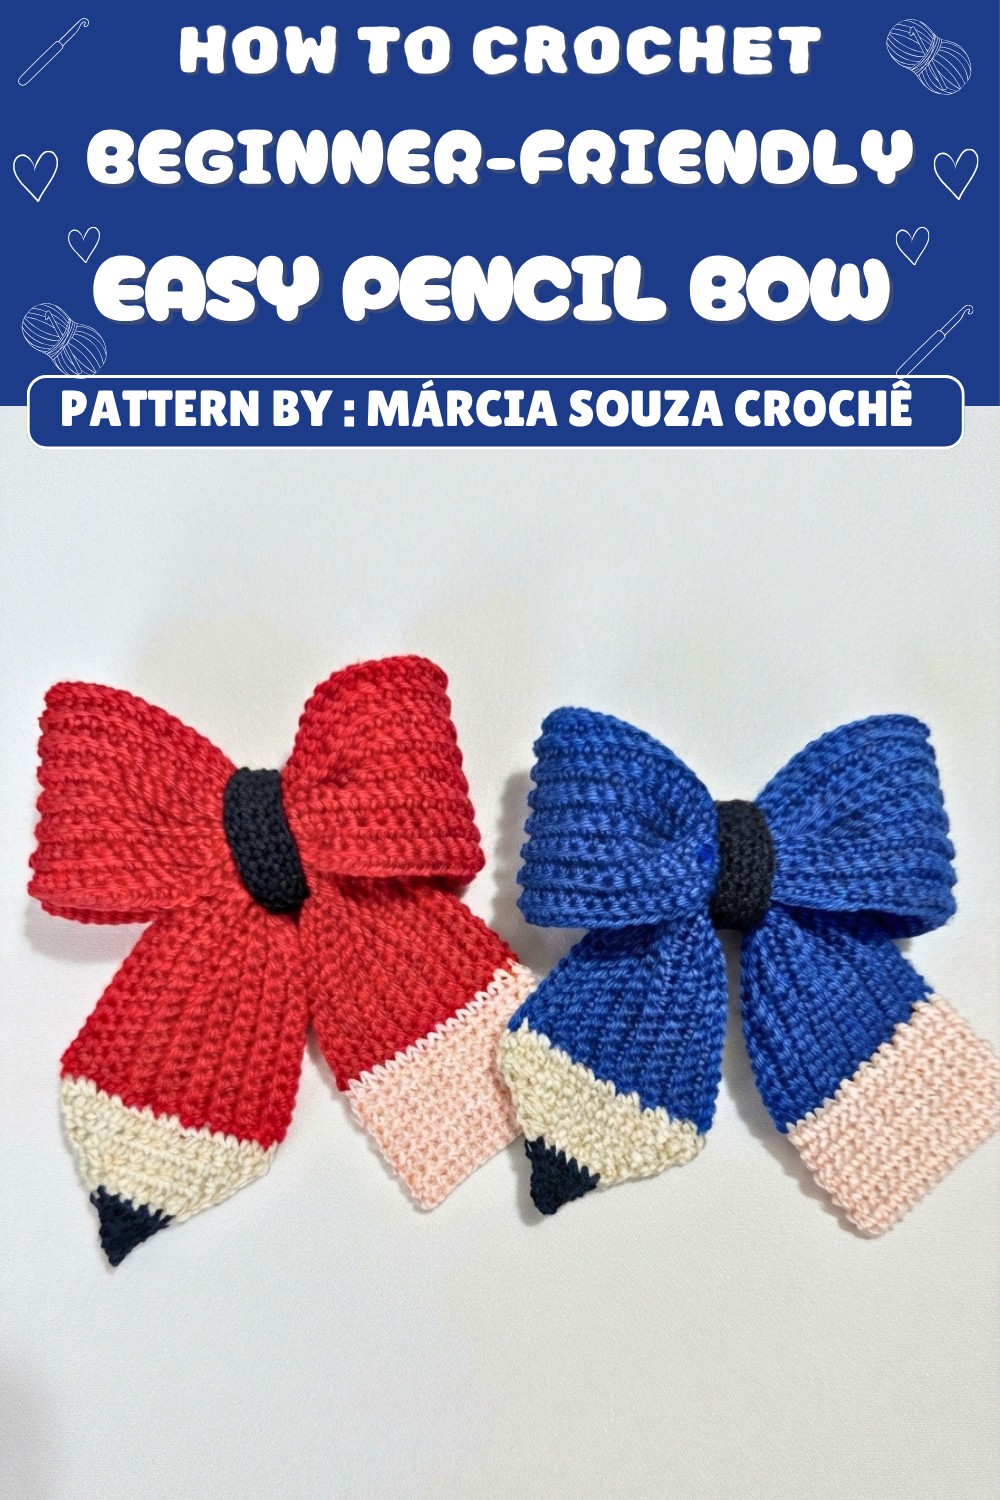 Overall, this Crochet Pencil Bow is a quick and enjoyable project that adds beauty and personality to simple pencils while giving you a chance to practice your crochet skills.
Crochet Pencil Bow
This crochet bow pattern is designed in the form of a pencil, making it perfect for back-to-school accessories. Its neat and colorful construction mimics the look of a classic pencil, complete with an eraser tip, wood detail, and point. This project uses basic stitches, assembly techniques, careful finishing, and can be used as a hair accessory or embellishment. The bow is lightweight, beautifully structured, easy to replicate, and uses amigurumi yarn for a crisp, polished finish.
Pattern Basic Points
Features:
- Mimics a pencil with eraser, wood detail, and tip.
- Structured bow for clips or headbands.
- Simple techniques suitable for most skill levels.
- Neat stitch work for a polished school-themed accessory.
Benefits:
- Great gift for students and teachers.
- Customizable colors.
- Lightweight and sturdy.
Uses:
- Hair clips or headbands.
- Backpack embellishments.
- Classroom decoration.
Special Notes
- Maintain consistent tension for even edges and a professional appearance.
- Different yarn weights or brands may alter the size—measure by centimeters if substituting materials.
- Finish off yarn ends with fabric glue for durability.
- Changing colors and assembly order is possible for customization.
Skill Level
Beginner to Intermediate: Basic single crochet stitches and elementary shaping; some simple assembly and finishing.
Materials
- Amigurumi yarn in four colors:
- Red (eraser)
- Light Pink or Cadmium (eraser metal band)
- Natural or Beige (wooden tip)
- Black (pencil lead and bow center)
- Crochet Hook: 3.0 mm
- Small Scissors
- Tapestry Needle
- Hair Clip or Headband (Duckbill/Alligator clip or tiara)
- Fabric Glue (for tidy finishing touches)
- Measuring Tape
Measurements / Sizing
- Bow Width: 7 cm
- Bow Length (Main Body): 13 cm
- Full Length (Including Point): 15 cm
- Small End Strip: 14.5 cm × 7 cm
- Large Base: 29 cm × 7 cm
- Finished Weight: 42g (approximate)
When using a different yarn, work to measurements above by chain and row length.
Gauge
- 30 chain stitches = 14 cm (for small sections)
- 60 chain stitches = 29 cm (for large section)
- Rows: Each “ridge” = 2 rows of single crochet
Stitch Abbreviations
- ch = chain
- sc = single crochet
- dec = decrease (sc2tog – single crochet two together)
- sl st = slip stitch
- st(s) = stitch(es)
Special Stitches
- Invisible/joining sc (for neat start): Create a slip knot on hook, insert into row edge, yarn over and pull through all loops.
- sc in back loop only (BLO): Insert hook into the back loop of the stitch only to create ribbing.
- sc2tog (decrease): Insert hook into next stitch, yarn over and pull up loop, insert into next st, yarn over and pull up loop, yarn over and pull through all three loops on hook.
Pattern Instructions
Bow Base (Pencil Barrel)
Round 1
- With red yarn, ch 60.
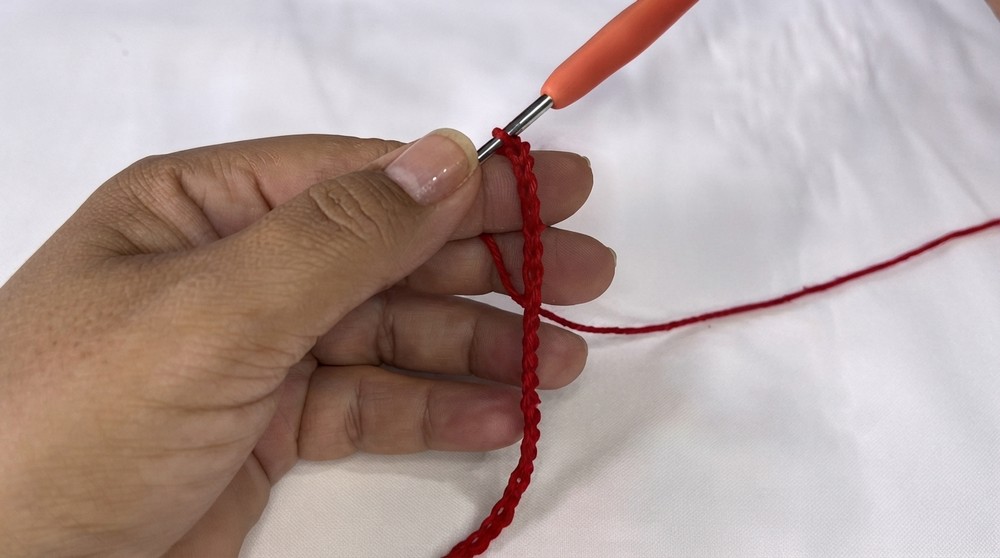
- Row 1: Starting in second ch from hook, sc across (59 sc).
- Ch 1, turn.
- Leave a long tail (approx. 1 m) for assembly.
Rounds 2 – 16
- Working in back loop only:
- Sc across every row, ch 1, turn
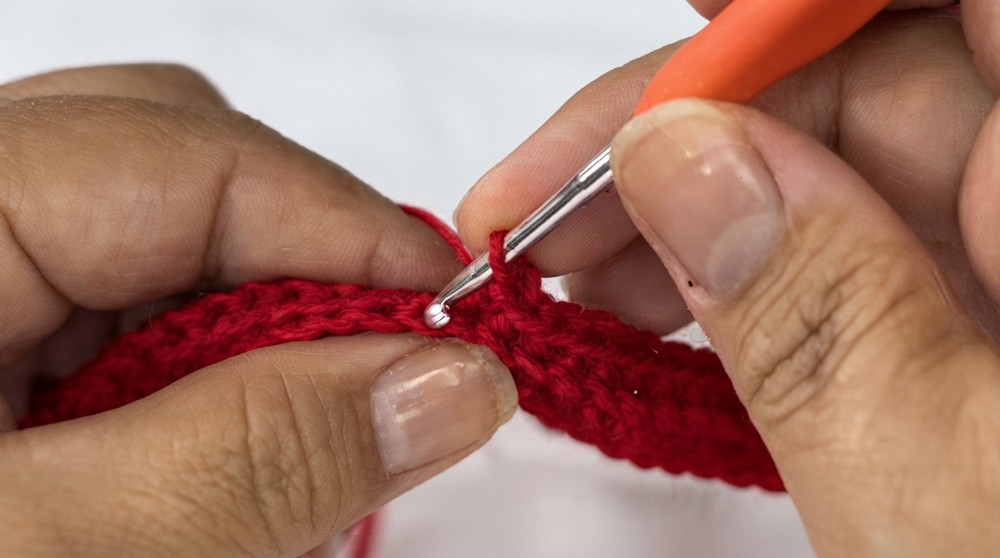 .
. - Total: 16 rows.
- Fasten off, set aside.
Pencil Tip Section (Small End)
Round 1
- With red yarn, ch 30.
Round 2
- In second ch from hook, work sc across (29 sc).
- Ch 1, turn.
Rounds 3 – 16
- Sc in BLO across each st, ch 1, turn after every row.
- Complete 16 rows total.
- Fasten off.
- Finished section should be 14.5 cm × 7 cm.
“Wood” Section (Natural/Beige Color) – Pencil Point Shaping
Round 1
- Attach natural or beige yarn to a small tip section at one edge.
- Start by making a joining sc in the row end.

- Work 16 sc evenly across the row ends.
Round 2
- Ch 1, turn.
- Begin shaping tip by:
- Dec over first 2 sts (sc2tog).
- Sc across to last two sts.
- Dec over last 2 sts (sc2tog). (12 sc remain)
- Ch 1, turn.
Subsequent Rows
- Work as follows, always starting and ending with a decrease:
- (Row 3): dec, sc to last 2 sts, dec. (10 sc)
- (Row 4): dec, sc to last 2 sts, dec. (8 sc)
- (Row 5): dec, sc to last 2 sts, dec. (6 sc)
- (Row 6): dec, sc to last 2 sts, dec. (4 sc)
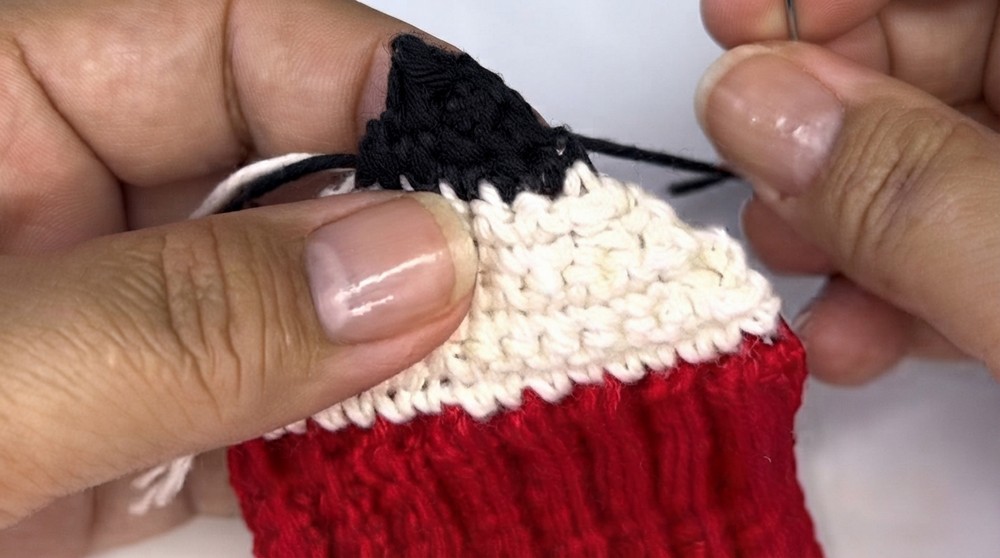
Changing to Black Yarn for Lead
- At the final decrease row, before closing, drop natural/beige, join black yarn, and finish the decrease (now 2 sc).
Final Rows (Lead Point)
- Decrease both remaining sts to 1 sc using black yarn.
- Fasten off, weave in ends securely on wrong side with a tapestry needle.
- Optionally, use a little fabric glue at ends for security.
Eraser Band (Light Pink/Cadmium Stripe)
Round 1
- Attach light pink yarn to the other end of the tip section.
- Make joining sc in edge of each row end (16 sc)
- Ch 1, turn.
Rounds 2 – 8
- Sc across using both loops, ch 1, turn each row.
- Continue until the pink section is the same height as the rest of the bow tip.
- Fasten off, weave in ends.
Bow Middle Wrap (Black)
Round 1
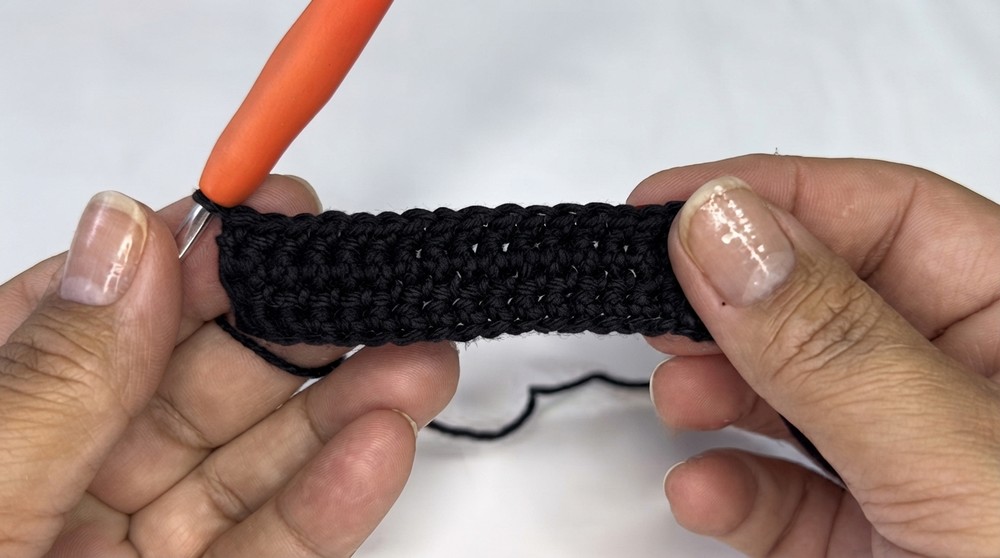
- With black yarn, ch 17.
Rounds 2 – 4
- Working in rows: sc in 2nd ch from hook, across (16 sc).
- Ch 1, turn.
- Repeat for 4 total rows.
- Fasten off, leaving approx. 20 cm tail for sewing.
Assembly & Finished Size
- Join Main Bow and Tip:
- Place large and tip sections right sides up.
- With long tail from barrel end, sew using tapestry needle along edge of tip section.
- Use small, neat back-and-forth stitches; do not pull too tight.
- Form Bow Shape:
- Fold large rectangle in half to find center. Use the seam as a guide.
- With same yarn, make running stitches up and down vertically at the bow’s center.
- Pull yarn tightly to gather bow and tie off securely.
- Attach Bow Point:
- Fold the tip piece, matching widths, and sew to main bow at the gathered seam, using running stitches to shape into a neat pencil tip.
- Create Center Wrap:
- Fold short black rectangle around bow center.
- With the tail and tapestry needle, sew ends together snugly at the back.
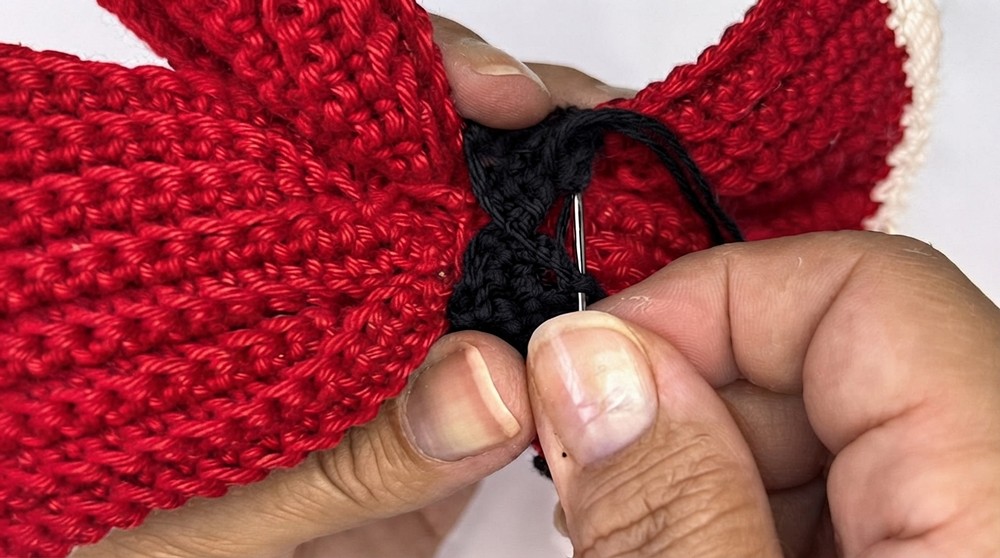
- Hide and trim ends, reinforce with glue if desired.
- Attachment:
- Slide hair clip/pub into the back of the black section, or sew/attach bow to a headband.
- Option: Do not glue the clip, so the bow can be transferred.
- Final Adjustment:
- Shape bow, adjust ruffles and points.
- Tidy all yarn ends, snip close, seal with fabric glue as needed.
Finished Size
- Full bow: approx. 13 cm × 7 cm (main body); 15 cm (including point)
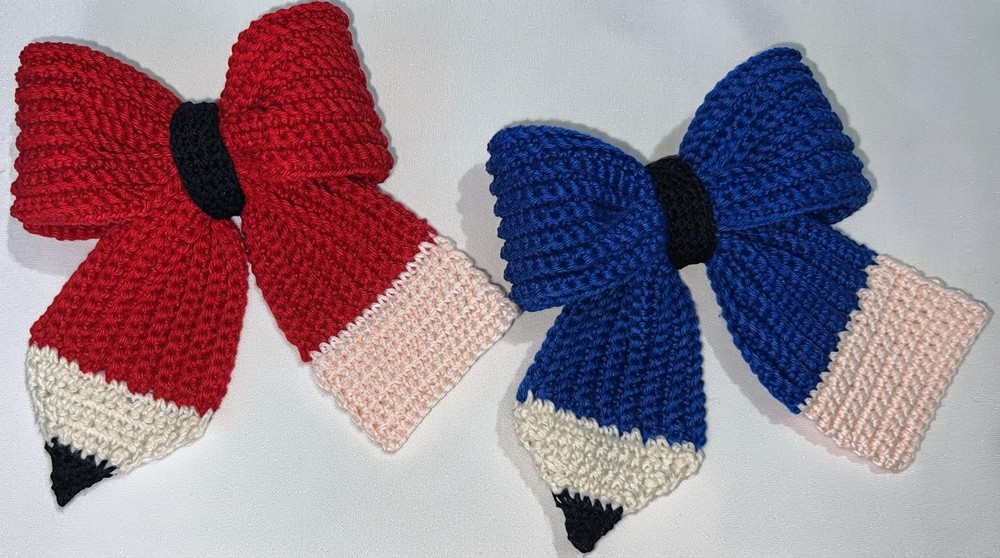
- Weight: approx. 42 g
Conclusion
This pencil bow pattern is created with accessible stitches and modular construction. Its charming and playful look works as both a practical accessory and a delightful decorative accent for school-themed events. The project is an excellent way to practice bow shaping, color changes, and neat assembly techniques, and is adaptable for use with clips, headbands, or other accessories. Custom color combinations and simple stitchwork make it suitable for crafters at all experience levels who want to create a functional and whimsical piece.
